DIY Hand Stamped Cloth Napkins and Place Cards
Do you need some inspiration for your holiday table this year? How about making your own cloth napkins and place cards using Iron Orchid Designs Decor Stamps?
Hi! This is Kathleen here, from The French Marketplace, and I’m going to show you how to dress up your table for the upcoming Christmas season.

I’ll show you how to make these. You’ll just need a few things:
For the Napkins –
Dropcloth Fabric (or another neutral color fabric of your choosing, bonus with drop cloth is there will be plenty leftover for other projects!)
Sewing Machine or Fabric Glue
Rotary Cutter/Acrylic Ruler and Mat or Fabric Shears
For the Place Cards –
Stamps, Acrylic Block, Ink listed above
Paper Scissors
Corner Rounder (optional)
Okay, let’s get started!
I used drop cloth fabric because I love the nubby texture and color. It reminds me of linen or hemp, but it’s a fraction of the cost. You may use a different fabric though if you like. Just make sure that it’s neutral in color so that you can see the beautiful stamp.

Make sure that you wash your drop cloth in hot water and then put it in the dryer to dry. This way, any shrinkage that’s going to occur, will happen before you cut and sew.
For each napkin, cut an 18X18 inch square. I used a rotary cutter because it’s just easier for me. I can’t cut a straight line to save my life, but you can use whatever you have on hand. Sewing shears are perfectly fine too.


Now comes the fun part – stamping! For this project, I have used the IOD Decor Stamps. I used the Louis set and the large acrylic block.

In this set, there are two different sized crowns. I used the larger one for the napkin and the smaller one for the place card to create a coordinated place setting.
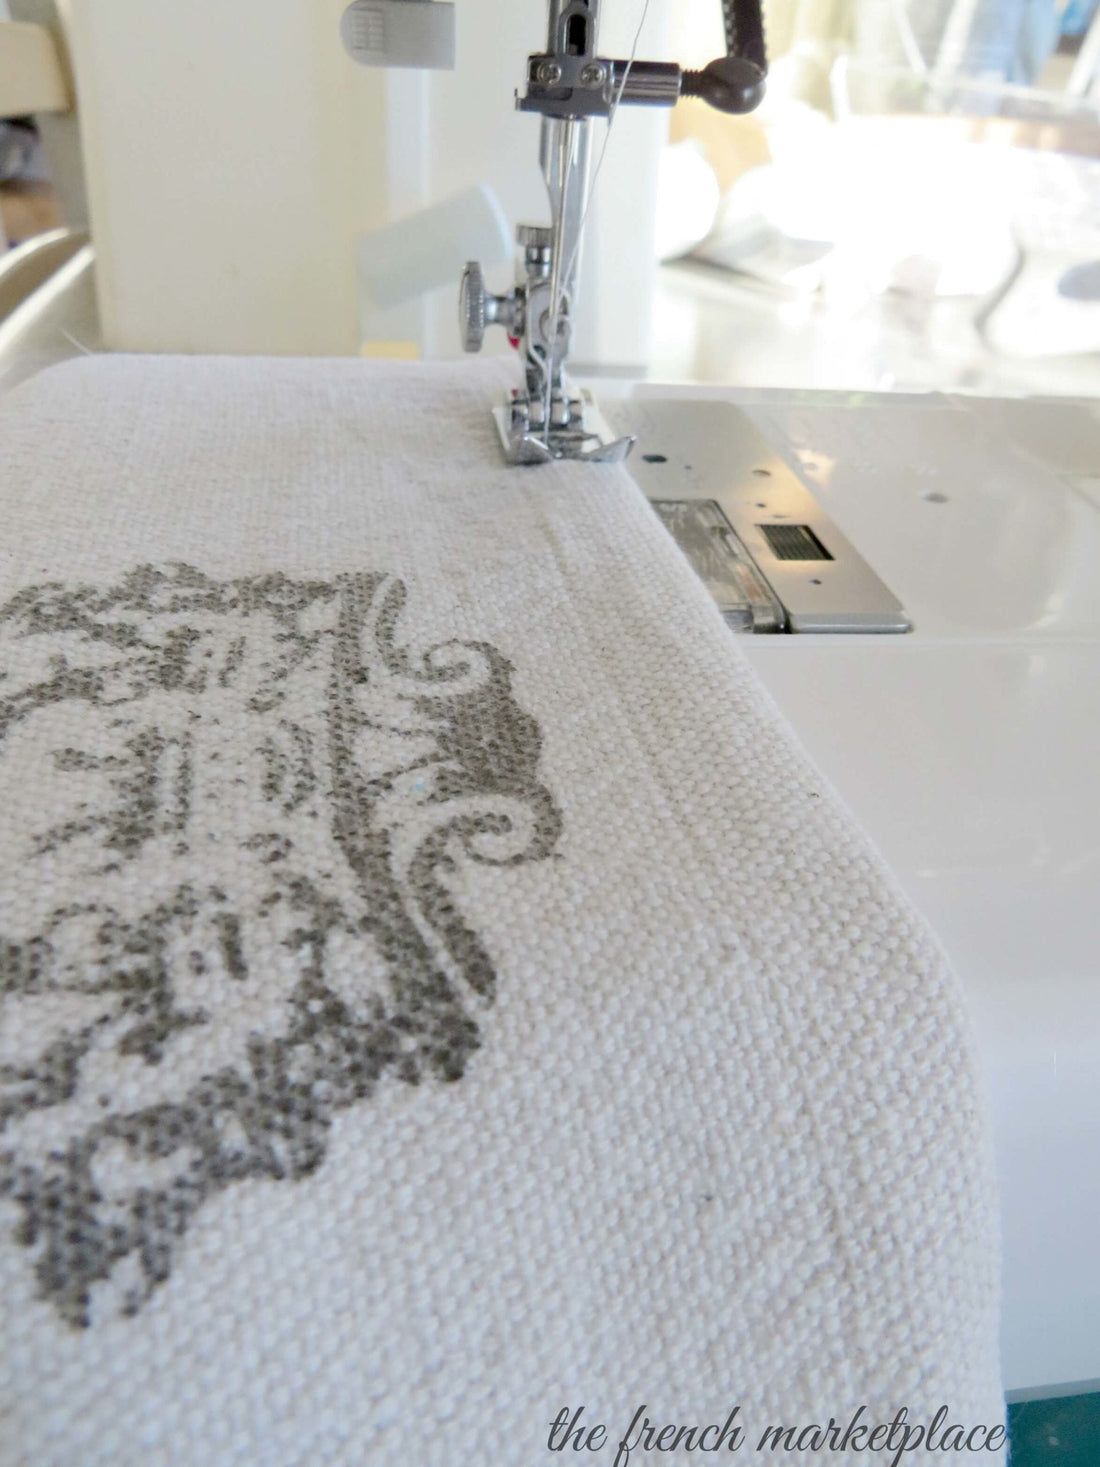
Gently peel your stamp from the backing sheet and place it onto the acrylic block. The block has grid lines on it to help you line up your stamp. Now get your ink. I used IOD Decor Ink in Stone. Put a few drops on the tip of your foam brush. A little goes a long way. Brush the ink onto your stamp, You don’t want too much ink, so just brush lightly.


Once you have inked your stamp, hold the block by the handle and position it above your fabric where you want your image to go. Make sure you don’t touch the stamp to the fabric until you have it right where you want it. I centered the crown about 3 inches up from the bottom raw edge of the fabric square. It doesn’t have to be exact. I just eyeballed it. This way, once you’ve sewn the hem on the napkin and it’s folded at the table, you can see the crown. Now lower the stamp straight down (NOT angled) and press. I like to push down on the block with my hand all around the image just to make sure that the whole stamp transfers. These stamps are amazing. They’re cut really well and stamp so nicely on fabric.

Okay, lift your block straight up (again, not at an angle) and there you have it – a beautiful stamped image!

Let the ink dry for a bit and then it’s time to sew your hem. If you’re not a sewer, that’s perfectly okay. You can use fabric glue to create your hem. Flip your fabric over so that the unstamped side is facing you. On the top and bottom edges, fold over 1/4 inch and press, then fold and press again another 1/4 inch to create the hem. By folding over twice, you get rid of your raw edge. You don’t want to see that on the underside of your napkin. Once these two edges are folded and pressed, go ahead and sew them with a straight stitch using a 1/4 inch seam allowance. Again, if sewing is not your thing, fabric glue will work too. Just follow the fold and press steps, then glue.

Once you’ve sewn your top and bottom edges, repeat the steps for remaining two sides. Once your napkin is hemmed, you’ll want to press it flat, fold it, and you’re ready to set your table!

To make the place card pictured above, cut a piece of card stock into a 3 1/2 inch by 4 inch rectangle. Follow all of the stamping steps above, except you will stamp on card stock instead of fabric. Also, I used the smaller of the two crowns in the set for the place cards. I used a corner rounder to round my corners but you can leave them square if you wish. Put it into a place card holder if you have one or you can simply lay it on the top plate.


There you have it. Make as many or as few as you need and have fun with it!
If you just LOVE working with IOD Decor Stamps on textiles and you’re looking for some other easy handmade gift ideas, check out these tutorials:
 ×
×