DIY Holiday Gift Paper and Tags!
Hello, Iron Orchid Design aficionados…
Heather from Thicketworks here, with some easy-to-implement strategies for creating fabulous Handmade Gift Paper and Tags!

{this post contains affiliate links}
Handmade gifts are a tradition in our family….
Handmade Gift Paper? Not until now.
This year, with the help of the stunning new Decor Stamp offerings from Iron Orchid Designs, I’m creating the Special DIY Holiday Gift Paper that I’ve yearned for.
Now, nobody has time to spare, so I’ve experimented and developed the fastest and easiest methods to create these glorious papers…
Join me, and you’ll discover just how easy it is to pamper those you hold dear with special packaging you create yourself!
{Of course, if you prefer to use Ink or Paint for this project, that will work as well…I was hungry for some shimmer and shine, which is what drove me to develop this method.}
Supplies:
- A roll of Plain Brown Package Paper
- A roll of Plain Black Paper
- Scissors
- VersaMark Watermark Ink Pad
- Mica Powder:Bronze
- Mica Powder: Sunshine
- IOD Decor Stamps: Hardware II
- IOD Decor Stamps: Signage II
- IOD Decor Stamps: Grainery
- One or two fluffy dry paint brushes
- A small container to hold the Mica Powders
- A soft dry cloth
- Black Cardstock
- Kraft Cardstock
- Optional:
- A Heat Tool
- Martha Stewart Crafts Scoring Board and Envelope Tool
- A Bone Folder
- A Paper Trimmer
- A Hole Punch
- Cornstarch or equivalent
Unroll a generous amount of brown wrapping paper onto a flat surface.
Open the IOD Decor Stamps: Hardware II package, and remove the protective clear sheet from the etched side of the stamps. We are going to use the entire sheet to create our repeating pattern!
Note: Do NOT remove the stamps from the backing sheet.

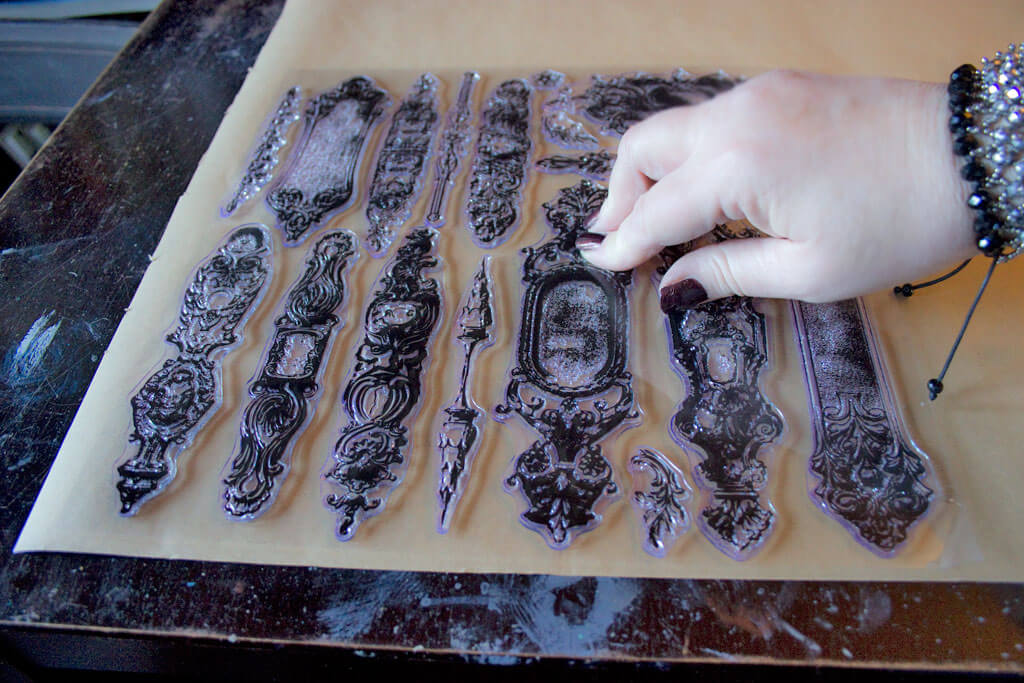
Apply VersaMark Watermark Ink to the etched side of the stamps.
This is a colorless ‘watermark’ ink that leaves an adhesive layer, rather than ‘ink’ when stamped:

Carefully position the entire sheet over the brown paper, and use your fingers to press firmly over each design, being mindful not to shift the stamps:
Carefully remove the sheet.
Here’s a close-up of how the VersaMark Ink appears once stamped:

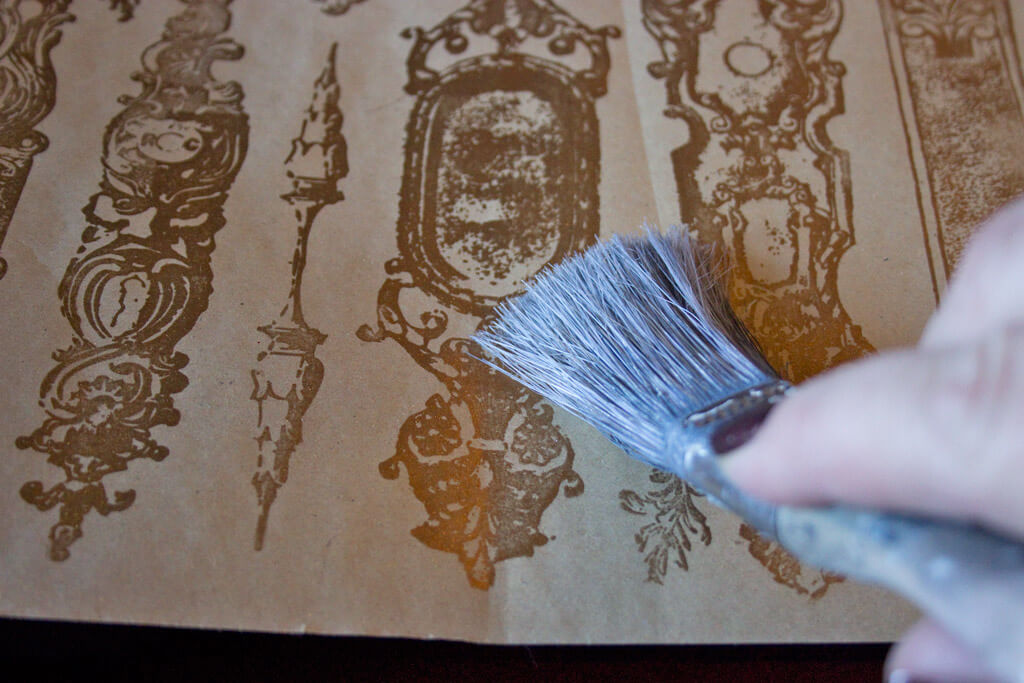
Pour a small amount of Mica Powder:Bronze into a container:

With a dry fluffy brush, apply the Bronze Powder to the stamped motifs:

Once Mica Powder has been applied to the entire design, swirl the bristles of a large soft brush over the whole surface:

Sweep any remaining powder back into the container:

Use a soft dry cloth to burnish the surface:

Repeat the process until you have covered the amount of paper required to wrap that special gift:

The end result is stunning.
Isn’t it fantastic that the entire set of stamps can be used at once to create such a lovely pattern?
I was thrilled!

For a regally impressive Gift Paper, use the beautiful motifs from the IOD Decor Stamps: Signage II set.
This time, select just the motifs needed to create a stunning focal design.
Attach them to the clear protective sheet in a pleasing arrangement:

Apply VersaMark, and stamp onto the surface of the black paper:

Apply Mica Powder: Sunshine with a dry brush.
Swirl the bristles to work the powder into the adhesive:

Swoon at the resulting glory:

And that’s all there is to it!
You now have two extraordinary, bespoke papers, ready to use for that special gift…
Note: if you find that there is any residual stickiness to the designs, a quick dusting with cornstarch, or any inert white powder will take care of it. Just wipe away the excess with your dry cloth.

I selected the IOD Decor Stamps: Grainery set for our Gift Tags.
This classic set of Grain Sack Stripes is gender neutral, elegantly simple, and super easy to work with.
Again, remove the protective clear cover from the stamp set, but do NOT pull the stamps off of the backing sheet.
Apply VersaMark to the entire surface of the set:

This time, place the cardstock onto the surface of the inked stamps, and smooth with your fingers and hands until the entire design has been transferred to the paper.

Repeat the process to add shimmer: Gold on the black paper, and Bronze on the kraft:

A heat tool will help to ‘set’ the powders:

The result is so shimmery and delicious:

No need to measure: use the striped motifs to guide you as you cut strips along the length of the cardstock:

Fold the resulting strips in two:

Then cut along the fold lines:

Now, you’ll have 51/2″ long strips, ready to be folded into lovely Gift Tags:

I used a Scoring Board to easily crease the strips at the 2 3/4″ mark:

And a Bone Folder to reinforce the crease:

Two sheets of cardstock yields 12 Gift Tags!

With a Crop-a-Dile Hole Punch four or more cards can be punched at one time:

All ready for little love notes:

Such a simple process…this took less than an hour from start to finish!
I’m in love with the shimmer of these classic designs…the combination of metallic with kraft paper suits me to a tee!

Add a bit of ribbon, and the look is complete:

The Black and Gold version is ever-so-glamorous…

Elegant and Regal…

And the shine of the gold thrills the eye…

This Holiday Season, I’ll be using Iron Orchid Design tools for everything from DIY Holiday Gift Paper and Tags to one-of-a-kind handmade gifts!

A simple process – a delectable outcome!

Thank you so much for visiting Iron Orchid Designs today! I hope that these examples of Shimmery DIY Gift Paper and Tags have inspired you to try your hand at this fun process!
For more unusual craft ideas, visit me at Thicketworks…the kettle is always on!
Until next time,
Heather
 ×
×