Do-it-Yourself Alcohol Ink Painting With IOD Transfers
Did you know you can do alcohol ink painting with IOD Transfers? The results are AH-MAZING and, with a little practice, you can use this technique to DIY your own unique wall art (and so. much. more!).
No time now? Pin this post for later.

In the Iron Orchid Designs Creative Tribe on Facebook, IOD stockist Diane, owner of Diane’s Designs located in Minot, ND, created quite a stir when she shared this beauty.

We couldn’t help but ask her to share all the steps so we could show you a new way to play with IOD rub-on transfers. This is a great technique to use with paintable transfers, as the black and white designs lend themselves to showcasing the high contrast and rich colors created by inks.
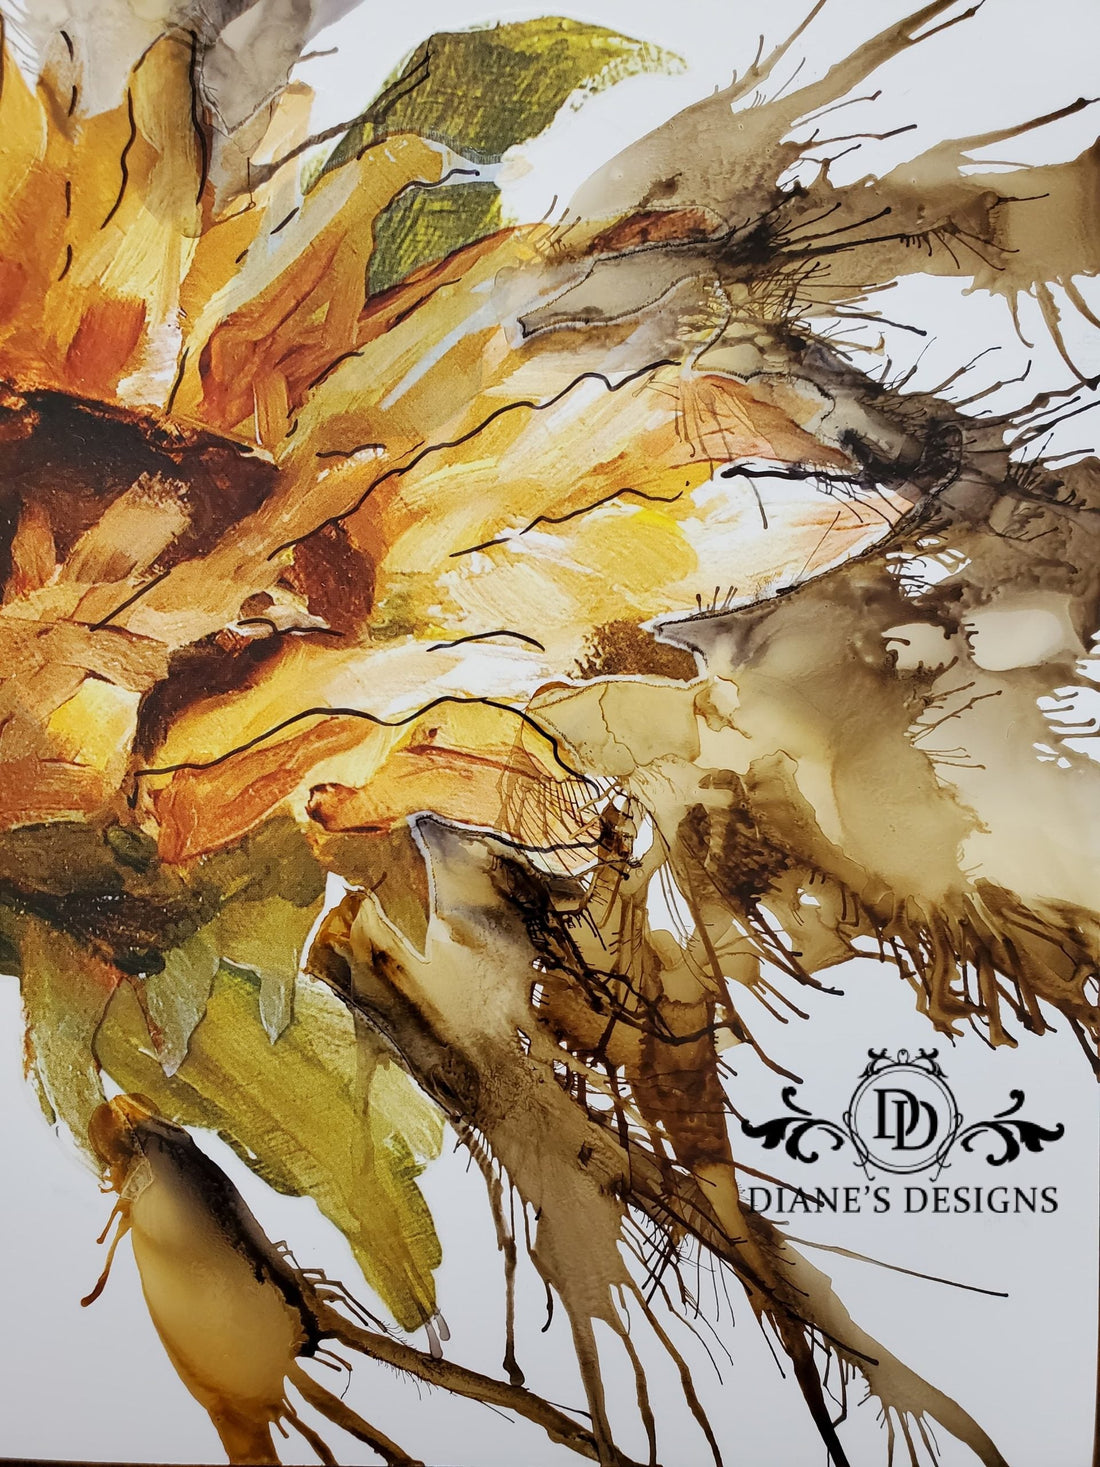
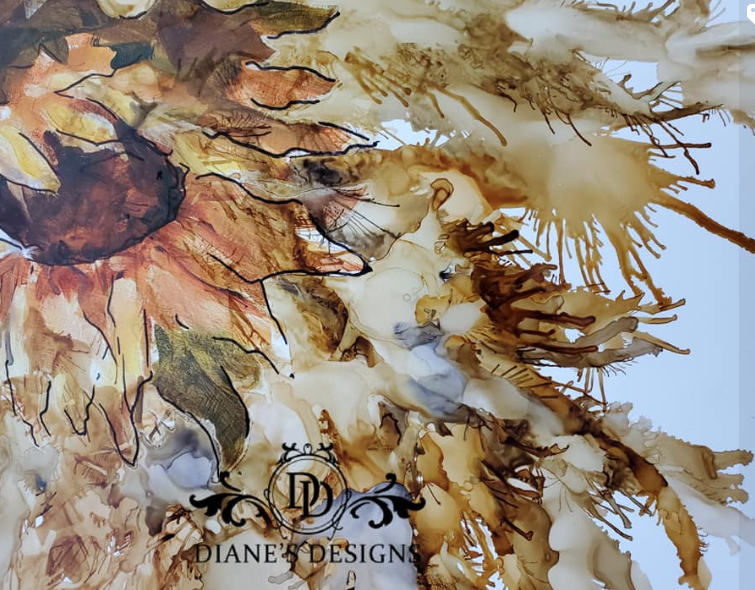
Next level – you can also use this technique with the full line of IOD’s high-quality color furniture transfers, as you see with the sunflowers from the IOD Painterly Floral transfer above.
SUPPLIES FOR ALCOHOL INK PAINTING WITH IOD TRANSFERS
All IOD products can be purchased from an approved stockist. To find a shop local to you, click here. To find an online store, click here.
(This post contains affiliate links.)
- Astoria Foliage Transfer by IOD (or other IOD transfer that complements your interior design style)
- IOD Wood Gallery Blank (optional, if you want to mount your art or do an easy epoxy pour)
- YUPO Paper
- Alcohol Inks (Brown tones and black)- Diane’s favorite color is Carmel
- Blending alcohol (91% or greater)
- Blub blowing tool (or a straw)
- Toothpicks (optional)
- Fine-tipped permanent black marker (optional)
- Epoxy or resin pour (optional)
Step-by-Step: Alcohol Ink Painting with IOD Transfers
As with many of our tutorials, this one focuses on the creative process and showing you how to achieve a specific look that you can then experiment with to reflect your own aesthetic. As Josie says, it’s all about the reps – practice with ink colors and the IOD transfers that inspire you!
STEP 1: Cut out and apply the transfer to the YUPO paper.
This particular DIY decor project only uses a bit of transfer, so you can either use scraps left over from another project or you can cut out only the portion you plan to use.
Side note: If you’re wondering what YUPO paper is, check out this post. Diane experimented with several different surfaces for this technique (so you don’t have to!) and determined that this is the best option for DIY art with alcohol ink painting and IOD transfers.
Using the gridlines on the transfer as your guide, determine where on the paper you want the design to go. Then, remove the non-stick backing and rub on the transfer using the included tool. Diane recommends leaving a lot of white space to allow room for the ink to show its beauty.

Note: If this is your first time using IOD paintable transfer, check out this tutorial to get up to speed on all the ways (so many!) you can use them.
Step 2: Drop the ink and then add the blending alcohol.
Diane dripped the ink so that it outlined the parts of the black and white transfer where she wanted more contrast. A toothpick can be used if you want to introduce small amounts of black ink within the ink colors. After you have all the alcohol ink colors you want to use, add the blending alcohol.

Step 3: Move the alcohol ink around by creating airflow with your bulb tool or a straw.
The alcohol ink dries fast so you’ll need to work fairly quickly. Diane prefers the bulb tool because using a straw can get tiring. (Be careful not to hyperventilate and pass out! 😳) Another option would be air in a can or a compressor with a blower fitting. You just want to make sure you can direct the air in a focused way.

This is what Diane’s DIY art looked like after she finished blowing the alcohol inks for the first go-round. How deliciously elegant are those streams of ink color?

Step 4: Add more alcohol inks and blending alcohol as you go.
Avoid leaving too much ink and blending alcohol on the transfer because it will lift the design. No puddles! Keep the ink moving in a direction off the transfer and layer colors as you go. White open areas on your YUPO paper will make this technique pop!

Step 5: Highlight with a fin-tipped permanent black marker.
Go over the IOD transfer design with a fine-tipped permanent black marker. This step brings back the drama, detail, and contrast of the transfer with the vibrant alcohol ink colors.
Let everything dry completely for 48 hours.
(Optional) Step 6: Mount on an IOD Gallery Blank and finish with an epoxy pour.
Diane likes to finish her DIY wall art with an epoxy pour to magnify the design and colors, as well as to preserve their longevity. You could also do a layer of resin or high-quality water-based polyurethane.
Or, as long as it’s not a high-touch surface, you could just leave your art unsealed.
If you’d like to do a pour (either epoxy or resin), the easiest way is to adhere your DIY alcohol ink art to the shadow box side of an IOD Gallery Blank. This will contain the pour while it cures and then you can make a beautiful frame on the raised edge. (Check out this post to see how to DIY a frame with stamps or this post to DIY a frame with moulds.)
**************
To see what else Diane is making with IOD, follow her on Facebook.
More ideas with alcohol inks and IOD products
If you like this look and want to try it on a dresser makeover or furniture flip, we recommend you use India inks as alcohol inks don’t have great lightfast quality. For furniture, you’ll get more vivid, long-lasting results with India inks.
To learn more about all the ways you can use India inks with IOD Stamps (including the Batik technique), check out this post.
Or, if you love DIY jewelry, see how to use alcohol inks to make vintage style pendants in this post.

Here are more ideas using IOD paintable transfers:
Now, time for you to blow us away with your alcohol ink creations! We want to see — share with us on social media or let us know in the comment below.
 ×
×
popular
- How to Apply IOD Athenaeum Gilded Transfer to Colored Glass Bottles
- From Ugly Duckling to Gorgeous | Black Dresser Makeover with IOD Marché des Fleurs
- 5 Creative Ways to Use One Decorative Stamp
- Turn Thrifted Finds into Charming Garden-Inspired Decor with a DIY Jadeite Finish
- Little Lark Paint Inlay Projects: Vintage Teapot & Canvas Wall Art with IOD