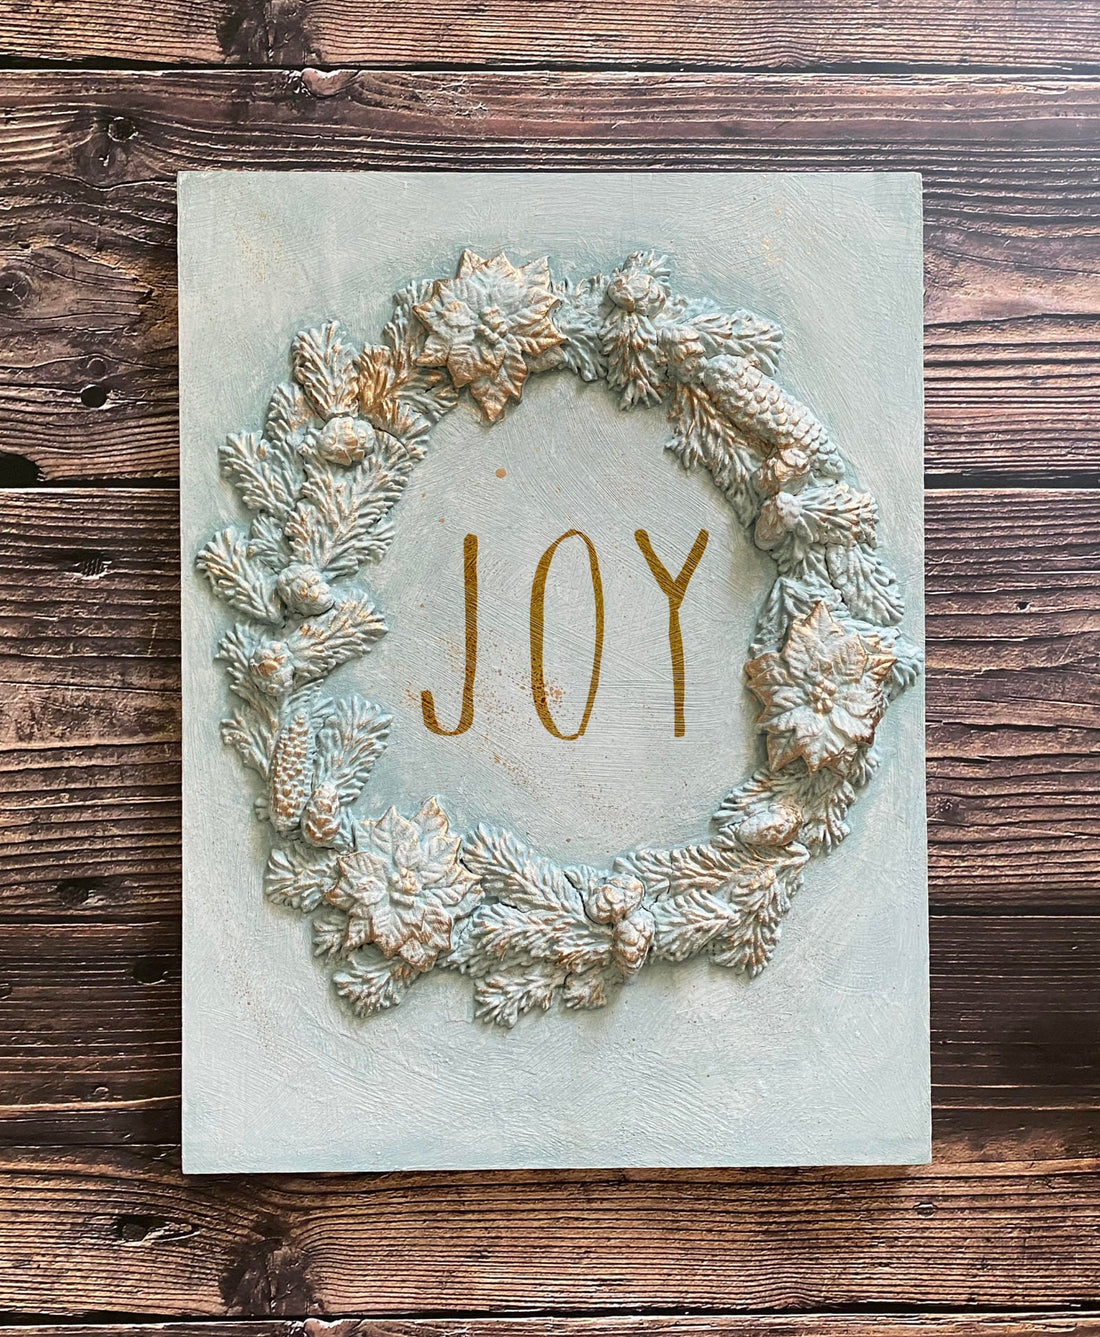
DIY Christmas Wall Decor: Easy Wreath Wall Art with IOD Moulds
We’re already thinking about decking the halls with this DIY Christmas wreath wall art project! (Fa la la la la…)
And while Josie and I might be the only ones singing Christmas carols right now, it’s the perfect time to start your holiday making so you can relax and enjoy your eggnog come December.
No time now? Pin this project for later.

Check out our step-by-step video below or keep scrolling for a supply list and instructions.
Here’s everything you need to make your Christmas wall decor
All IOD products can be purchased from an approved stockist. To find a shop local to you, click here. To find an online store, click here.
(This post contains affiliate links.)
- 12×16 IOD Wood Gallery Blank – Click here to find your local IOD stockist
- IOD Boughs of Holly Mould – Click here to find your local IOD stockist
- IOD Farmhand Stamp (optional) – Click here to find your local IOD stockist
- IOD Air Dry Clay – Click here to find your local IOD stockist
- Cornstarch
- Putty knife
- Titebond Quick & Thick Multi-Surface Glue
- Your favorite mineral or chalk-type paint in antique white
- Your favorite mineral or chalk-type paint in a complementary or contrasting color (We chose a sage green for this project)
- Liquid Leaf in gold
- Lint-free shop cloth
- Water
- Plastic cup to mix color wash
- Quality oval paint brush
- Fan paint brush
- General Finishes Flat 450 Topcoat or other flat water-based polyurethane topcoat
Step-by-Step Instructions: Make Your Own Christmas Wreath Wall Art
Step 1: Make the castings.
Start by lightly brushing some cornstarch in the mould cavity and shake out any excess.
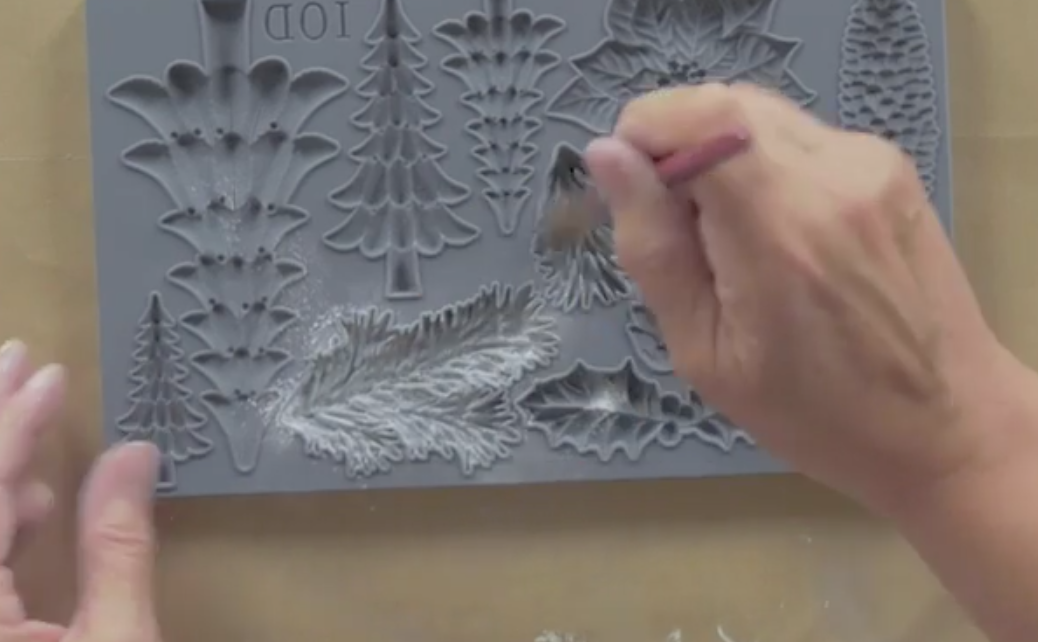
Then pinch off the desired amount of IOD air dry clay needed to fill the cavity and place any remaining unused clay back into a sealable plastic bag. This will keep your clay soft and ready for your next project.
Squeeze the clay in your hands to warm it up a bit and then roll it into the rough shape of the mould cavity. Next, press the clay firmly into the cavity making sure to fill it up entirely.
Using the putty knife, pull away any extra clay until the micro rim is fully visible all the way around the cavity; Take a moment to smooth and flatten the back of the casting with the side of the putty knife so that your casting will lay flush on your project.

Lastly, flip the mould top side down and then fold it back to release the casting onto your work surface; Handle gently to prevent warping or distortion of the design.

If you’ve never made castings with IOD moulds before, check out this post for a detailed beginner tutorial.
Step 2: Arrange the castings on your wood blank.
Gently layer the castings in the shape of a wreath on your wood blank. Intermix the different pine cone shapes and poinsettia castings with the evergreens for visual interest. Continue to work your way around the circle in one direction with your layering until you complete the wreath shape.

To make this step easier, you can mark a circle on the wood with a pencil as a guide. You can also use the pencil to mark where you want to put the clay castings when you glue them down.
Step 3: Glue the evergreen, pinecone and poinsettia castings to the wood blank.
Apply craft glue to the backside of the casting making sure to fully cover the surface and then position each piece where you want it.

Make sure the edges of the casting make good contact with the wood. Do this by gently pressing down while taking care not to distort the design. Wipe away any excess glue with your finger.

Step 4: Let your Christmas wall decor project dry overnight.
Because you’re layering up the clay it will take longer to fully dry so you need to wait at least 24 hours before the next step. While the air dry clay won’t be completely cured in that time, it’s still OK to go on to the next step because it will have a hard crust.
Step 5: Apply two coats of antique white chalk or mineral-based paint.
Allow the paint to dry completely in between each coat.
If you like a more textured look, use short cross-hatch strokes – like you’re painting the letter ‘x.’ If you want a smooth look, use long, straight strokes when painting.

Don’t forget to ‘noodle in’ the paint in all the crevices of the wreath. 🙂

It’s SUPER important to let the white paint completely dry before going on to the next step. If you don’t, you might accidentally reactivate the paint when you color wash.
Step 6: Color wash in a complementary or contrasting color of your choice.
To create the color wash mix 1 part paint to 3 parts water in a plastic cup.

Then, brush the color wash onto your project making sure to get it into all the design details (this will really make them pop).

Crumple up and wet a piece of shop cloth with water. Squeeze out the excess so that it’s not dripping – just damp. Then use it to blot and wipe away some of the color wash until you get your desired color and texture.

Let your project completely dry.
Step 7: Add some bling with ‘stinky gold paint’!
Using a fan-shaped paintbrush and liquid leaf paint in gold, “kiss” (as Josie says) the tips of the high points of your design.

You can also create a splattered look with drops of gold by using the “flicker trick.” This is when you load the brush with paint, hover it over your project, and then quickly tap it against another brush handle to shake the paint off as droplets.

Step 8: Stamp a festive message.
If you want, you can stamp a word in the center of the wreath like we did using the new IOD Farmhand stamp. Some other ideas are “Peace,” “Love,” or “Merry.”
For a great tutorial on how to use letter stamps, check out this sign-making video.
Step 9: Seal your gorgeous DIY Christmas wall decor.
After your project is completely dry, seal it with an even coat of high quality water-based polyurethane so it looks beautiful for many holidays to come.
Remember, if you’d like to buy any of the IOD products used in this tutorial, reach out to a stockist near you. To find a stockist, please go to our Find a Retailer page.
What Christmas decorations do you like to make for your home?
Let us know in the comments below and check back soon because we have another DIY Christmas decor project that you’re gonna love in the works!
Here are a few other DIY holiday decorating projects you might enjoy:
DIY Christmas Pillow Cover with IOD Stamps
 ×
×
popular
- How to Apply IOD Athenaeum Gilded Transfer to Colored Glass Bottles
- From Ugly Duckling to Gorgeous | Black Dresser Makeover with IOD Marché des Fleurs
- 5 Creative Ways to Use One Decorative Stamp
- Turn Thrifted Finds into Charming Garden-Inspired Decor with a DIY Jadeite Finish
- Little Lark Paint Inlay Projects: Vintage Teapot & Canvas Wall Art with IOD