Peacocks & Roses: Learn New Decor Stamp and Ink Techniques with IOD
Do you remember using craft stamps and watercolors as a kid? Well, get ready to tap into your inner child and learn new ways to make art with stamps, inks and the IOD Sisters (that’s us!).
While you can make your own wall art, like we do here, there are so, so, SO many ways to use these stamp and ink techniques. You can incorporate them into all kinds of DIY home decor and craft projects.
Now, get ready to have some fun and give yourself permission to play as you take this next step in your creative journey!
Watch the video below. If you prefer to read, keep scrolling down (but, you might still want to go back later and watch the video as these techniques are easiest to understand when seen in action).
No time now? Click here to pin this post for later.
Everything You Ever Wanted to Know About Decor Stamps with IOD
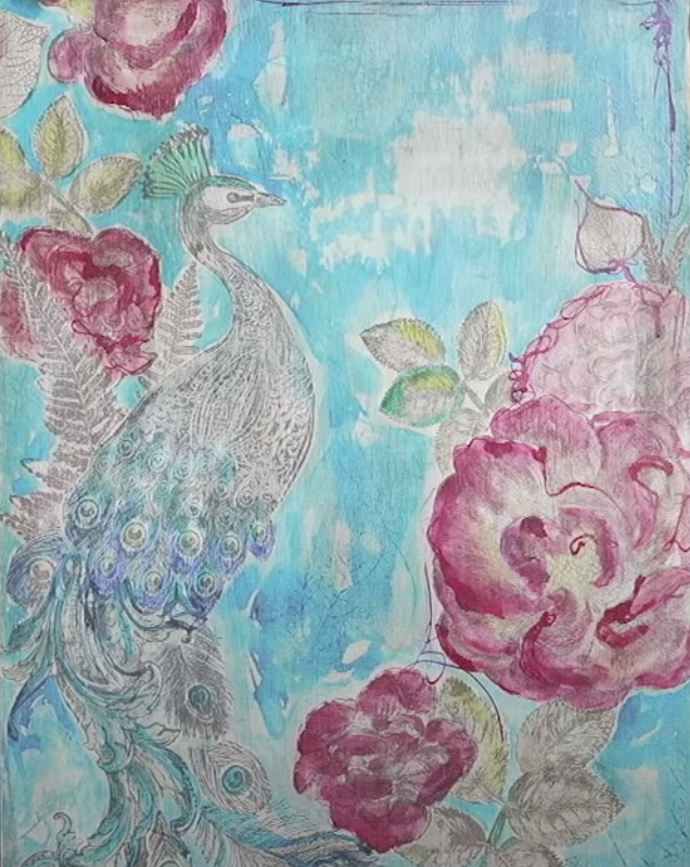
To learn all the ways you can use IOD stamps and Artisan Inks, we’re going to show you how to make a piece of wall art using three of our clear stamp sets: Pavo, Lady of Shalott, and Fronds.
To buy any of the IOD stamps and inks you see used in this project, click here to find an IOD retailer near you.
Tips and Techniques for Using Decor Stamps
In this DIY decor tutorial, we explain a few stamping techniques and creative ways you can use Artisan Inks to enhance your stamp impressions. You’ll learn about:
- Conditioning a new IOD stamp
- Masking stamped images
- Wet on Wet (aka “Flooding Technique”)
- Puddling
- Dip pen technique
- Spray bottle mister for a speckly or “blown out” texture effect
- Batik technique
How to Prep Your IOD Decor Stamps
The first time you use one of our clear stamps, you need to condition the stamping surface.
Start by removing the acrylic sheet attached to the stamping side of the design, while leaving the stamps attached to their backing sheet. Using a fine grit sand block scuff or rough up the stamping surface. Then lightly sand in one direction and then rotate the craft stamp 90 degrees and sand lightly in a different direction.

Next, use a wet wipe to go over the surface and clean up any residue. You’ll notice the craft stamping surface is no longer shiny.
It’s important to note that you only need to season your stamps one time – before the very first use.
A scuffed surface helps keep the medium, usually ink or paint, on the stamp until you have a chance to make your magic happen!
For more detailed instructions on the use and care for your IOD Stamps, check out About IOD Decor Stamps.
To see the latest release of IOD stamp designs, click through to read this post.
Making Wall Art with Peacocks and Roses
Here’s a list of the materials used in our project.
(Disclosure: This post contains affiliate links.)
- Pavo Decor Stamp – Find your nearest IOD stockist here
- Lady of Shalott Decor Stamp – Find your nearest IOD stockist here
- Fronds Decor Stamp – Find your nearest IOD stockist here
- Black Decor Ink – Find your nearest IOD stockist here
- Blank Ink Pad – Find your nearest IOD stockist here
- Artisan Inks – India Inks – See note below*
- Fine grit sandpaper block
- Mixing palette
- Flat palette or plate
- Small cups for water
- Fine mist spray bottle
- ¼ in smooth plywood cut 16 in x 22 in
- Your favorite off-white mineral-based or chalk type paint
- Paint brushes
- General Finishes Flat 450 Topcoat or other flat water-based polyurethane topcoat
“Note about the IOD Artisan Inks: We’re still in the process of creating our Artisan Inks so we’re offering you a temporary alternative called India Inks which also give fabulous results.
If you want to be the first to know when our new Artisan Inks are released, sign up for our newsletter by clicking here.
Prepare Your Stamp Project Surface
Apply two coats of an off white mineral-based or chalk type paint to your project surface.
For this example, we used a smooth ¼ in thick plywood cut to 16 in by 22 in, but feel free to get creative and use something else as your project base.
Keep in mind, your surface needs to be completely dry before the next step. Unsealed mineral-based or chalk type paint dries quickly.
Stamp Your Project Surface
Time to use your IOD stamps, inks and ink pads! Start by taking an IOD Ink Pad filled with black IOD ink (or mix your own brown color) and pat it directly onto the stamp.
Get a generous amount of ink on the clear stamp so that it’s nice and “juicy” because mineral-based paint is a thirsty surface. That means it likes to absorb and “drink in the ink.”

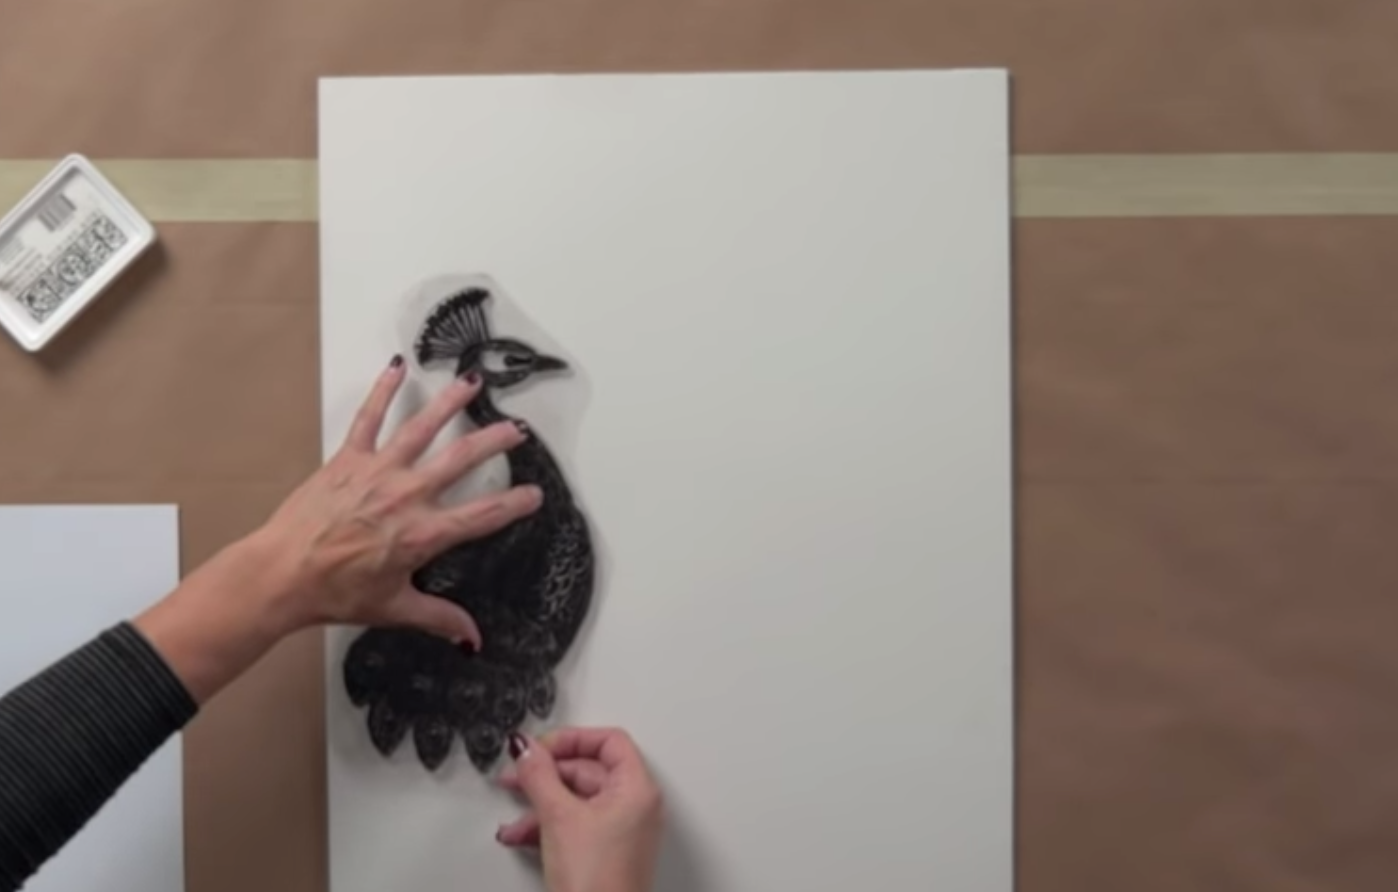
Turn the stamp over and carefully hover over your project surface as you position it where you want your design. We put ours along the left side, on roughly the lower half. Now, carefully lay the stamp down onto the surface.
Hold the craft stamp in place with one hand while carefully smoothing and gently pressing down all across the stamp with the other hand.
Try to avoid shifting the stamp and causing a halo effect.
Tip: Practice placing an ink ‘loaded stamp’ onto different surfaces and finishes to learn how it feels. This will help build up your skill and refine your stamping technique before moving to the main project.
Masking: How to Overlay Stamp Impressions
In order to do this technique, you first have to create a mask.
You use the same stamp and ink after removing it from the project board – in this case we started with the peacock head. Remove the stamp from the project surface and immediately place the stamp on a piece of plain paper. Press lightly, then remove the stamp — all you need to capture is the outline of the peacock.
Make sure your original stamped image is completely dry before advancing to this next step. Roughly cut out the paper peacock, getting fairly close to the outline edge.

Once complete, place the paper peacock mask, print side up, directly onto the peacock image on the project surface. This will block future stamp impressions from your original image.

Next, take the tail section stamp and repeat the entire process you followed for the initial printing of the peacock stamp onto the surface.
Apply the ink to the stamp, hover the stamp where you want it to be, overlapping the paper ‘mask’ peacock. Hold the stamp in place with one hand while gently smoothing the stamp.

Once you remove the tail stamp, immediately stamp onto a piece of paper, cut it out, and then cover the same area on the project once the project surface is dry.

Continue replicating this process to add on individual peacock feathers, the flowers, and individual leaves in the wall art.
When you’re satisfied with the images on the surface, pick up the board and shake off the layered masks. You’ll reveal a multi-dimensional but clean design.

If you want to watch how to make and use a mask in the video, you can skip forward to the 6:52 timestamp.
NOTE: Stamping over previously stamped images, especially when using different colors, can create a muddied look. Using the masking technique gives a vivid, layered look to a design.
After the project is fully stamped to your satisfaction, apply a coat of flat polyurethane, and let it dry thoroughly.
Balancing Negative and Positive Space in Your Project
Yay! The project is now ready for color! We’re using IOD Artisan Inks, which are not yet available, but you can use India Inks to get a similar effect (see the supply list for details).
Before we start, let’s talk about two important concepts: negative space (the non-stamped area) and positive space (stamped area). Both of these aspects of your creative project work together to bring a piece to life — especially the way the color in the negative space draws the viewer into the piece.

Wet on Wet Technique (aka Flooding)
Keep that in mind as you choose your colors and apply them in the negative space using the Wet on Wet technique (aka the flooding technique.) The best way to describe this technique is to jump right into the next step in our project. If you want to watch this in the video, you can skip forward to the 17:08 timestamp.
Dip a brush into water and apply it generously to the negative space. This can be plain water or it’s also OK if the water is tinted with your chosen color.
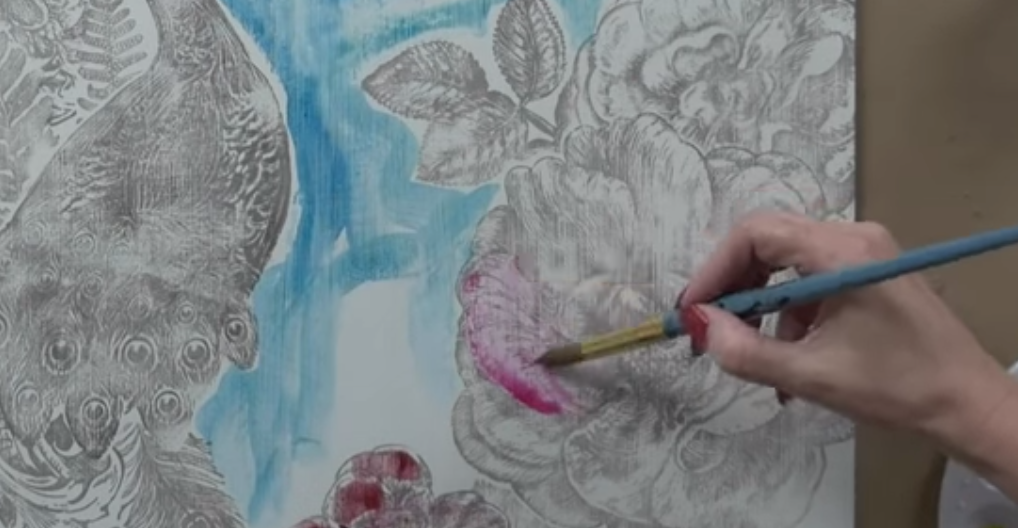
Now, use the Artisan Inks to blend the perfect color.

Load the ink on the brush, and move it around in the negative space. Let the water move the color and leave a slight border around the positive space.

Be freely creative with the water and color, allowing pooling or tilt the surface around, letting water and color move and drip in different directions. With mineral or chalk-based paints on the project surface, you also get the texture of the brush strokes.
NOTE: You can use a rag to wipe off anything that gets in the positive space. This is easily done before the ink dries.
Puddling Technique
Onto the positive space where you’ve stamped! Start by adding water to the brush, then dip into the ink color and apply. Let any puddling that occurs stay to create shading and some edges or smooth them out. (Puddling is just where the ink gathers into a puddle and makes for a more intense color in that spot.)
Repeat this process for your positive space before moving onto using this next cool technique using the Artisan Ink dropper as your tool.
Dip Pen Technique
Take the dropper out of the Artisan Ink and use it as a dip pen, which is a metal-tipped pen used to dip into an inkwell. Without squeezing the dropper, drag it around the lines in the positive space, outlining the design.

You’ll create lines in varying widths and some fun, blobby bits with the dropper. If you want to watch this technique in the video, you can skip forward to the 22:30 timestamp.
TIP: You can go back over any larger blobs and drag the excess ink along the lines without re-dipping the dropper into the ink. When holding the dropper upright more ink will come out, and tilting the dropper will apply less ink. It’s definitely a fun technique to play with while adding color to the positive space!
Misting Technique
One more technique to use on both the negative and positive spaces of the project is spray bottle misters filled with water.
Before the water and ink dry, use the spray bottle mister to create fun texture by holding it high above the surface and misting. Then, hold the spray mister close to the surface and blow out the water and ink.

If you want to watch this technique in the video, you can skip forward to the 25:37 timestamp.
How quickly the Artisan Inks dry depends on a few things:
- The type of surface used in the project.
- The amount of water used.
- Environmental conditions.
NOTE: Get a feel for this by practicing on the same type of surface you’ll use in the actual project. After you know approximately how long it takes to dry, you can time the texturing techniques you want to use.
Batik Technique
Finally we used an amazing Batik technique in our project to add unique depth and texture. It’s definitely a technique to use as the star of an all Batik project someday!
If you want to watch this technique in the video, you can skip forward to the 27:22 timestamp.
We love the fine veining in the leaf stamp from the Frond Stamp set which is why we’re using it for our Batik effect here. Starting with the Ink in the same color as the background/negative space, use the dropper and add ink in a random pattern to a plate.

Don’t worry about getting a solid coverage of the color on the stamp. Just dip the leaf stamp into the ink for enough coverage to create a unique texture on the project.
Then hover the stamp to position it, then place it softly onto the surface and gently rub the back of the stamp.

Remove the craft stamp and repeat the process across the surface randomly. With a watery surface, you’ll create a Batik watercolor look to finish the project.

The surface doesn’t need to be wet to add in this texturing step. Using this technique on a dry surface will give beautiful texture too.
The Batik technique shows the difference between the Decor Inks and the Artisan Inks. Decor Inks, used for stamping the positive space in this project, produce a sharp, defined detail of the stamp. The effect with the Artisan Inks is more ephemeral and totally different.

Are you ready to experiment with masking, wet on wet painting, Batik or one of the other techniques we shared here? Let us know in the comments below.
Remember, if you’d like to buy any of the IOD products used in this tutorial, please reach out to a stockist near you. To find a stockist, please go to our Find a Retailer page.
Now, go create something beautiful!
 ×
×
popular
- How to Apply IOD Athenaeum Gilded Transfer to Colored Glass Bottles
- From Ugly Duckling to Gorgeous | Black Dresser Makeover with IOD Marché des Fleurs
- 5 Creative Ways to Use One Decorative Stamp
- Turn Thrifted Finds into Charming Garden-Inspired Decor with a DIY Jadeite Finish
- Little Lark Paint Inlay Projects: Vintage Teapot & Canvas Wall Art with IOD