DIY Elegant Christmas Ornaments with IOD

December is here, and you know what that means—it’s tree decorating time! 🎄 Whether you’ve already decked the halls or you’re just getting started, there’s always room for more ornaments, right? Let’s be honest—buying new ornaments every year can really add up, and let’s not even talk about how boring the same old ornaments can get. That’s why we put together this charming tutorial using our Bibelots Mould! Plus, we’re sharing some resin techniques you’ll want to keep handy for your next mould project.
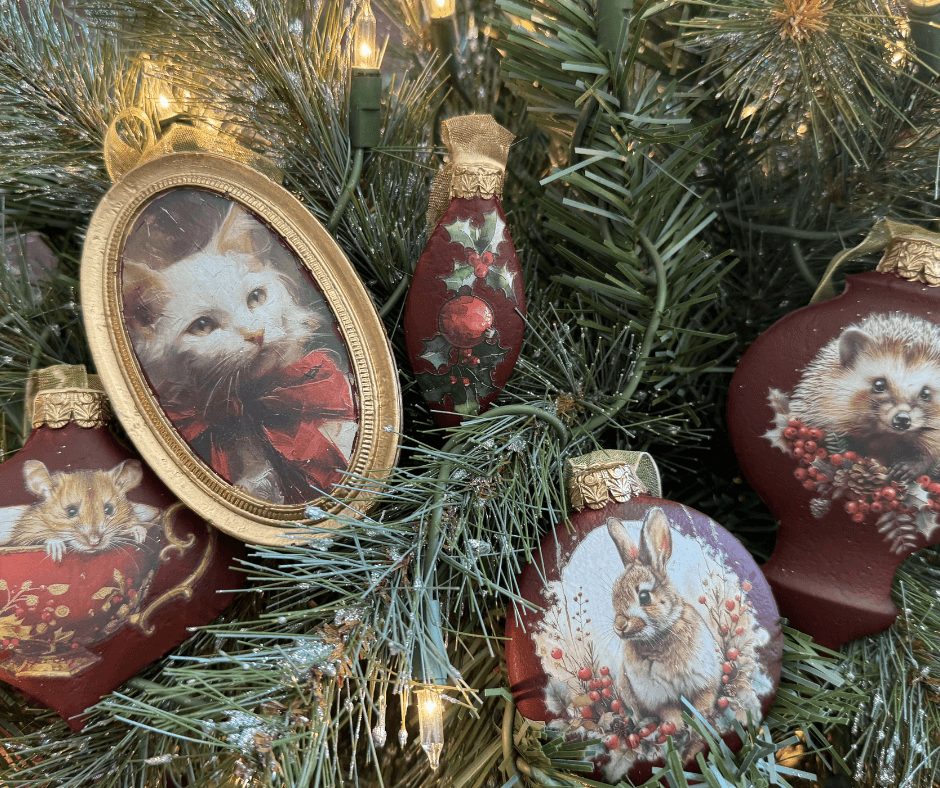
We handmade lovely bibelot ornaments that are packed with vintage charm and just the right amount of whimsy to make your tree extra special this year. We used the Bibelots Mould, Crimson Velvet Transfer, and Yuletide Transfer, but you can totally mix and match your faves from the latest IOD holiday release. What about the Tinsel Gilded Transfer on these?! Stunning! 😍
Keep scrolling for the step-by-step tutorial, and don’t forget to share your creations in our Facebook Creative Tribe —we can’t wait to see what you make!
Grab your IOD products and supplies by using the store locator and finding a stockist near you.
IOD Products Needed:
Other Supplies:
- Ribbon
- Amazing Cast Quick Set Resin
- General Finishes Matte Sealer

Step-by-Step Guide
STEP ONE: PREP YOUR RIBBON
To start, begin by cutting your ribbons for the ornament loops. We made ours about 6 inches long, but you can decide what works best for your tree. Cut enough ribbons for the amount of ornaments you’re making.
Side note: If you decide to use something thicker, like a cord, you’ll need to do some extra work around the top to have the two castings sit together properly. Ribbon works the best, especially for beginners.
STEP TWO: PREP AND CAST YOUR MOULDS
Next, mix up your amazing cast resin at a one-to-one ratio and allow it to set completely. Remove your castings once hardened. Next up, mix up another round of resin. If you’re more comfortable, you can make one ornament at a time, otherwise, you can do the entire set—it’s up to you.
For this round, don’t fill the cavity all the way, come just shy of the micro rim. The reason for this is that you’re going to sandwich your ribbon with the hardened casting, and if you overfill the cavity, you might overflow (ask us how we know 😂). Your ribbon should form a loop between the wet resin and the hardened casting, and your pieces should line up nicely inside the micro rim. Because you’re not going to be able to tell when the casting turns white, we usually set a timer for ten minutes to give it time to set up firmly without risking jelly edges.


STEP THREE: TRIM YOUR CASTINGS
Trim up your sides. It’s just the nature of resin that you get little extra bits around the edge. We usually take a pair of scissors and carefully shave off the excess for a smoother, more seamless joint.

STEP FOUR: PAINT YOUR CASTINGS
We chose a deep, cranberry red chalk paint (custom mixed), for our ornaments for a traditional Christmas feel. Apply as many coats as needed for full coverage, ignoring the frame on the oval bibelot and the tops on all the other ornaments. (Side note, you can cover your ribbons with painter's tape to help keep them clean of any paint. Not that we got paint on them. We’re professionals. 😉)
Next, if you’re using a chalk-type paint with no built-in top coat, apply a layer of sealer. We used General Finishes Flat Out Flat matte sealer, but check with your stockists for their suggestions. Don’t put away your sealer just yet, you’ll need it again in a moment.

STEP FIVE: APPLY YOUR TRANSFERS
Time for transfers! We chose ones that would fit the size and scale of each ornament. Cut out your favorites and take your time, especially on the curves of the oval. You can take a pen or even your fingernail to help give you the size and shape, then cut out the image. There’s a slight curve to the surface, but don’t let that intimidate you! The transfer will accommodate. Next, trim off your excess with anything handy. We just used our fingernails, pressing firmly into the crease so it naturally pulls away.
Apply another coat of sealer on top of your transfers.

STEP SIX: APPLY A GOLD TRIM
Now for some gold! With a fine artist's brush, paint the tops of your ornaments, as well as the gold frame of the oval bibelot. No need to seal the gold gilding paint, as the one we used is an oil-based product. If yours isn’t, you can switch the steps around as needed.
Allow everything to dry and enjoy your beautiful handmade ornaments!

If you're just kicking off your creative journey, have no fear — our Product 101 pages are packed with straightforward techniques to set you up for success. We're thrilled to accompany you as you explore and create. For more how-tos and creative inspo, make sure to browse through the rest of our blog.
Once you've crafted your final piece, share it with our Facebook Creative Tribe! This community is not just a showcase but also a supportive hub for when you hit those creative roadblocks. And remember, your local stockist is always ready to assist with IOD supplies and expert advice. We're excited to see what you'll bring to life!


