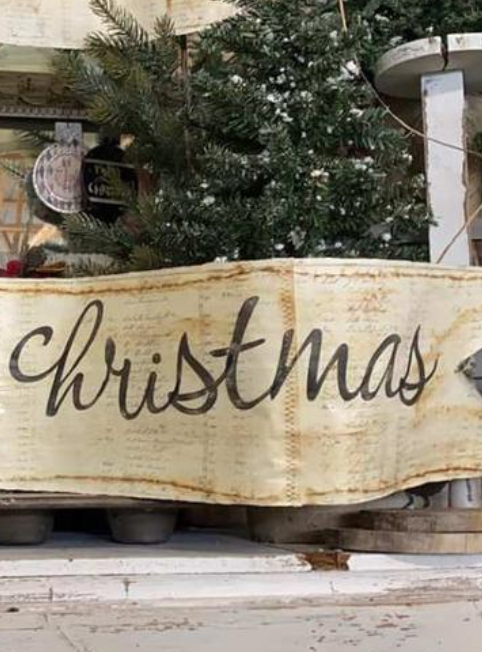
Rustic DIY Merry Christmas Banner
This rustic DIY Merry Christmas banner is one of those holiday decor pieces that you’ll use year after year. It’s big, it’s beautiful, AND it’s bendable so you can shape it to work as a wreath sign, mantle banner, or wall accent.
You can also use this technique to make banners for any occasion – birthdays, weddings, showers, anniversaries. There are so many possibilities with IOD letter stamps and, as Carmen of Curious Farms Market in Bennet, CO says, “Whatever you do, have fun!”
No time now? Pin this project for later.
This tutorial uses the IOD Swoosh Stamp, but you could also use the Retro, Farmhand, or Block Type Stamp sets for this project. All products by Iron Orchid Designs can be purchased through local retailers. Find a shop near you using our store locator.
Here’s everything you need to make this DIY Merry Christmas Banner
(This post may contain affiliate links)
- Swoosh Stamp by IOD
- Holly Jolly Stamp by IOD (this is a limited edition stamp; if you can’t find one, elements from the Merry & Bright or Queen Bee Stamp would also look fab on this banner)
- Vintage Textures Stamp or the Craquelure Stamp by IOD
- IOD Decor Ink in Black for letters and Stone Gray for crackle texture
- Ink pads by IOD
- Brayer by IOD
- Paper wire
- Quick drying glue
- Yard stick or scissors for ripping or cutting the paper
- 3 sheets of 11 x 17-inch paper
- Sewing machine (optional)
- Distress Oxide Ink in the color Vintage Photo
- Spray or brush on water-based sealer in finish of your choice
How to make a DIY Merry Christmas Banner
Step 1: Cut or rip the paper to the size needed.
For this specific banner, you need to cut the paper to 7.5-inches wide and leave it 17-inches long. If you’re using a different font or choose a different saying, you’ll need to adjust your measurements to fit your design.
Save the paper strips you cut as you’ll use them later
Step 2: Sew the short ends of the papers together to make one long sheet.
Carmen used a zigzag stitch on her sewing machine to attach the long pieces of paper together. You can use tape or glue if sewing isn’t your jam.
Step 3: Arrange the Swoosh letter stamps on your banner to figure out spacing and placement.
Step 4: Ink the letters with IOD Decor Ink in Black and stamp the banner.
Because the Swoosh letters are a script style, they should connect and flow together. To do this, it’s easiest to stamp each letter one at a time. If you’re using the Retro or Farmhand stamp, you can mount the letters on an acrylic sheet and stamp them all at the same time.
Step 5: Lightly stamp with the crackle texture stamp using IOD Decor Ink in the color Stone Gray.
Stamp a few different spots and use a light touch on the back of the stamp. (Josie calls this ‘tickling’ the stamp.)This will add to the aged look and give the banner more visual interest.
Step 6: Make the dovetail ends on your banner.
Fold the banner on itself without creasing it to line up the ends. Carmen used her yardstick as a guide to rip the paper in a “V” shape as she loves a rustic, handmade look. If you want a more finished, smooth look, you can cut the dovetails with scissors.
Step 7: Glue the paper wire to the back top and bottom edges of the banner.
If you want to be able to tie your banner, cut the paper wire longer than the banner so there are tails at each end. Run a line of glue along the edge of the back of the banner and stick the paper wire on it. Then take the strip of paper you ripped in Step 1 and lay it on top of the paper wire. Line the edge of the strip up with the edge of the banner and squish down over the paper wire to ensure good contact.
Trim any excess paper from the banner.
Step 8: Lightly rub a pad of Distress Oxide in the color Vintage Photo on the banner.
Step 9: Seal your banner.
The sealer will activate the Distress Oxide and move it around a bit. This will give your banner an aged look. You can use a matte sealer if you like, or a semi-gloss if you want a bit more of a sheen.
Looking to make a Christmas Countdown? Check out the tutorial below to learn how to make the perfect chalkboard countdown for little hands.
 ×
×
popular
- How to Apply IOD Athenaeum Gilded Transfer to Colored Glass Bottles
- From Ugly Duckling to Gorgeous | Black Dresser Makeover with IOD Marché des Fleurs
- 5 Creative Ways to Use One Decorative Stamp
- Turn Thrifted Finds into Charming Garden-Inspired Decor with a DIY Jadeite Finish
- Little Lark Paint Inlay Projects: Vintage Teapot & Canvas Wall Art with IOD