Vintage Travel Decor Ideas: DIY Trunk Coffee Table
Vintage travel decor never goes out of style, especially when you combine it with the function of a DIY trunk coffee table. You get high-end style with storage all on a budget!
No time now? Pin this post for later.

Watch how Michelle of Serendipity House creates this DIY trunk coffee table, or keep scrolling for a supply list and step-by-step instructions.
If this is your first time using IOD Transfers, check out this post for all the basics as well as our best tips and tricks.
HERE’S EVERYTHING YOU NEED FOR YOUR DIY TRUNK COFFEE TABLE
IOD products can be purchased from an approved stockist. Click here to find one near you.
(This post contains affiliate links.)
- Exploration Transfer by IOD
- Thrifted trunk or you can buy a cheap footlocker
- Your favorite brand of chalk type or mineral-based decor paint in a light gray-green
- Good quality paintbrush
- Painters tape
- 220-grit sanding sponge
- Hand-held vacuum or baby wipes
- High-quality water-based sealer in matte and satin finishes
- Your favorite liquid patina or liquid antiquing medium
- Lint-free shop cloth
- Old toothbrush
- Your favorite brown and bronze paints
- Fine mist water bottle
- Four caster wheels and any tools needed for installation
Step 1: Apply two thick coats of light gray-green paint.
Use a cross-hatch brush pattern (like an “X”) to create texture and stroke lines on the trunk with the paint. Cover the entire trunk including any hardware, seams, and lock, but avoid painting the leather handles. Cover them with painter’s tape to avoid any mishaps. 😆
Allow the first coat of paint to dry fully before applying the second coat.


Step 2: Sand and distress the trunk.
Create areas where some of the metal from the hardware and other contours of the trunk show through. Think of where natural wear would show – corners, edges, and any other raised points.
Use a vacuum or wet wipe to clean off all the dust from sanding.

Step 3: Apply a high-quality water-based topcoat.
Using long even strokes, seal your DIY trunk coffee table with a matte topcoat. Wait 24 hours for it to dry completely.

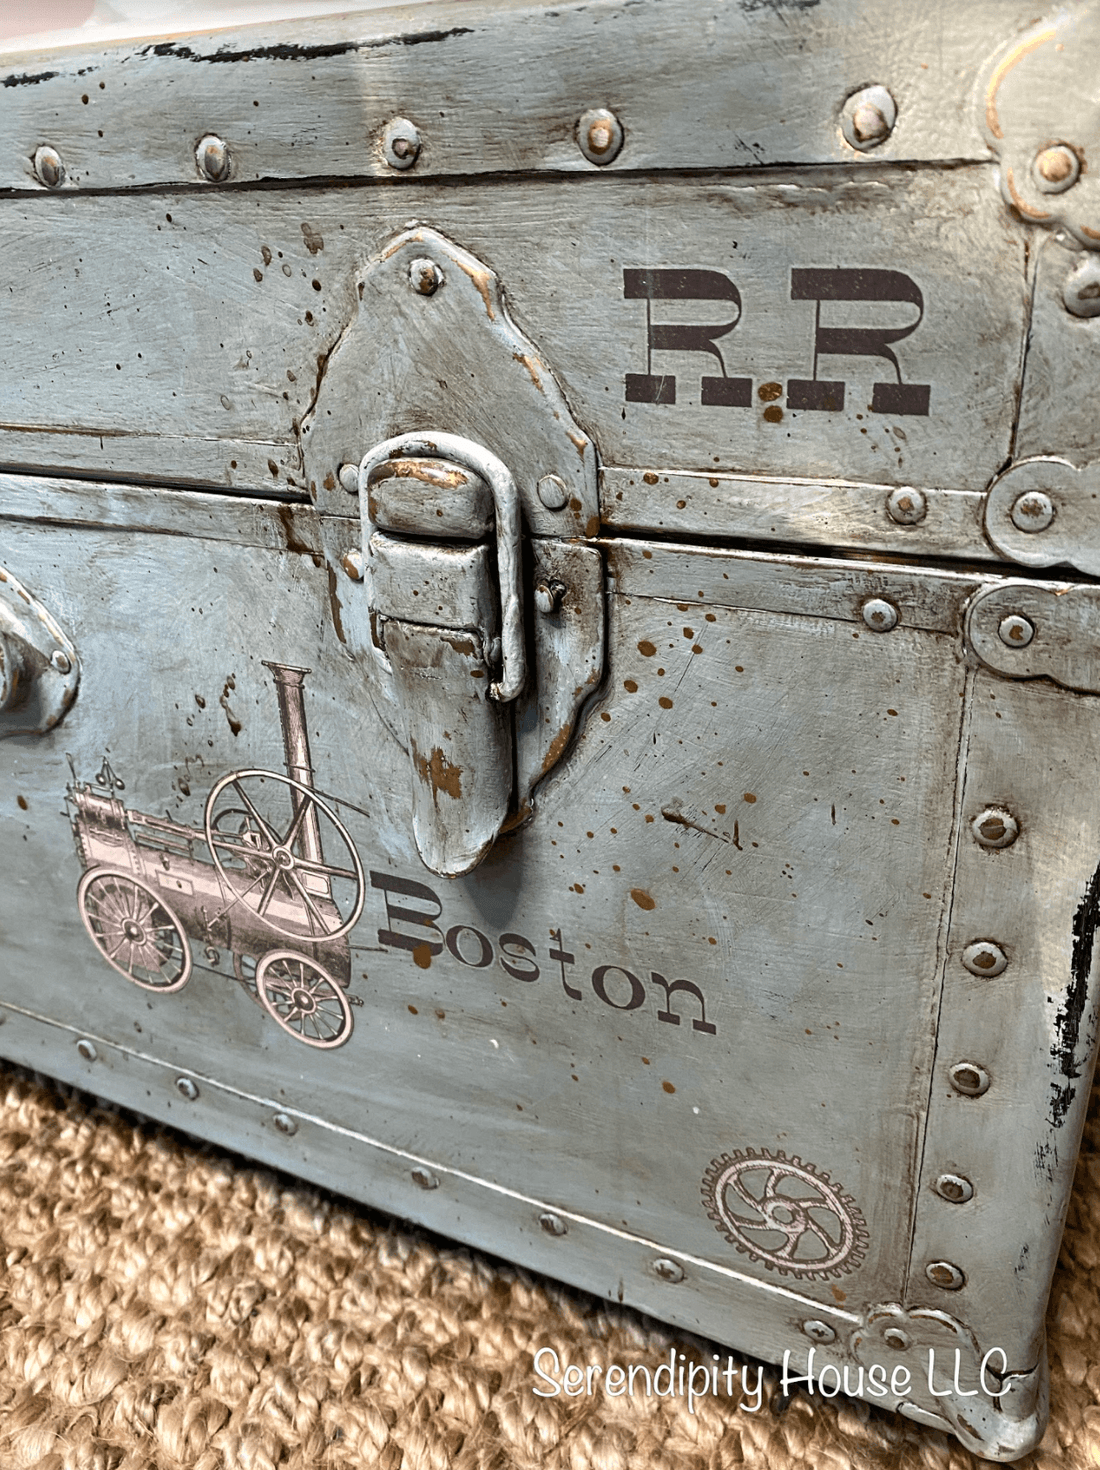
Step 4: Cut apart, arrange and rub on the Exploration Transfer pieces you want to use.
Use the application tool provided with your transfer to gently rub on the furniture transfer. Slow lift the grid-lined backing to make sure all parts of the image are transferred. If you find you missed a piece, just lay it back down and keep transferring.
Feel free to layer and arrange the vintage travel designs to create just the look you want. Michelle created a train-themed DIY trunk coffee table but you can use the old-time airplanes, hot air balloons, or wooden sailing ships.

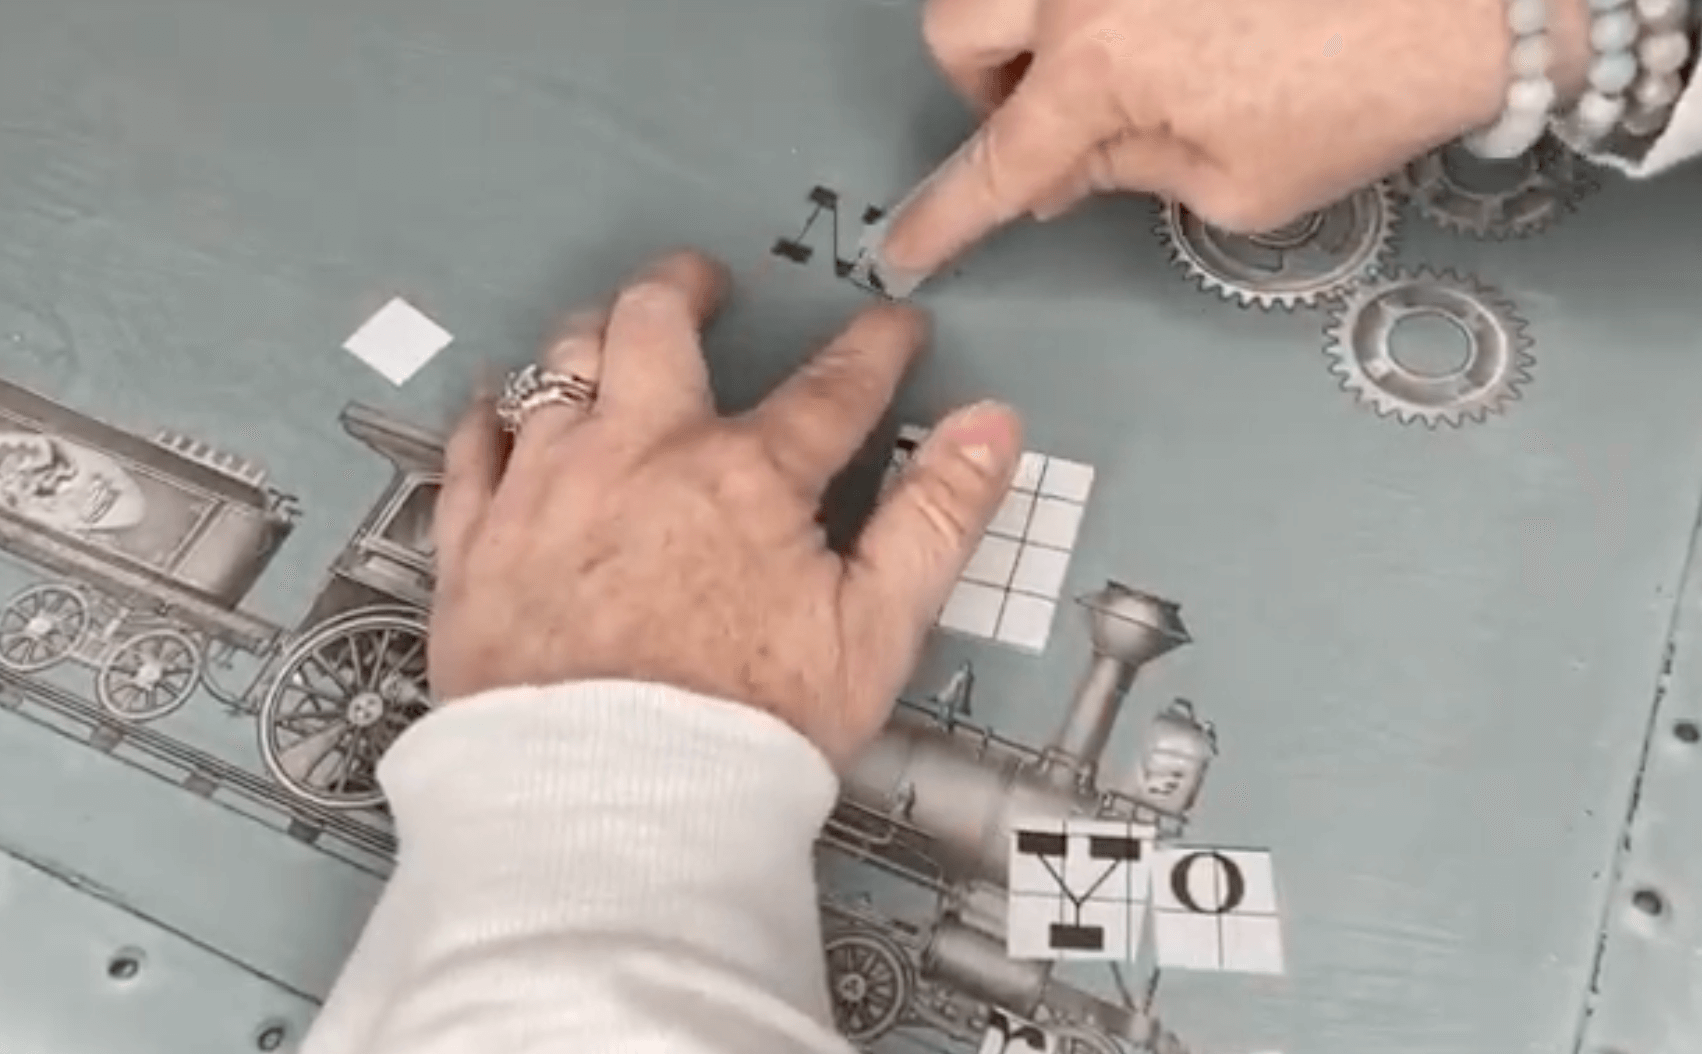
Note: If this is your first time using IOD Transfers, check out this product basics video for extra tips and pointers for easy release and adhesion to your project.
Step 5: Burnish the vintage travel-inspired images.
Cut a piece of the leftover non-stick backing and use it to firmly rub the entire transferred image. This is to make sure all the edges securely adhere to the trunk.
Step 6: Apply a satin sealer over your entire DIY trunk coffee table.
Brush on an even, thin topcoat and allow to dry completely.
Step 7: Antique the trunk to give it an authentic, time-worn feel.
Apply a liquid antiquing patina or dark wax. Work in small sections – applying and wiping the antiquing medium with a lint-free cloth as you go. Work the antiquing medium into all the seams and hardware – wherever dirt and dust would settle. Allow the trunk to dry fully.


Add flecks of bronze and brown paint by dipping an old toothbrush in the paint and lightly flicking it. You can do this by stroking the bristles with your finger.

Mist the flecks with a spray water bottle before the dry to create an organic movement of the paint droplets.
Step 8: Install the casters.
Following the directions on the package, secure a caster on each of the four corners of the trunk.

And you’re DONE with your DIY coffee table!

Do you love vintage travel decor? Get inspired by these other DIY home decor ideas using the IOD Exploration Transfer.

Antique child’s rocker by Deja Vu Boutik 
Wall art by ellen j goods 
Dresser by Elsie Lane Boutique 
Vintage window by Seaporium 
Bar stools by Blue Star Antiques 
Dresser by Abracadabra Refurbished
Is vintage travel decor your style? Let us know in the comments below.
 ×
×
popular
- How to Apply IOD Athenaeum Gilded Transfer to Colored Glass Bottles
- From Ugly Duckling to Gorgeous | Black Dresser Makeover with IOD Marché des Fleurs
- 5 Creative Ways to Use One Decorative Stamp
- Turn Thrifted Finds into Charming Garden-Inspired Decor with a DIY Jadeite Finish
- Little Lark Paint Inlay Projects: Vintage Teapot & Canvas Wall Art with IOD