Furniture Transfers Your Way: How to Mix & Match IOD Transfers
Have you ever gotten creatively stuck when working on a furniture makeover?
You’ve painted a headboard, a wooden cabinet, or a dresser the perfect color but it still needs a little something more to give it that extra special “Umph!”
We’ve got an easy solution for that… furniture transfers made with love by Iron Orchid.
(And don’t be fooled – these babies can be used on WAAAAYYYYY more than just furniture, 😆 but more on that later.)

No time to read now? Pin this post for later.
What are Furniture Transfers?
A furniture transfer is a pre-printed design that comes attached to a non-stick backing sheet. Pressure-sensitive, you apply the image by rubbing it onto a surface, then peeling off the backing sheet and the pre-printed design remains on the surface.
IOD transfers are designed in both scale and motif to be appropriate for a wide range of decor styles including farmhouse, vintage, shabby chic, boho, French cottage and more. Use these beautifully rendered, timeless designs to add a unique touch to your furniture projects, wall art, or any decor accessories.
They’re truly transformational!
How to Use Furniture Transfers
Wait ’til you see how easy it is to use rub-on transfers.
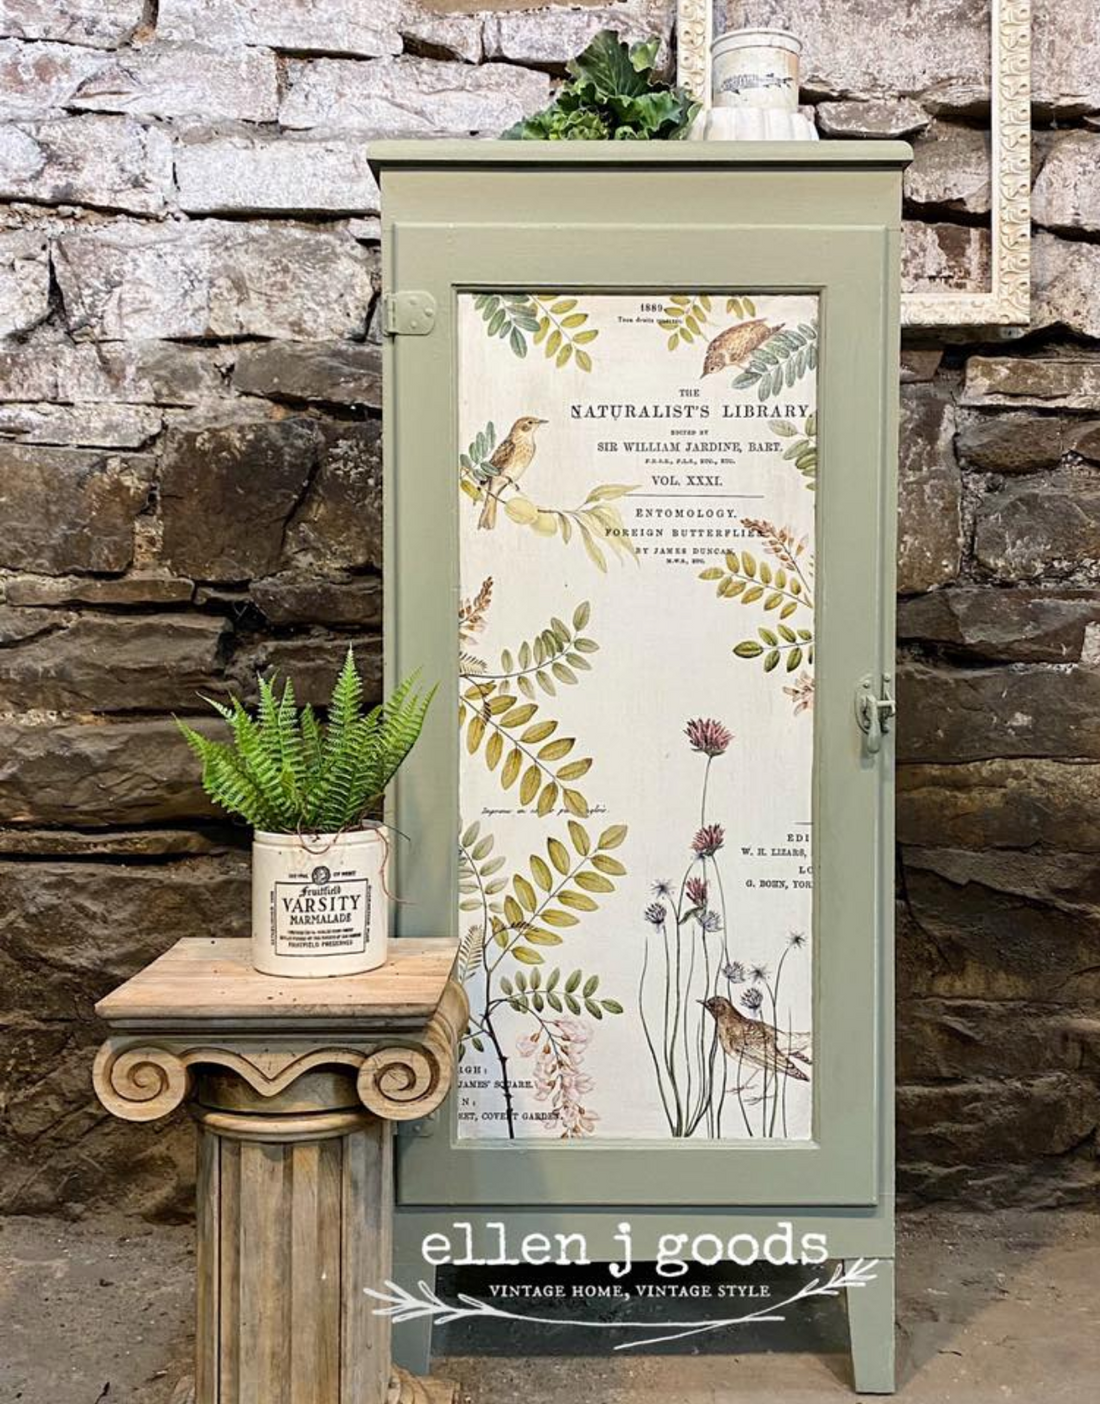
In the step-by-step video below, Lynne from Ellen J. Goods in Medina, NY, takes a simple little cabinet and transforms it using three different IOD furniture transfers.
Yes – THREE different transfers! There are single stems and birds, combined with groups of ferns and layered buds from the IOD Entomology and Fronds Transfers. The final layer comes from pieces of a typography transfer, IOD’s Label Ephemera.
Watch the video below to see how Lynne mixes and matches IOD transfers until she gets just the look she wants.
No time to watch the whole video? Keep reading for the highlights.
Best Design Tips for Using Color and Composition in Your Project
“Don’t be afraid to cut your transfer apart!” exclaims Lynne. How liberating is that!?!
Specifically she guides you with the following advice when mixing and matching several transfers on one piece:
- When using several different transfers, cut selected pieces, and lay them out. Step back and check if the colors and scale of the pieces are cohesive.
- Feel free to chart your own path as you cut up a transfer. You don’t have to adhere to the images’ outline. Cut off that stem, leaf, or flower!
- Aim for an edited, curated look. Don’t feel like you have to use everything you cut in your piece.
- If you want to figure out exactly where to cut your transfer, position the piece of transfer on your project and then make a small fold on the transfer to mark exactly where to cut.

Lynne slips in some best practices for combining and layering different pieces of the transfers. For example, you want to make sure you completely rub on the transfer for the bottom layer before beginning to rub on the overlapping piece.
And it’s OK to lay out the pieces on one section at a time as you progress through a project. This gives you a chance to adjust and play with your design! You can try off-centering the pieces or centering them. Experiment with different combinations to find what fits your design.
Lynne also positions certain elements of the transfer to point to different places on the piece. For example, when placing the bird, she makes sure the bird is angled such that he’s looking toward the center of the piece rather than away from the center. This helps draw the eye to where the bird it looking.
And don’t forget to use negative space, which is usually the empty or blank area of your design. Empty spaces give the eye a place to rest which can sometimes be just what a design needs to complete it.
Finally, straight, level lines are extra important when incorporating a typography transfer or other lettering into a project. To make it easy for you, the IOD transfers have printed on grid lines. Using these gird lines, it’s a snap to make sure the lettering is lined up straight before transferring the image.

Applying a Furniture Transfer (aka a Furniture Sticker or Furniture Decal)
You might think it’s a bit tricky to transfer an image on to a piece of furniture, but get ready to be pleasantly surprised!
First, you’ll want to apply a quality water-based sealer on the wood or on top of the paint (if you’ve painted your project). The key thing to remember is you’re rubbing the image onto the coat of sealer to improve adhesion and the longevity of the transfer.
Next you need to decide where to place the transfer. In the video, Lynne shows exactly how to use low tack tape to keep her pieces in place and gently rub the image with the tool provided with the IOD Transfer.

She partially pulls the backing up to check for any straggly pieces as she progresses. Moving on to the next transfer piece, she builds by layering and overlapping and creates a sense of “realism” in the piece.
Using layering in this way adds depth and interest to a piece.
Finishing a Furniture Transfer Project
Once you’ve rubbed on all your bits of furniture transfers, it’s time to burnish all the images. A soft cloth rubbed gently across the piece will make sure all the edges of the decal are sticking to the wood. If you don’t have a lint-free cloth, you can even use a piece of leftover transfer backing, as Lynne shows in the video, to burnish the IOD transfers.
Now is your chance to distress the piece to give it that vintage, shabby chic look. To do this, take a lightweight sandpaper block and gently go over the design surface and transfers. This will bring some of the painted background through while making the transfers look less like furniture decals and more like hand-painted designs.

So to recap… to get the best finish when using IOD furniture transfers, the steps are paint > seal > rub on transfer > distress (optional) > seal.
Creating a Library of Decor Transfers for Furniture
Of course, when you cut out just what you want to use in a project you’ll have so many leftover transfer scraps. Lots and lots of them! Here’s the golden rule: Save every last bit of transfer (with the non-stick backing) for future projects. Over time, you’ll have a library of transfers!
Even the tiniest leaf might fit perfectly in a future project.
For example, check out this wreath Lynne made using transfer scraps.

Top tips for saving your transfer bits and scraps
- Use low tack tape to hold backing on to transfer and store them in a large envelope
- Staples scraps to the non-stick backing before storing them (some in a box or on shelves)
- Organize them by subject (leaves, birds, flowers, butterflies, frogs, labels, etc.) and separate them into manila file folders or sleeves
So Furniture Transfers are the Same as Rub On Decals?
Pretty much! IOD transfers go by many names (but we like IOD transfers best, hehe!). Some people call them rub on decals, furniture decals, furniture stickers or rub on transfers because the backing of the transfer is designed to adhere to the surface of your project when you apply pressure.
Everything You Ever Wanted to Know About IOD Rub On Transfers
Not only are the images gorgeous (if we do say so ourselves 😆), but there’s also some extra details about IOD transfers that make them really something special.
As you saw in Lynne’s video, many of our furniture transfers are “buildable” because of the opacity included in the designs.
What does that mean? It means these colorful rub-on images look amazing layered in a project because of their richness and depth of color. You can customize and ‘build’ your own designs by arranging IOD transfers however you want.
And the opaqueness of the designs means they show up well against both light and dark backgrounds.
More About IOD Transfers
As you get comfortable working with the new IOD transfers, play with your designs! Unleash that creativity because these transfers:
- Are “distressable” which means you can lightly sand them to give that perfect shabby chic, vintage-y look
- Have improved backing with grid lines to prevent crooked or off-kilter applications
- Are so easy to use with the provided rubbing tool – these beauties transfer onto your project surface like butter!
Take Your Next Creative Step with Paintable Furniture Transfers
What makes paintable furniture transfers different from other IOD furniture transfers? Paintable transfers are more like a page from a coloring book that you can stick on your furniture. They’re classically designed black and white transfers just waiting for you to bring them to life by coloring it in with your favorite palate. Watercolor? Diluted ink? Yes and Yes!

See the kiss of color on the roses and leaves painted by Lynne? What colors would you paint?
To learn more about IOD paintable transfers, check out this post.
Do IOD furniture decals work on more than just wood?
There are SO. MANY. WAYS. to use IOD transfers. You can even use them on fabric (but keep in mind this is considered an ‘off brand’ use so we can’t guarantee the results.)
For example, check out this tutorial by Michelle of Serendipity House on how to use transfers to make beautiful lampshades.
We’ve seen them used on upholstery, basket lids, and to create beautiful tapestries. For more ideas, check out this post on using IOD products on fabric.
More ways to use IOD transfers on all kinds of DIY home decor projects than you can count!
Here’s just a small sample of ways to tempt you into trying furniture transfers on your next project.


Are you inspired to try IOD transfers or to cut apart ones you already have to create your very own completely unique, one-of-a-kind piece?
Let us know in the comments below. Now, go make something beautiful!
 ×
×
popular
- How to Apply IOD Athenaeum Gilded Transfer to Colored Glass Bottles
- From Ugly Duckling to Gorgeous | Black Dresser Makeover with IOD Marché des Fleurs
- 5 Creative Ways to Use One Decorative Stamp
- Turn Thrifted Finds into Charming Garden-Inspired Decor with a DIY Jadeite Finish
- Little Lark Paint Inlay Projects: Vintage Teapot & Canvas Wall Art with IOD