Gleaming & Gorgeous: DIY Vintage Book Covers and Ends

We’ve got a fabulous project for you today, one that turns your bookshelf clutter into charming, bespoke decor!
Have you ever glanced at your bookshelf and thought... mismatched bindings, outdated covers, and a whole lot of visual noise? Us too. We love giving those forgotten or thrifted books a second chance as lovely, vintage accents. A little gilding...some floral sprays or whimsical details, and suddenly, that stack of books is the prettiest detail in the room.
In this tutorial, we’re dressing up books using a few scrumptious Gilded Transfers and Transfers, but you can swap in your fave Paint Inlays or Stamps. This technique is lovely for styling an open shelf, coffee table, or even creating a meaningful handmade gift. It's such a fun way to bring personality and charm to your space.
So grab a book or two from your stack, your IOD supplies from your local stockist, and let’s get to making something beautiful. 💛
IOD Products Needed:
Other Supplies:
- Journals
- Dark Wax
- Matte Sealer
- Painters Tape
Step-by-Step Guide
STEP ONE: PAINT YOUR JOURNALS
We decided to dress up two books for this tutorial, because why have one when you can have multiple? 💕
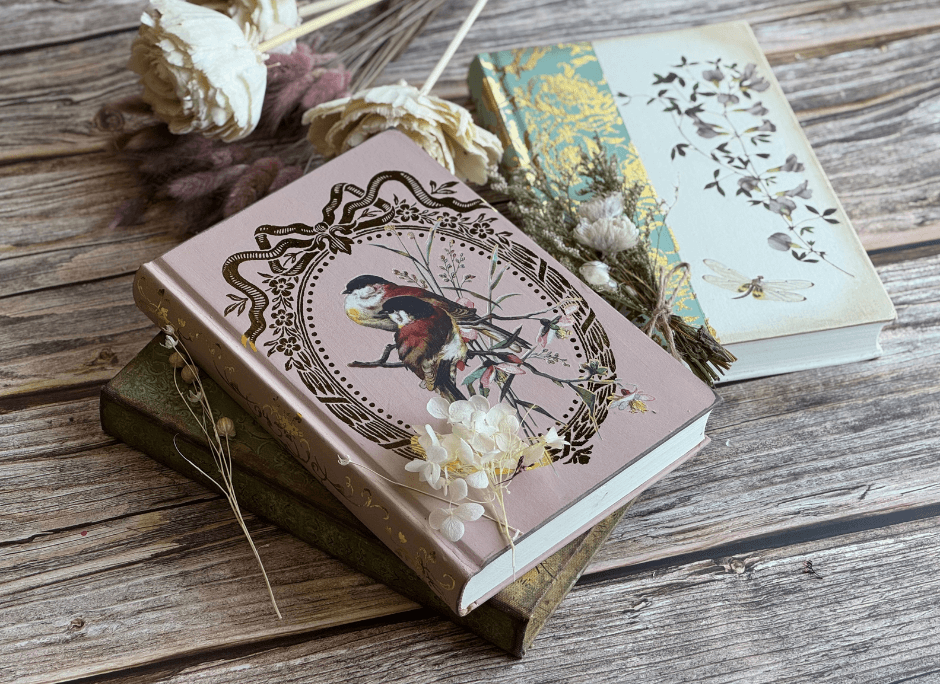
For the first journal, start by painting a section in a soft white and let it dry completely. Then tape off a nice generous chunk for the “spine” and paint it in a dreamy duck egg blue. Let it dry, then peel away the tape to reveal that crisp two-tone goodness. For the second journal, we went with a soft dusty pink.
Our pink paint had a built-in top coat, but for the other journal, we gave it a quick mist of water-based sealer to help the transfer grip. Let that dry completely before moving on!


STEP TWO: APPLY TRANSFERS AND GILDED TRANSFERS
Now for the gilding, our favorite part! We started with the blue and white journal by cutting an 8.5” x 6” section of the floral gilded transfer from Emporium. Line it up right where the blue meets the white and gently press it over the spine, taking care to nestle the design into the book’s creases. Take your time!
Next up, we added a sweet sprig of florals and a dragonfly from Wilde Bleomen to the white section of our journal, just the touch it needed!
For our pink journal, we reached for the prettiest combo: a delicate frame from Petits Ornements on the front cover, sweet birds from Catharina tucked inside and fluttering out of the frame, and a trio of flourishes from Si Belle dancing along the spine. This is the perfect kind of project to use up all those little leftover transfer pieces you’ve been saving for “just the right thing.” 🥰


STEP THREE: DISTRESS AND SEAL YOUR PROJECT
To give it that vintage sophisticated finish, we added a touch of dark wax around the edges, just enough to add a little depth. We ran our ink pad, loaded with Stone Grey ink, along the edges to create a perfectly worn, stained look. Lastly, seal it all with a couple of light coats of water-based sealer.
This is such a great way to test new techniques with IOD Paint Inlays or Stamps, and to use up leftover bits you’ve been saving from past projects. Don’t let those scraps go to waste, use them for something sweet like this!
We hope this inspires you to see your craft stash (and your bookshelf!) in a whole new way. Happy making, friends! ❤️


If you're just kicking off your creative journey, have no fear — our Product 101 pages are packed with straightforward techniques to set you up for success. We're thrilled to accompany you as you explore and create. For more how-tos and creative inspo, make sure to browse through the rest of our blog.
Once you've crafted your final piece, share it with our Facebook Creative Tribe! This community is not just a showcase but also a supportive hub for when you hit those creative roadblocks. And remember, your local stockist is always ready to assist with IOD supplies and expert advice. We're excited to see what you'll bring to life!
popular


