Molded Chocolate & Shaped Butter - Does Life Get Any Better?
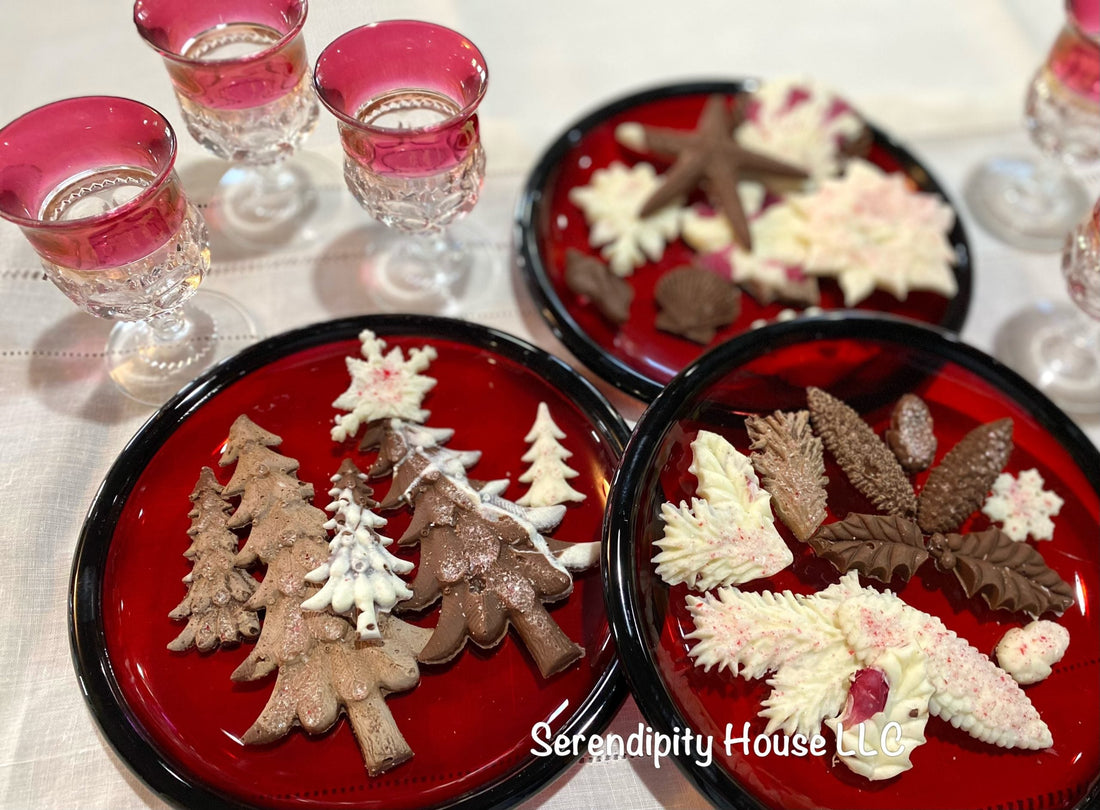
OMGoodness!!! Just in time for your holiday table, IOD stockist Michelle from Serendipity House in Southern NH, is in her kitchen making our mouths water with her molded chocolate and pretty pats of herbed butter.
Whether you have dinner guests or not, we love how you can beautifully bookend your meal – start with mini butter sculptures and end with peppermint chocolate Christmas trees. This is also a fun way to get your kids or grandkids in the kitchen, making with you.
No time now? Pin this deliciousness for later.

Whether you use them as silicone chocolate moulds or butter molds, IOD moulds are perfect for culinary experimentation!
For the molded chocolate, Michelle tried crushed peppermint candy canes, swirled dark and white chocolate melts, and talked about peanut butter cups. To add a little elegance, she placed slivered almonds on the backs of the Christmas chocolate moulds.
With the DIY butter sculptures, she tried edible flowers in the He Loves Me Mould, basil and suggested roasting the garlic before mixing it into the butter.
Check out the video tutorial here or keep scrolling for a supply list and step-by-step instructions.
Here’s everything you need to make Molded Chocolate with IOD
All IOD products can be purchased from an approved stockist. To find a shop local to you, click here. To find an online store, click here.
- Silcone chocolate moulds by IOD – Michelle used Boughs of Holly, but you can pick whichever you like
- Melting chocolate for molds
- Microwave-safe bowl
- Spoon
- Leveling tool, like a straight edged spatula
- Slivered almonds (optional)
- Crushed candy canes (optional)
- Diced walnuts, caramel syrup, peanut butter chips or whatever tickles your fancy when it comes to chocolate candy mold embellishments
Step 1: Warm the melting chocolate.
In a microwave-safe bowl, melt the chocolate by microwaving it for 30 seconds, then mixing. Repeat this until the chocolate has no lumps and is smooth a consistency.
Step 2: Sprinkle a bit of crushed candy canes in the silicone chocolate mold.
You can do this while your melting chocolate is warming.
Michelle made chocolate Christmas candy in tree shapes using the Boughs of Holly Mould. By sprinkling the crushed candy cane in before pouring in the chocolate, she created a snow-kissed tree look.
Note: Because IOD moulds are made of high-quality, food-grade silicone, there’s no need to coat them with anything before using with food. (Although we do recommend having a dedicated set for use with food that’s separate from your craft mold set.)
Step 3: Pour the melted chocolate into the moulds and level.
You can use a toothpick to draw out the chocolate and move it into all the mould details.

Scrape off the excess chocolate and level it with a spatula using the raised micro-rim on the IOD mould as your guide.

For extra elegance and to enhance the taste, sprinkle some more crushed candy cane on the back of the chocolate candy.
Step 4: Place the filled chocolate mold in the freezer until the shapes are hardened.
This was pretty quick — about 10 minutes.
Step 5: Gently push up or tap the chocolate from bottom of the mold to release it.
Carefully lift out your molded chocolates and try hard not to eat them before your holiday meal!

You can even use IOD moulds as chocolate lollipop molds

Here’s everything you need to make Herbed Butter shapes
- Silcone butter moulds by IOD – Michelle used Snowflakes and Sea Shells, but you can pick whichever you like
- Butter
- Mixing bowl
- Spatula
- Favorite herbs – Michelle chose rosemary and garlic; She used fresh but mentioned you can use fresh or dried
- Knife and cutting board if using fresh herbs
In advance of starting this, set the butter out on the counter for a bit so it has time to soften. You can use any kind of butter you like.
Step 1: Finely chop the herbs if using fresh.

You want to make sure you chop them quite small, otherwise the larger chunks will distort the shape of the mould. There are so many yummy combinations of herbs that you can use for this – roasted garlic and basil, rosemary and fresh garlic… whatever inspires you!
Step 2: Mix the herbs into the butter.
Put the softened butter in the mixing bowl and stir to fully combine and evenly distribute the herbs.
Step 3: Fill the butter molds.
Using a spatula, load the butter in the silicone moulds. Make sure to push it into the design details. Then use the spatula to level off the back of the butter.

Step 4: Put the filled silicone molds into the freezer to harden.
This takes a bit longer than the chocolate but less than 30 minutes.
Step 5: Gently tap the bottom of the mould to release the shaped butter.

If not serving immediately, store the butter in an air tight container. Consider layering wax paper in between the butter pats to help them retain their shapes.


