Re Purposed French Armoire Stamped in TOILE!
So, on the quest for doors for my pantry, I found nothing at home depot or lowes that was remotely close to what I wanted. Not even simple solid wood raised panel doors that would fit. I was conundrumming bad and didnt want to settle for lame doors, especially since this pantry is right in my dining room. Flash! Idea alert! I happened to get an email from the want-ad mailer, someone was selling an old dated armoire. According to the measurements, these would work. I emailed her, countered the asking price, and sealed the deal.
After convincing a skeptical hubby (These days it doesn’t take long to convince him to go along with my crazy ideas, even when he is doing most of the work ;), we took that gorgeous beast apart and started to work.
After measuring the doors, we made a plan to position them high so that the entire opening was covered at the top, and create a drawer at the bottom. We measured and used regular 2×4 lumber to create the sides pieces to hang the doors on, and used a piece of the armoire frame, cut about two inches in width, to trim the top, purely for aesthetics. We ended up with a gap at the corners, which we couldve avoided had we cut the lumber longer, but we went with it and bought a couple of rosette pieces at home depot that fit the bill.
Hubby mounted the doors, he even inset the hinges to eliminate gaps (a regular Chip Gaines he is!).
Next he built a drawer front for the bottom, using a side panel from the armoire. He had to cut it down and biscuit joint it together but it came out just fine, in my biased opinion 🙂


I gave the lumber a quick sand, and gouged a couple of spots just for some added irregularity and quirkiness, then set to painting with some annie sloan paris gray chalk paint.

After the first coat dried, I used regular ol’ paraffin wax all over it, rubbing good and hard in some areas where I wanted to maximize the chipping effect.
Then I ran out of paint, and had to run out and find some. I found some maison blanche and was back in business. I used franciscan gray and coated it thoroughly.
After it dried, I scraped it off.


I found the contrast just a little much, and the chippy look a little too strong, and also felt the color too cool. SO- I made a very watery wash with raw umber artists acrylic, and water. I brushed that on liberally and gently wiped off and rubbed in. It was just what was needed, it warmed it up, toned it down and softly aged it.


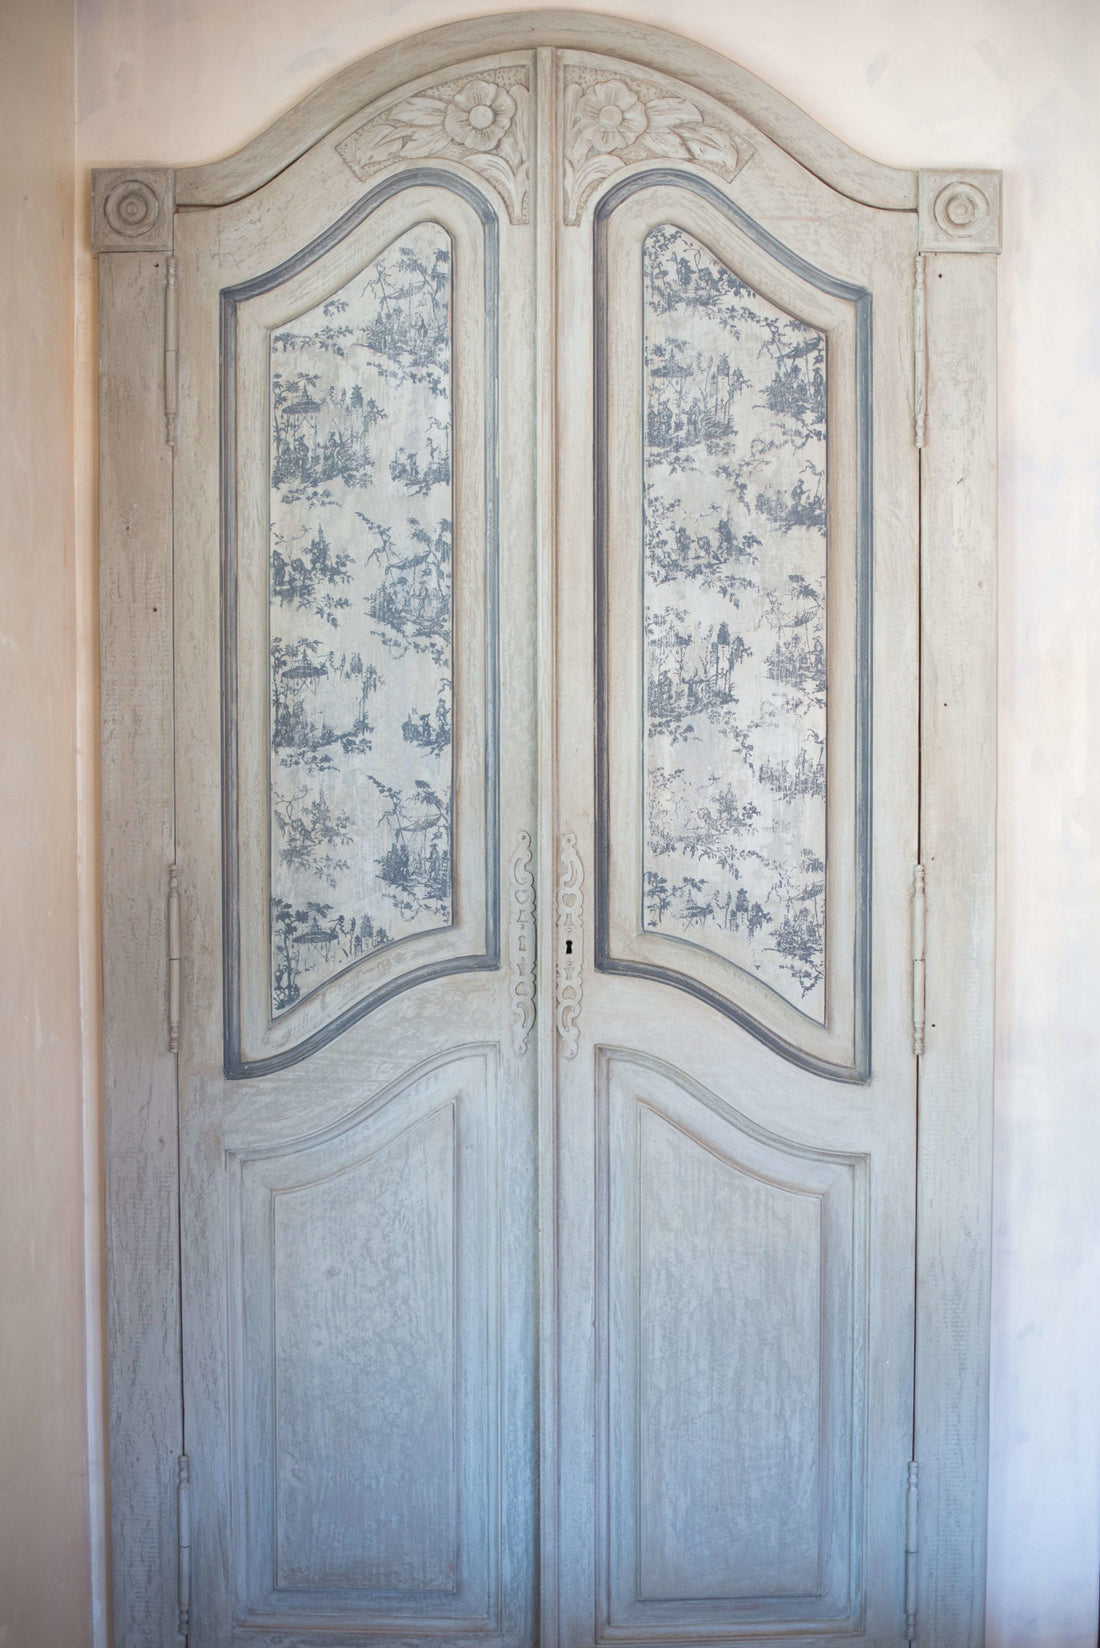
It was then time to bring out one of my favorites from our Iron Orchid Designs Decor Stamps, ” Chinoiserie” a beautiful Asian Toile that I knew would give it just the touch of sophistication it needed! I layed out my pattern nice and close together to emulate a traditional toile. Mounted my stamp to the IOD Decor 10×12 Stamp Block and then rolled a thin coat of Annie Sloan Graphite Chalk Paint onto the mounted stamp. Then simply apply the stamp to your surface, if you choose to ( I did) once dry you can lightly sand the stamped design to soften and age. then finish with a sealer of your choice such as Annie Sloan clear wax! ( for more on our Decor Stamps check out our collection of videos with different stamp projects here: IOD DECOR STAMP VIDEOS )

Here is the armoire all finished!

To find the IOD products in this tutorial simply click on our store locator HERE or order online HERE .
Ok lovelies… go #stampallthethings !!! To see all the other “Maker’s Candy” that we ( the IOD sisters) create for your making pleasure look HERE and for more inspiration check our our INSTAGRAM account HERE . and MOST important of all, COME GET CONNECTED with us and others who LOVE TO MAKE BEAUTY in their lives here in our IRON ORCHID DESIGNS CREATIVE TRIBE on Facebook!
Voila! Happy Making LOVELIES!
 ×
×
popular
- How to Apply IOD Athenaeum Gilded Transfer to Colored Glass Bottles
- From Ugly Duckling to Gorgeous | Black Dresser Makeover with IOD Marché des Fleurs
- 5 Creative Ways to Use One Decorative Stamp
- Turn Thrifted Finds into Charming Garden-Inspired Decor with a DIY Jadeite Finish
- Little Lark Paint Inlay Projects: Vintage Teapot & Canvas Wall Art with IOD