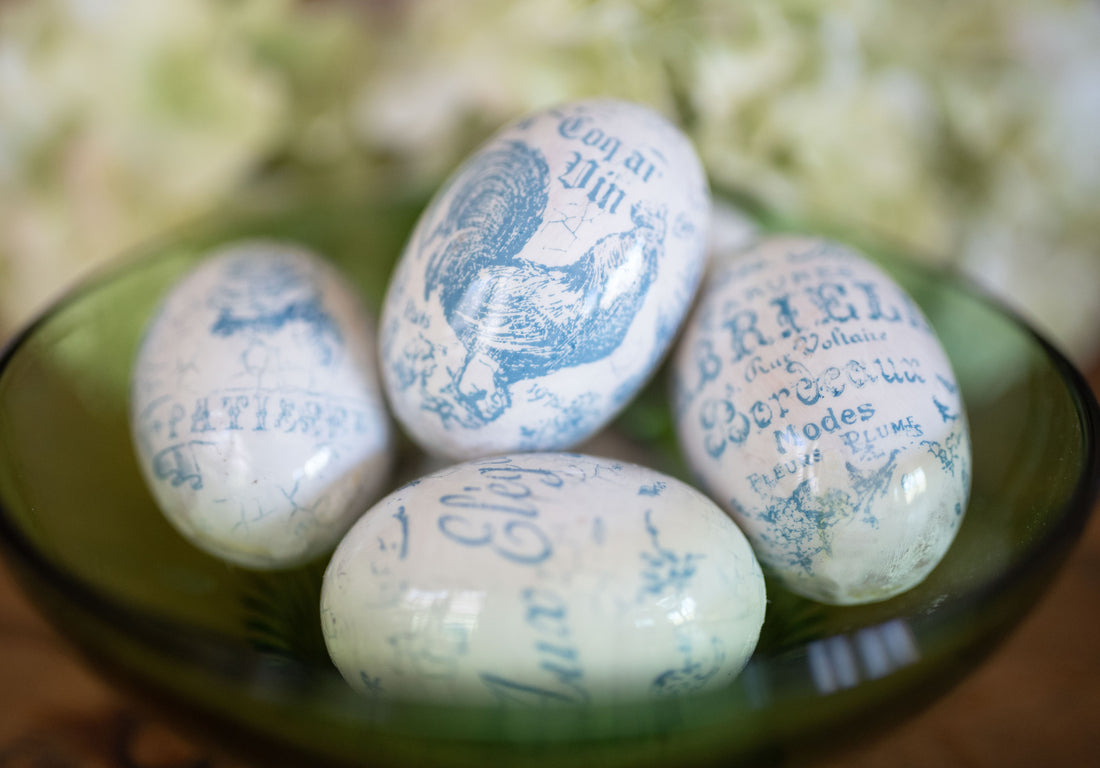
Spring Decor DIY: Blue Willow Porcelain Easter Eggs

Here is an easy Spring DIY for you! We love the final look of these Blue Willow Porcelain Easter Eggs in a bowl for display on a countertop or entry hall table, and they really take no time at all to make.
Olivia will start by showing you how to paint the wooden eggs with off-white chalk paint. Once the eggs are dry, we'll use our IOD ink in the shade of China Blue, along with our IOD Antiquities stamps. We'll show you a tip for getting a good stamp impression on your rounded surface (remember this technique for future projects!) and how to add delicious texture using our Vintage Texture Stamps.
We had Josie’s husband Aaron build us this wonderful board and nail contraption to dry our eggs after painting, and once we applied the resin, but hey, we know not everyone has an Aaron handy, but don’t sweat; there is a less labor-intensive solution that anyone can do! Combine toothpicks and styrofoam, and you’ll have yourself a nifty egg-drying rack. See the full concept on this blog by Wisdom of the Moon.

Finishing with Resin: We really loved the finished look of the 48-hour cure resin because it really creates a pro look, especially since we were going for a porcelain finish in this project. BUT, if resin intimidates you, seal these with something else you’re comfortable with. Your stockist can recommend a product for this if you don’t already have a go-to sealer.
If you get a build-up of resin at your dry spots, just hit those with some sanding paper to dial those back, and you’ll be good to go. Let us see your finals in the Facebook Creative Tribe!
Grab your IOD products and supplies by using the store locator and finding a stockist near you.
IOD Products Needed:
- China Blue IOD Ink
- IOD Stamp Pad
- Antiquities Stamp
- Vintage Textures Stamp
Other Supplies:
- Old White Paint In Your Brand of Choice
- Unfinished Wooden Eggs
- Clear Casting Resin
- Wooden board with nails poking through to support eggs while resin is drying (or toothpicks and styrofoam)

If you're just kicking off your creative journey, have no fear — our Product 101 pages are packed with straightforward techniques to set you up for success. We're thrilled to accompany you as you explore and create. For more how-tos and creative inspo, make sure to browse through the rest of our blog.
Once you've crafted your final piece, share it with our Facebook Creative Tribe! This community is not just a showcase but also a supportive hub for when you hit those creative roadblocks. And remember, your local stockist is always ready to assist with IOD supplies and expert advice. We're excited to see what you'll bring to life!
 ×
×
popular
- Thrifted Stool + Lamp Makeover with the IOD Fern Fables Transfer
- How to Apply IOD Athenaeum Gilded Transfer to Colored Glass Bottles
- From Ugly Duckling to Gorgeous | Black Dresser Makeover with IOD Marché des Fleurs
- 5 Creative Ways to Use One Decorative Stamp
- Turn Thrifted Finds into Charming Garden-Inspired Decor with a DIY Jadeite Finish