

Thrift Flip: Vintage English Stationery Holder with Paint Inlays

Nothing makes our hearts sing quite like filling our home with charming florals to welcome the summer season! 🥰 Today’s tutorial is just that, a darling stationery holder thrift flip, dressed up with the sweet, traditional block print patterns from our Ditsy Bloom Paint Inlay.
Ditsy Bloom is brimming with petite florals and vintage English motifs that play beautifully together, whether you're going for French farmhouse, classic cottagecore, or a traditional aesthetic. This one is very Jane Austen with its soft pastels, bold floral patterns, and dainty details. 🩷
This is a great project for those who are new to IOD Paint Inlays because most small decor aesthetics are very forgiving of little imperfections. In fact, we believe imperfections are what make a project feel handmade and perfect. We hope you enjoy this tutorial and can’t wait to see what you create! 🤩
IOD Products Needed:
Other Supplies:
- Thrifted Stationery Holder
- Misting Bottle
- Soft Pink Chalk-Type Paint
* We used a chalk-type paint in this tutorial, but there are many brands and types of paint. Talk to your stockist to learn which one is right for you!
Step-by-Step Guide
STEP ONE: CLEAN & PAINT YOUR STATIONERY HOLDER
We kicked things off by giving our stationery holder a quick wipe down to remove any dust or oils. Then we brushed on a soft, dusty rose chalk paint. This little piece had lots of nooks and crannies, so we used an artist brush to get into all the fiddly spots.
Once we had a solid base coat and everything was nice and dry, it was time to add our inlay!


STEP TWO: APPLY YOUR PAINT INLAY
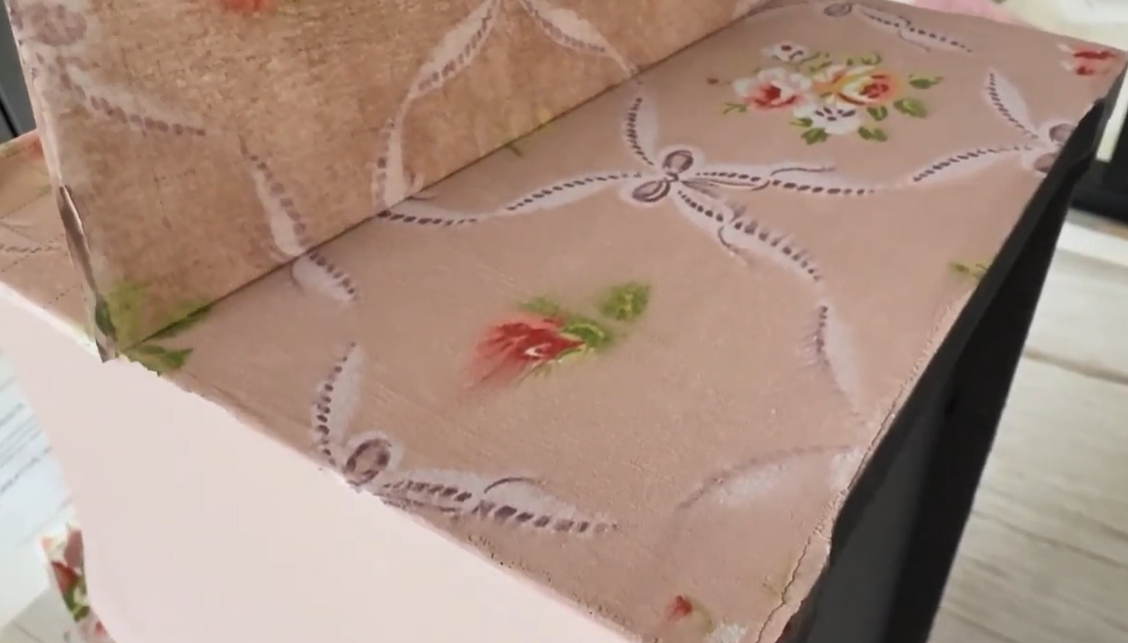
We chose the beautiful bowed lattice pattern for the sides and those sweet rose accents for the front and back.
Once you’ve cut your inlay pieces to size, set them aside and get your surface ready. Apply a generous, even coat of paint, then give your inlay piece a light misting. Hover it into place, then gently smooth it down with a brayer to avoid any wrinkling or air pockets. Repeat on all sides, working one section at a time.


STEP THREE: LET IT DRY
Let it dry. You’re looking for that soft, matte finish where the paint looks slightly faded and feels dry to the touch. If it still feels cool, that’s a sign it’s not ready yet.
STEP FOUR: REVEAL YOUR PAINT INLAY
Give it a light mist once it's fully dry and begin pulling up each piece. Too much water can cause smudging, so keep it light! If your image isn't adhering, add a bit more paint, let it dry, and try once more.
Once you’ve removed the paint inlay carrier sheet, apply a spray sealer, and voila!

If you're just kicking off your creative journey, have no fear — our Product 101 pages are packed with straightforward techniques to set you up for success. We're thrilled to accompany you as you explore and create. For more how-tos and creative inspo, make sure to browse through the rest of our blog.
Once you've crafted your final piece, share it with our Facebook Creative Tribe! This community is not just a showcase but also a supportive hub for when you hit those creative roadblocks. And remember, your local stockist is always ready to assist with IOD supplies and expert advice. We're excited to see what you'll bring to life!
 ×
×
popular
- Thrifted Stool + Lamp Makeover with the IOD Fern Fables Transfer
- How to Apply IOD Athenaeum Gilded Transfer to Colored Glass Bottles
- From Ugly Duckling to Gorgeous | Black Dresser Makeover with IOD Marché des Fleurs
- 5 Creative Ways to Use One Decorative Stamp
- Turn Thrifted Finds into Charming Garden-Inspired Decor with a DIY Jadeite Finish
Framed in Beauty | How to Create Vintage-I...
Pin this article to save for later If you've ever walked past an antique shop window, spotted a gorgeous gilded frame, and thought, 'I could make that, ' this project is about to prove you...
HOW TO MAKEOVER A VINTAGE STORAGE CADDY WI...
Pin this article to save for later If you're anything like us, you can't resist giving a beautiful vintage find a second life. In this project, our talented IOD Artisan Jonathon Marc Mendes transforms a...