How to use Vintage Moulds to DIY a French Cottage Chalkboard

Good Morning Lovelies! I’m sitting here listening to pandora piano worship hymns and basking in the first sunshine we’ve had in days. Speaking of days, it’s been that since we’ve posted any tutorials, so I thought this morning was a good time to share some inspiration with our beautiful tribe.
We’ve had so much response from our Instagram post featuring the french cottage chalkboard Josie made for my birthday (well, more accurately the one she gave me for my birthday after I convinced her it was only right, tee hee!) that I thought I’d share how she made it, so you can have your very own made by YOU!
Update October 2020: The products used in this tutorial are First Generation IOD, which means they’ve been discontinued. You can join our IOD First Gen Pop Up group on Facebook to try to purchase. Or, you can make something very similar using current products. Reach out to an approved IOD stockist and they will be able to suggest current moulds to make this project.
Click here to use our store locator to find a brick and mortar store near you or you can click here to find an online shop.
Supplies used:
- IOD moulds
- IOD Air Dry Clay
- Any household paintbrush
- Your favorite chalk or mineral-based paint in antique white
- Wax sealer of your choice,
- Charcoal Gray acrylic paint mixed with water in a 1 to 4 ratio ( you only need a little bit, tablespoon paint to 1/4cup water or there abouts)
- 1/4 inch thick MDF board from Home Depot cut to preferred size ( ours is 24×36″ and consider buying more than one board, as the other supplies will allow you to make some as gifts, etc.! )
- Rust-Oleum 206540 Chalkboard Brush-On, Black, 30-Ounce
- Titebond Quick & Thick Glue
First Josie looked through her moulds and decided upon her arrangement. Now, in the supplies list we’ve showed you what she used, but you may want to play around and see if there’s something you prefer. Go ahead and create all your moulds and set aside.
She then created her border using the clay and IOD Moulds. Please note a few key facts. The nature of air dry clay is to crack and warp as it dries. there are things you can do to minimize this. Such as:
1. Allowing to dry in the moulds will minimize warping. However, this take longer to dry, so keep that in mind
2. keeping in a cool dry place as it dries will minimize cracking
3. gluing while still moist is fine, and allows to flex to your project if it’s not flat, and also minimizes warping
However, bottom line? Don’t fuss. Go with it, enjoy it… by the time it’s done you’ll realize it’s part of the charm.

Next, while the moulds are drying Josie Painted the whole MDF Board in chalk board paint. Now, you don’t have to paint the whole thing, especially since the outer 3-4 inches is going to be painted a lighter color, that was just her process as she figured it out along the way 🙂
She then arranged the moulds on her board. Now, she did this while her moulds were still moist and glued them in place using the Gorilla Wood Glue. Josie even painted the outer edge while the moulds were still moist 🙂 Don’t be too careful about stuff. Just PLAY! Most of the time things can be remedied if there’s an issue, and more times than not it ends up being a happy accident and you discover wonderful new things!

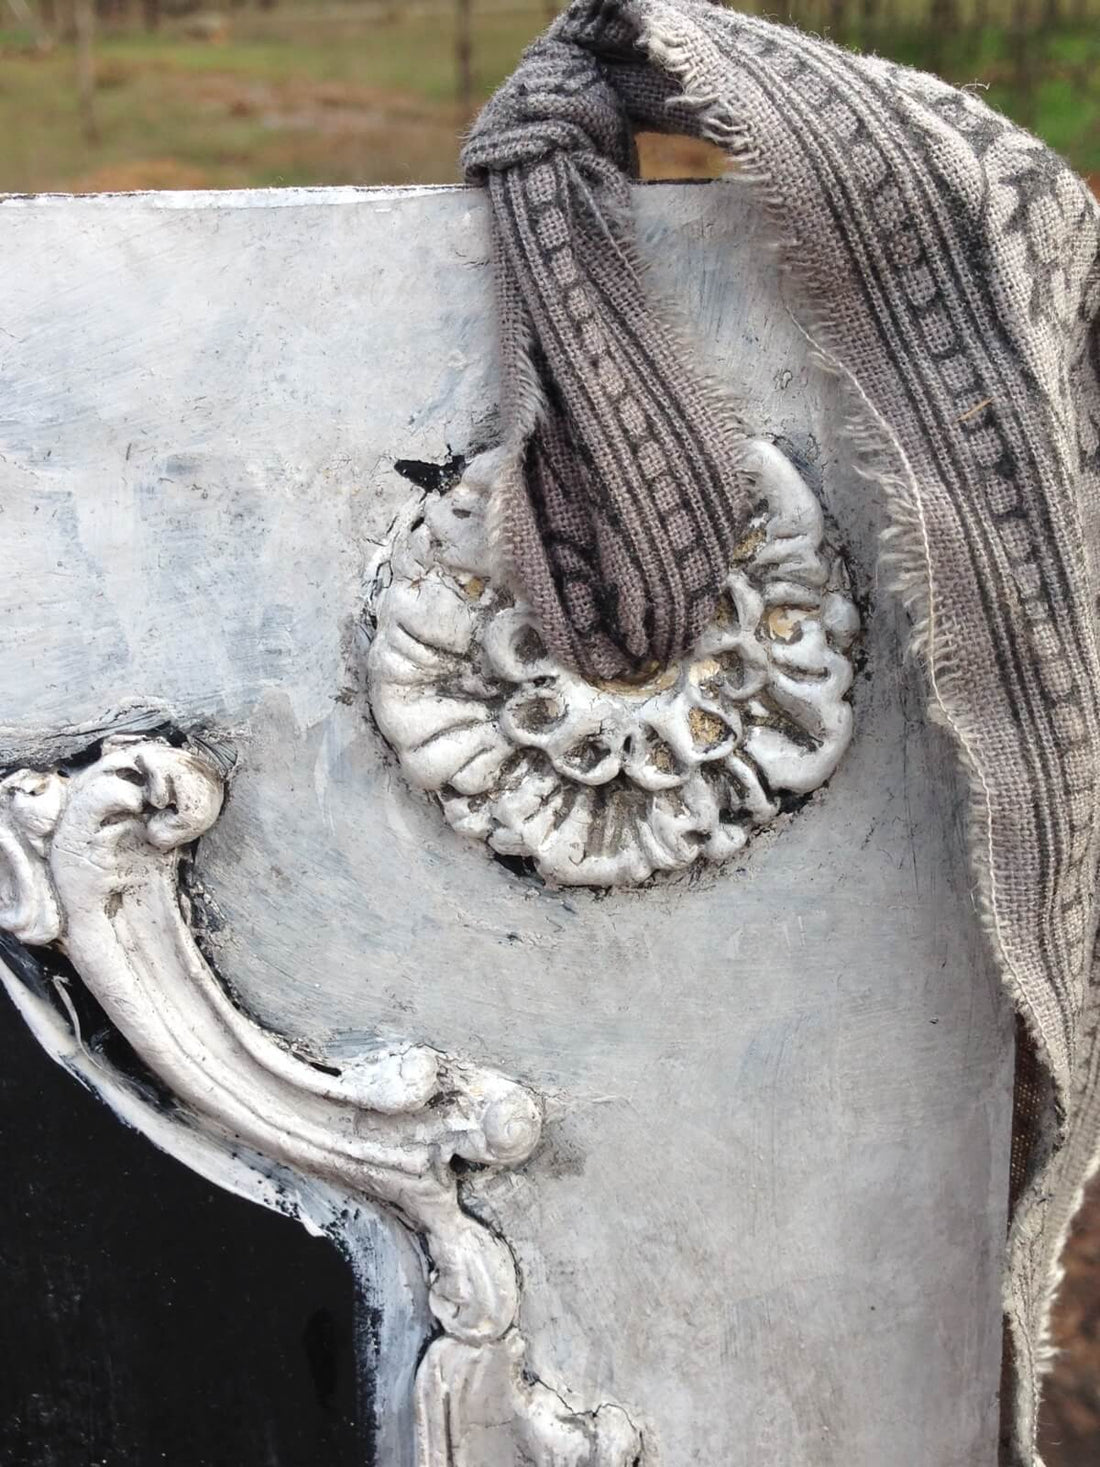
She used the medallions in the upper left and right corners where she planned on putting holes for her ribbon. If you plan to use a hanger on the back instead, you can skip this. She then used a straw ( remember her moulds were still moist) to create a hole in the medallion center.
Fourthly, she painted the outer edge of the board, including the moulds with the Maison Blanche Paint in Silver Mink. She only used one coat, but you can definitely use two if you prefer!

Hang in there, you’re close! Can you see it starting to take shape?? Oh yeah, baby! Ok, now that the outer edge is dry, the fun begins…. grab your glaze and and a brush that good stuff on, generously like you’re in 7th grade and using foundation for the first time. Yah, don’t act like you’re confused by that. Just gush it on already. Have fun and get heavy handed with it for a more dramatic look if you’d like. This is what Jos did. If you’re style is more conservative, we won’t fault you! It’s YOUR board, so make it suit you.

Once the glaze is dry, and the moulds are dry Now brush on your wax and wipe off according to wax directions (every wax is different so refer to your container) …
drill holes through the medallions and the MDF board… String your ribbon through and Voila! You’re done!

Isn’t it just beautiful?? And bonus, it’s functional too! I hope you enjoy your new french flea market chalk board as much as I enjoy mine!

 ×
×
popular
- Turn Thrifted Finds into Charming Garden-Inspired Decor with a DIY Jadeite Finish
- Little Lark Paint Inlay Projects: Vintage Teapot & Canvas Wall Art with IOD
- Furniture Makeover Inspiration: 4 Stunning Transformations with IOD's Summer Collection
- How to Decorate Thrifted Tins with IOD Marche Des Fleurs Transfers
- Framed in Beauty | How to Create Vintage-Inspired Floral Wall Art With IOD