DIY Beach House Decor: Watercolor Seashells for the Complete Beginner
Ready to get your paintbrush wet but not sure where to start? We’ve got a fabulous DIY beach house decor tutorial that will have you dreaming of lazy days collecting seashells.
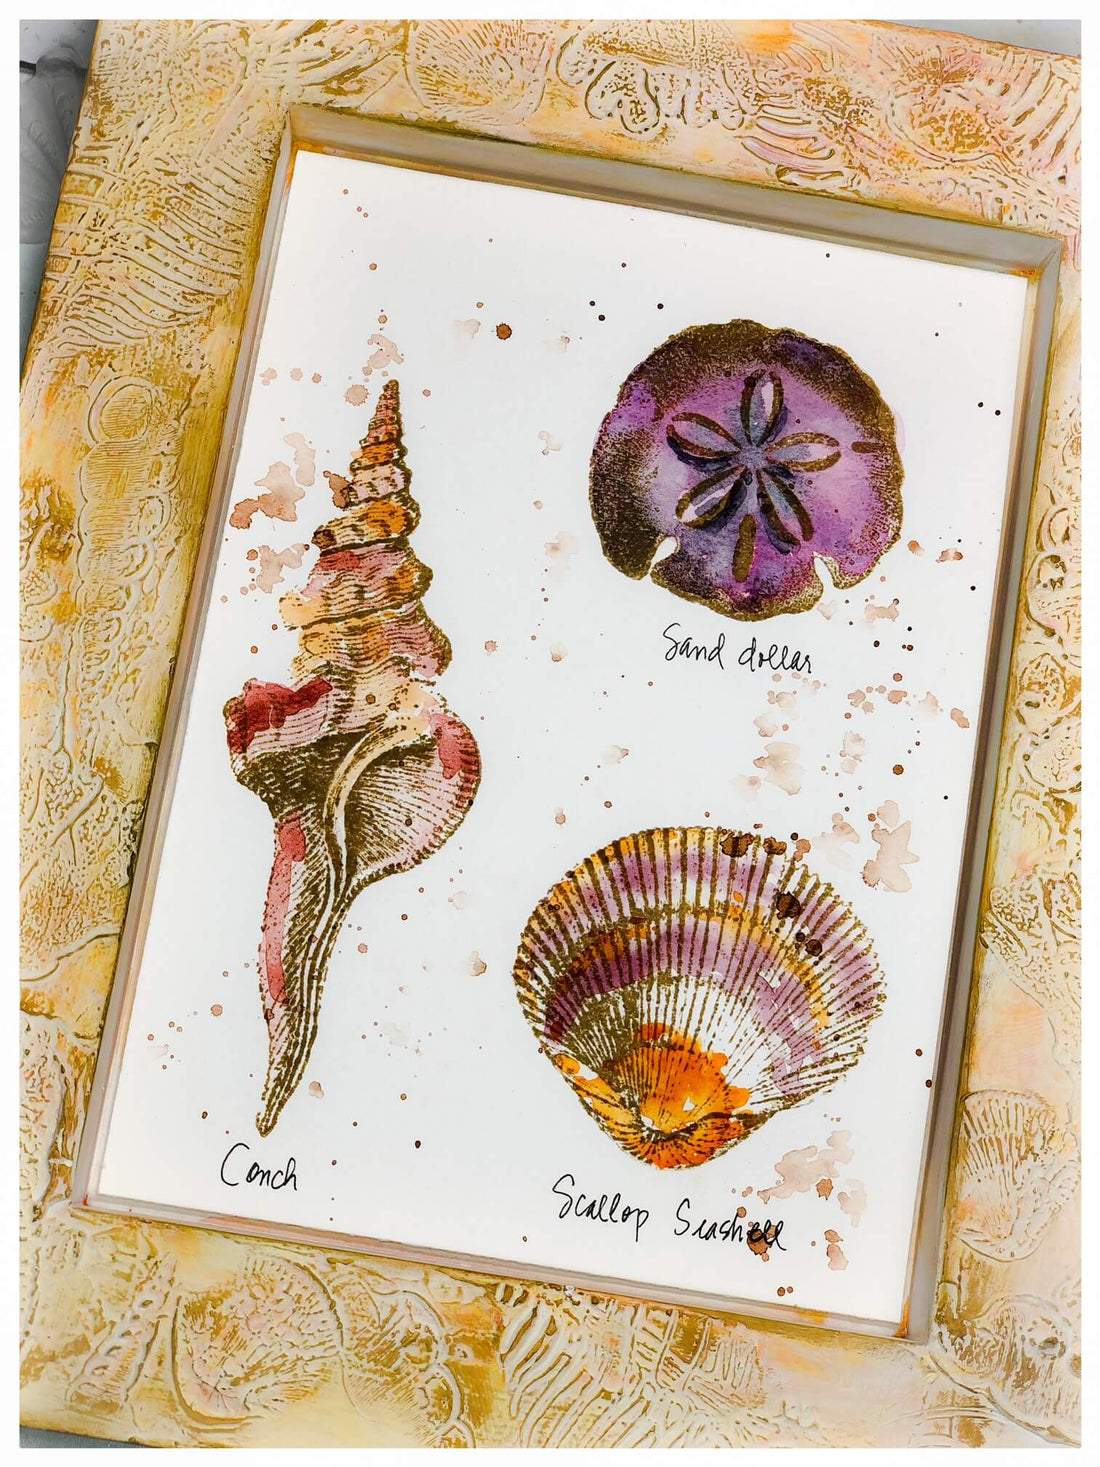
Learn from IOD Design Team member Lexi Grenzer how to make this seashell textured frame and watercolor print – no art skills or experience required!


No time now? Pin this project for later.
Let’s get started on this DIY Beach House Decor project!
For this DIY coastal wall decor you’ll be using the IOD Seashore Stamp. Here are all the beach-inspired designs you get with this clear stamp set.


All IOD products can be purchased from an approved stockist. To find a shop local to you, click here.
Watch the detailed video tutorial below or keep scrolling for a supply list and step-by-step instructions for this easy watercolor project.
Here’s everything you need for this DIY project:
(This post contains affiliate links.)
- Seashore Stamp by IOD
- 8″ by 10″ Wood Gallery Blank by IOD
- Thin mount by IOD
- Ink pad with permanant ink in brown or sepia
- Watercolor paints – Lexi used paints by Daniel Smith Quin in Deep Gold, Burnt Umber, Bordeaux, Yellow Ochre, English Red Earth, Rose of Ultramarine, and Moonglow
- Water cup & palette for paint
- Paintbrush round size 2
- Watercolor paper (coldpress) and scissor to cut it to size
- Craft heat tool or hairdryer
- Fountain pen
- Texture medium – Lexi used Venetian Plaster but any molding or texture paste any will do
- You favorite brand of chalk type paint in a creamy white
- Acrylic paint in a rusty brown color
- Craft sponge
- Palette knife
- Olive oil to prevent the stamp from sticking to the plaster
- Double sided mounting tape
DIY Beach House Decor Instructions
Step 1: Spread the texture medium on the frame with a pallet knife.
You are going for a textured look, so don’t worry if it’s not all perfectly flat. Not too thick or too thin. Apply just enough for the stamp image to take in the texture medium.

Step 2: Press the sea shell stamps into the wet texture medium.
Lexi used the gridded IOD Thin Mount to give her more control over stamp placement. Add just a little olive oil to your fingertip and rub it over the stamp surface to keep it from sticking to the medium. Use a variety of stamps in a variety of positions around the frame.

Step 3: Stamp images on watercolor paper, heat set, and paint.
Cut a piece of watercolor paper to 5 ⅛” x 7 ⅛” to fit inside the IOD Gallery Blank.
Decide on your stamp arrangement. Then mount the stamps by sticking them to a thin mount. Ink your stamps by bringing the ink pad to the stamp. Stamp your images then heat set the ink.

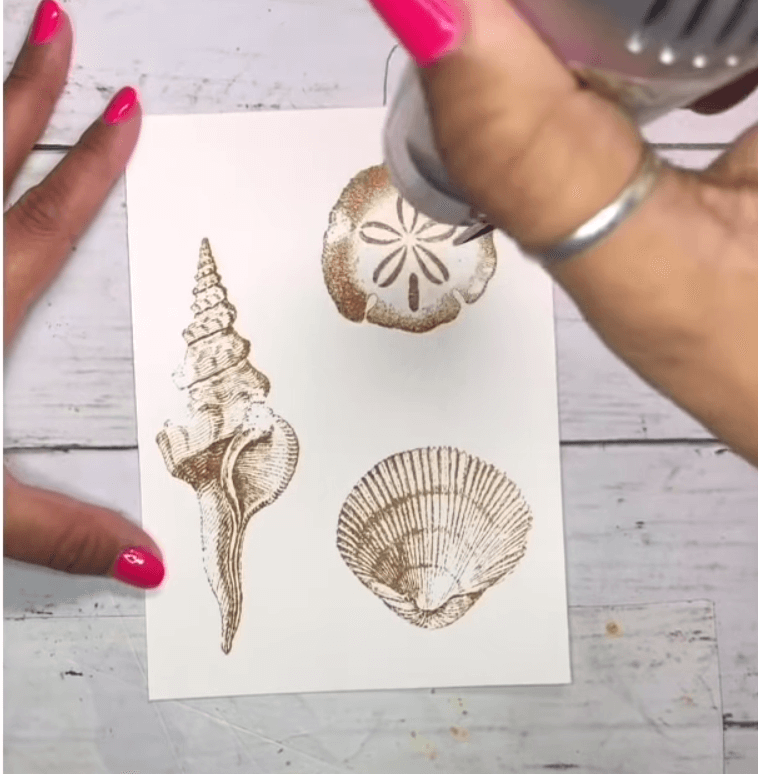

You should be at least a fist width (3”-4”) away from the paper when using the heat tool to avoid burning the watercolor paper. If the edges start to curl, flip the paper over, use the heat tool for a few seconds and the page will settle.
Lexi searched the web for images of the sea creatures that matched her stamps. The images helped her decide what watercolors to use to get a lifelike, vibrant image.
Step 4: Tap paint and water droplets on the watercolor paper, scumble, and heat set.
Load your brush with watery paint and flick it so that droplets fall on your paper. Scumble the droplets.


What is scumble? It’s mixing around the paint and water splatters slightly on the paper to make them appear a bit duller.
If your painted images look duller as they dry, you can go back and add some color, as Lexi did, to make them look 3D.
Lexi added the name of each sea creature under the image using a permanent fountain pen with platinum carbon ink. This type of pen is waterproof once it’s dry. Practice to get the hang of how the pen works.

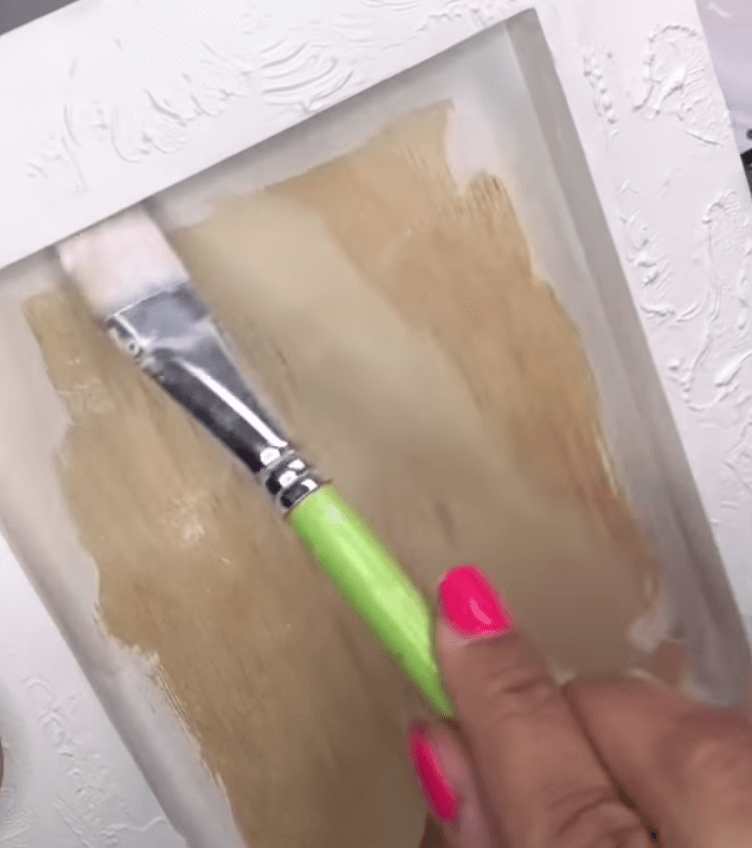
Step 5: Lightly whitewash the frame.
Watered-down chalk paint will highlight the stamped details. Lexi used white but experiment with color if that’s your jam! Get the inside and outside edges of the frame, covering areas that might peek through around the watercolor paper.
Use a damp cloth or wet wipe to wipe down any areas you want the wood grain to show through. Hold the outside of the frame, not on the plaster, just in case it is still a little wet. You don’t want to smudge up any of that beautiful stamped, impressed detail!


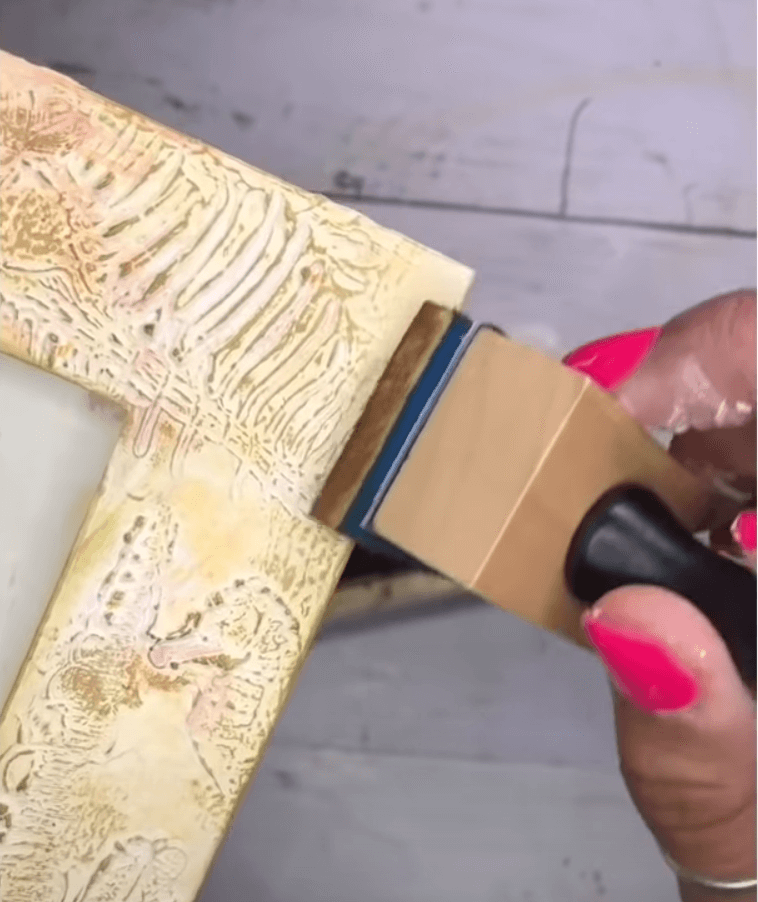
Step 6: Antique the frame to make the stamped impressions pop.
Once the whitewash is completely dry, antique with a rusty brown color. Lexi used a dime-sized amount of highly concentrated acrylic paint mixed with water. Work in sections, paint on, and wipe back until you get the effect you like.
Add some watered-down cream color chalk paint to small sections. Use your finger to rub the paint in and around. The idea is to just have a peekaboo of the antiqued color.
Next, add a soft touch of ink to your finger and then go over the raised textured parts of the frame. Then, use a craft sponge to pick up some ink from the pad and rub it on the corner of the frame to give it a darker edge and an antiqued finish to the frame itself.


Step 7: Mount your watercolor seashell print inside the frame.
Stick some double-sided foam tape on the back of your watercolor paper and then press it into the inside of the frame.

Well, what do you think of this beginner watercolor idea?
Here’s another watercolor project with IOD Stamps by Lexi that you might love.

Lexi is the imaginative artist behind our limited edition Woodland Christmas transfer design. She also created this adorable spring-themed DIY dry erase board AND an upcycled milk jug place setting tutorial.
Learn more about Lexi by checking out her website (she offers art and DIY classes!) and follow her on Instagram.
 ×
×
popular
- Turn Thrifted Finds into Charming Garden-Inspired Decor with a DIY Jadeite Finish
- Little Lark Paint Inlay Projects: Vintage Teapot & Canvas Wall Art with IOD
- Furniture Makeover Inspiration: 4 Stunning Transformations with IOD's Summer Collection
- How to Decorate Thrifted Tins with IOD Marche Des Fleurs Transfers
- Framed in Beauty | How to Create Vintage-Inspired Floral Wall Art With IOD