How to Use IOD Letter Stamps for DIY Signs
We love filling our walls with quotes and one of the easiest ways to do that is with the new IOD letter stamps for DIY signs. Chalkboard signs, wooden signs, welcome signs, and lettering on windows are all easy ways to remind us of our values or bring a little humor to our home decor.

Lettering on signs can be a little daunting for beginners. But stamps make it easy – especially if you take a little time to practice on a chalkboard. (That’s Sally’s favorite way to do it because shifts, smudges, and “oopsies” are easily fixed. Just wipe away with a damp cloth and start over!)
In this tutorial, we’re gonna…
- Show you all the tips and tricks for how to use letter stamps on DIY signs
- Spill the beans on the easiest way to get whimsical, cursive lettering
- Dish all the juicy details on how to customize block letters to suit your style
- Teach you how to use the gridlines on our acrylic thin mount (because who doesn’t want centered, straight, and evenly spaced letters?)
Watch the video below or keep on scrolling for a complete supply list and step-by-step instructions.
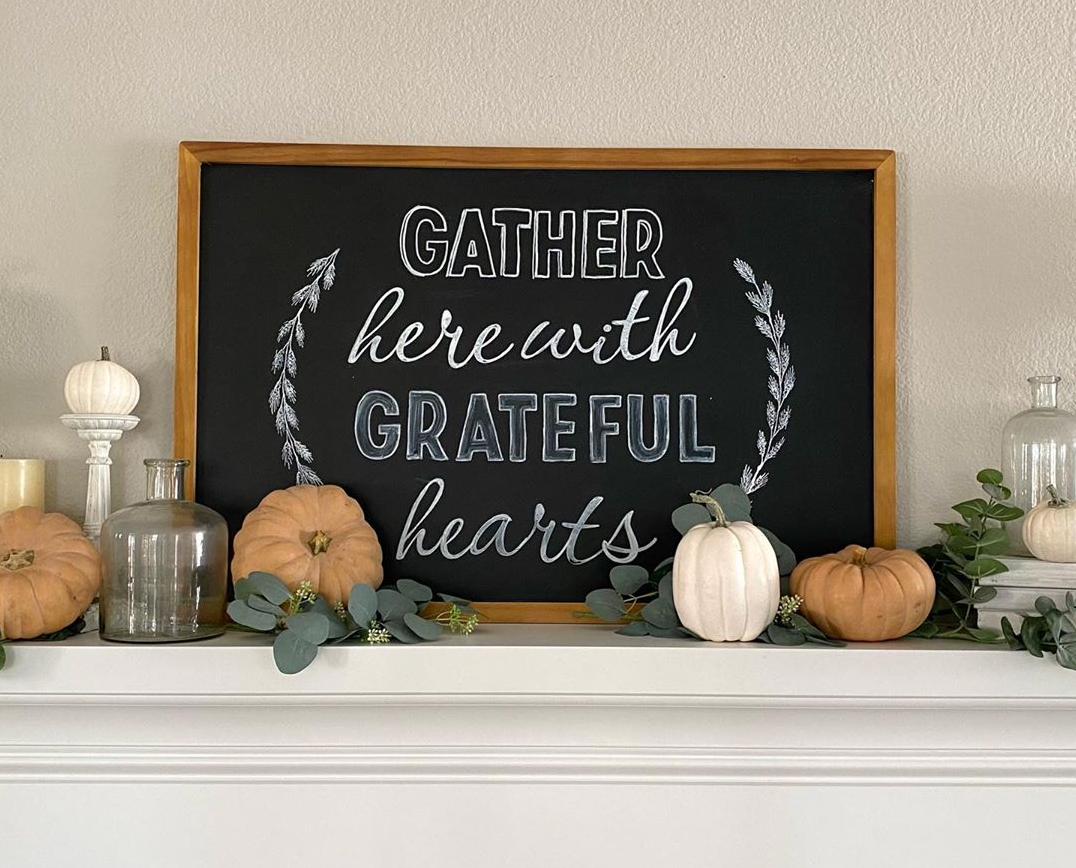
Sally wanted to hang this chalkboard over her fireplace mantle to complement her Fall decor. So, we chose to write “Gather here with grateful hearts.” Nothing’s more important than a little gratitude this Autumn, right? 💕
No time now? Pin this project for later.
Here’s everything you need to DIY a large chalkboard sign (and practice using letter stamps for DIY signs while you’re at it!)
All IOD products can be purchased from an approved stockist. To find a shop local to you, click here. To find an online store, click here.
(This post contains affiliate links.)
- 36” x 24” Chalkboard
- Erasable Liquid Chalk (ELC) in white by IOD
- Blank Ink Pad by IOD
- Swoosh Stamp by IOD
- Retro Stamp by IOD
- Wreath Builder Classic Stamp by IOD
- Thin mount with gridlines by IOD
Note: If this is your first time using IOD stamps, please check out this post before starting the project.
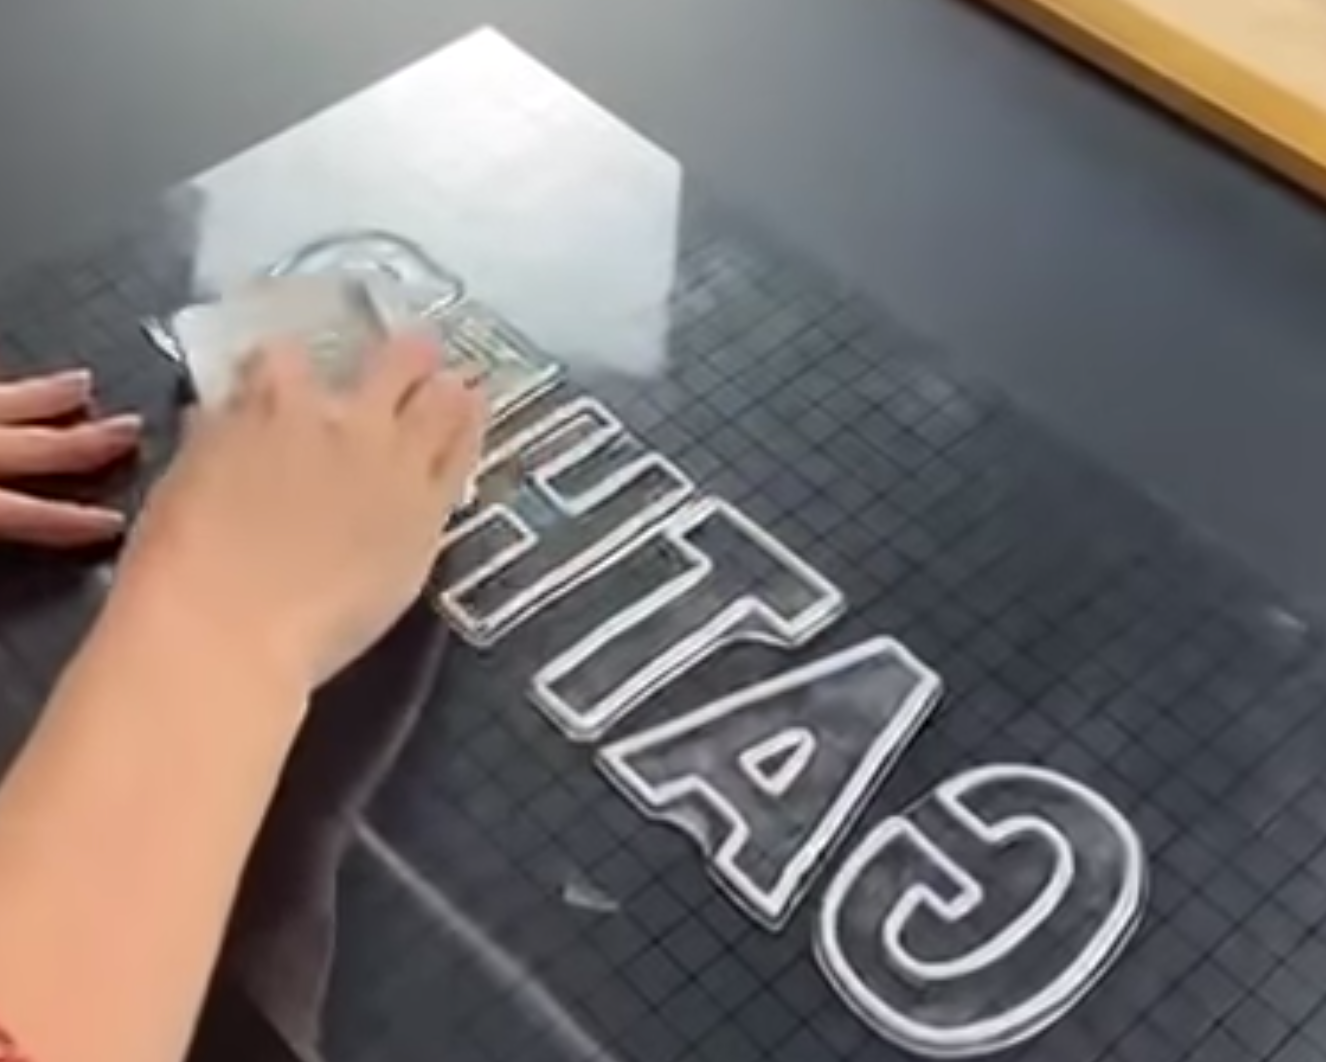
Step 1: Using the block letters from the Retro font set, stamp the word “Gather” at the top of the chalkboard.
Start by arranging the individual letters design side down where you want them on the chalkboard. Then lay the thin mount on top and press to stick the backs of the stamps to it.

Flip the thin mount over and set it on your work surface. You can make minor adjustments to the letter placement using the gridlines as your guide for straight, even letters.
Using an ink pad filled with IOD Erasable Liquid Chalk (ELC), pat the stamps to load them with ink.
Pick the thin mount up again and hover it over the chalkboard where you plan to stamp. Then commit by placing the stamps down on the chalkboard without shifting. Using one hand to stabilize the mount, run your fingers over each letter to ensure good contact with the chalkboard surface.

Lift the thin mount with the stamps straight up off the project surface.
Don’t worry if the ELC didn’t make a perfect impression within the letters. We’ll show you a little trick later how to fix that.
Step 2: For the second line, use the Swoosh letter set to stamp “here with”.
There’s so many ways to use the cursive lettering of this clear stamp set. Let whimsey and your sense of fun guide you!
For this step, we did it Sally’s way (aka “willy nilly” or “naked” as Josie likes to call it!). Officially it’s called “outlaw” style because you stamp one letter at a time using just your bare hands (no mounting surface).
One word of caution with this method. Since the stamp backs are designed to be sticky for mounting, it’s easy to accidentally shift when making an impression. To keep it from sticking to your fingers, roll your finger along the back of the stamp to get good contact.
Sally prefers to stamp “outlaw’ style because it gives her complete control over the overlap of each script letter. This creates a more natural, flowing, handwritten look.
Other tips for when stamping with the Swoosh font:
- Pay attention to the angle of your letter when using script letter stamps; they will visual flow better together if you keep the angle consistent
- Choose to start each letter a little higher or lower relative to the preceding letter – varying as Josie calls the “up and down” versus “tilty-tilty” where you vary the angle
- One risk with this “naked” stamping technique – it’s easier to have a misspelling (and even more so if you stamp right to left as Sally did for the word “with” to get the spacing right)
Step 3: Stamp the letters for “grateful” using the Retro typography set.
Repeat the steps in Step 1, but instead spelling “grateful.”
This is the step where you’ll truly fall in love with the gridlines on the thin mount. It’s essential for straight lettering and for centering and lining up your words relative to the frame and the rest of the quote design.

Step 4: Stamp the letters for “hearts” using the Swoosh typography set.
This time around, Josie shows you how to stamp with Swoosh using the thin mount (since she’s not a fan of “outlaw” stamping at all!).
With this technique, Josie stamps every other letter of the word. Then she goes back a second time to stamp the missing letters. (That sounds confusing but, we promise it isn’t.)
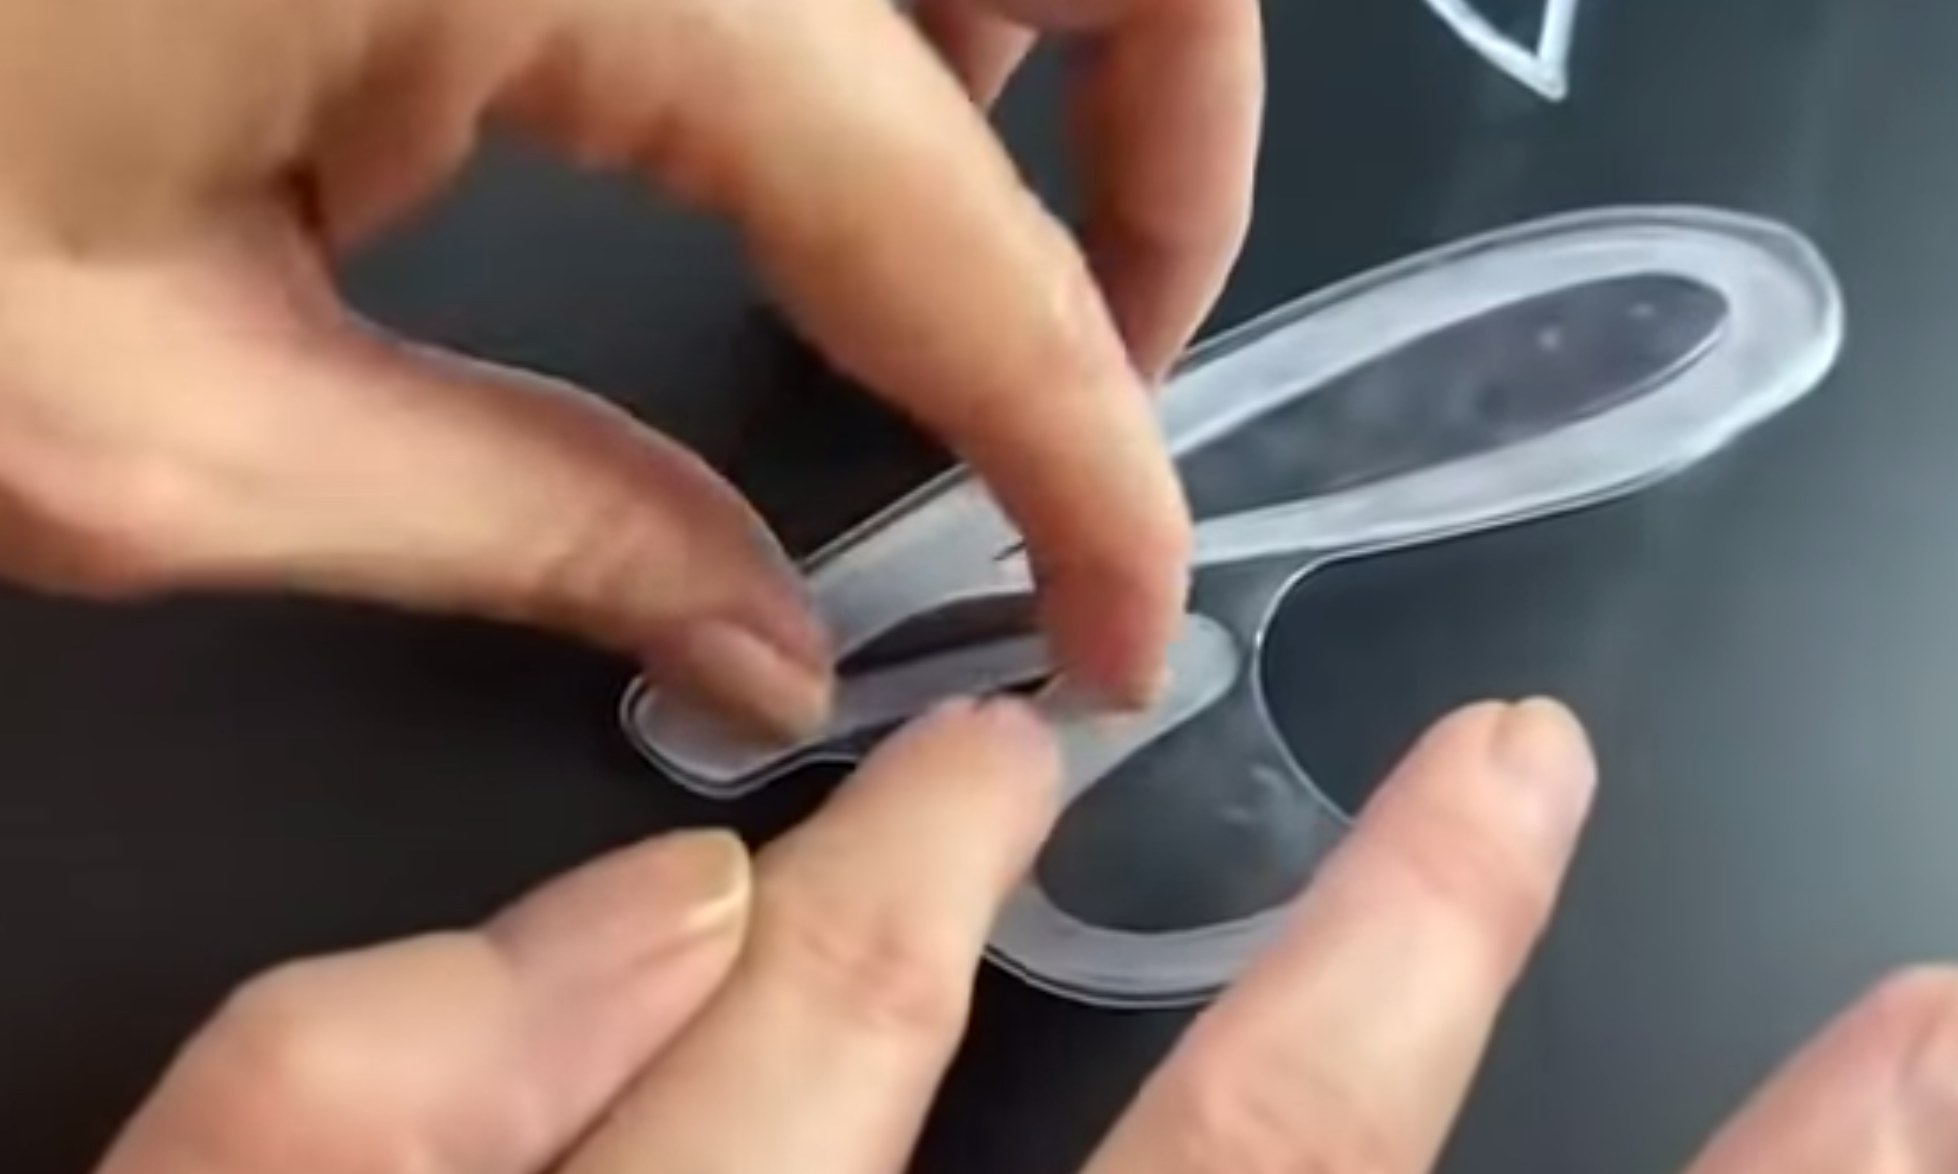
First, lay the letters for your word down, overlapping and connecting them how you want the final script to appear.
Make sure to start with your first letter resting directly on the project surface. Then, alternate the next letter so it rests on top of the first and third letters. (In Sally’s words, put ever other letter “on top-skis” 😆.) Layer them exactly how you want the cursive letters to overlap and connect.

Once you’re happy with how your lettering looks, carefully remove every other letter starting with the second letter. The clear stamps make it really easy to see what the impression will look like. Try not to disturb the positioning of the remaining letters.

Next, lay the thin mount on top of the arrangement and press to stick the stamps.
Flip the thin mount over and set it on your work surface. Load your letters with ink using the ink pad and stamp the chalkboard.

Lift straight up and allow the ink to fully dry.
Some quick notes for when you’re working with Erasable Liquid Chalk (ELC):
- Remember that it takes extra time to dry as compared to regular ink; be careful not to smudge while it’s still wet.
- It’s more opaque than other liquid chalks to give a clearer impression.
- Temperature and air movement will affect the drying time – use a fan in a warm room to accelerate drying.
After the first round of letters are dry, arrange the missing letters on the chalkboard to fill in the gaps.

Then lay the thin mount on top and press to stick the backs of the stamps to it. Load the letters with ink using the ink pad and stamp. In this case, take an extra moment when hovering before committing. You want to make sure your letters aligned and connecting with each other.
Step 5: Color in (or not) the block letters however you like.
The IOD Retro font is one of our favorites because you can customize it however you like. You can:
- Use it to get a clean, simple letter outline with negative space on the interior of the letter
- Color the letters in solid with the same color as the outline to make a classic block letter
- Color in the letters in with a contrasting color to give it a graphic look or make it pop
- Or you can do a shaded effect, as Josie shows, by using a wet brush to pull the outline color into the center of the letter

You can use the same wet brush to fill in any spots that didn’t get the fully stamped impression. You can either pull the surrounding liquid chalk into the spot with the brush or you can put a little ELC directly on the brush and fill in the spot.
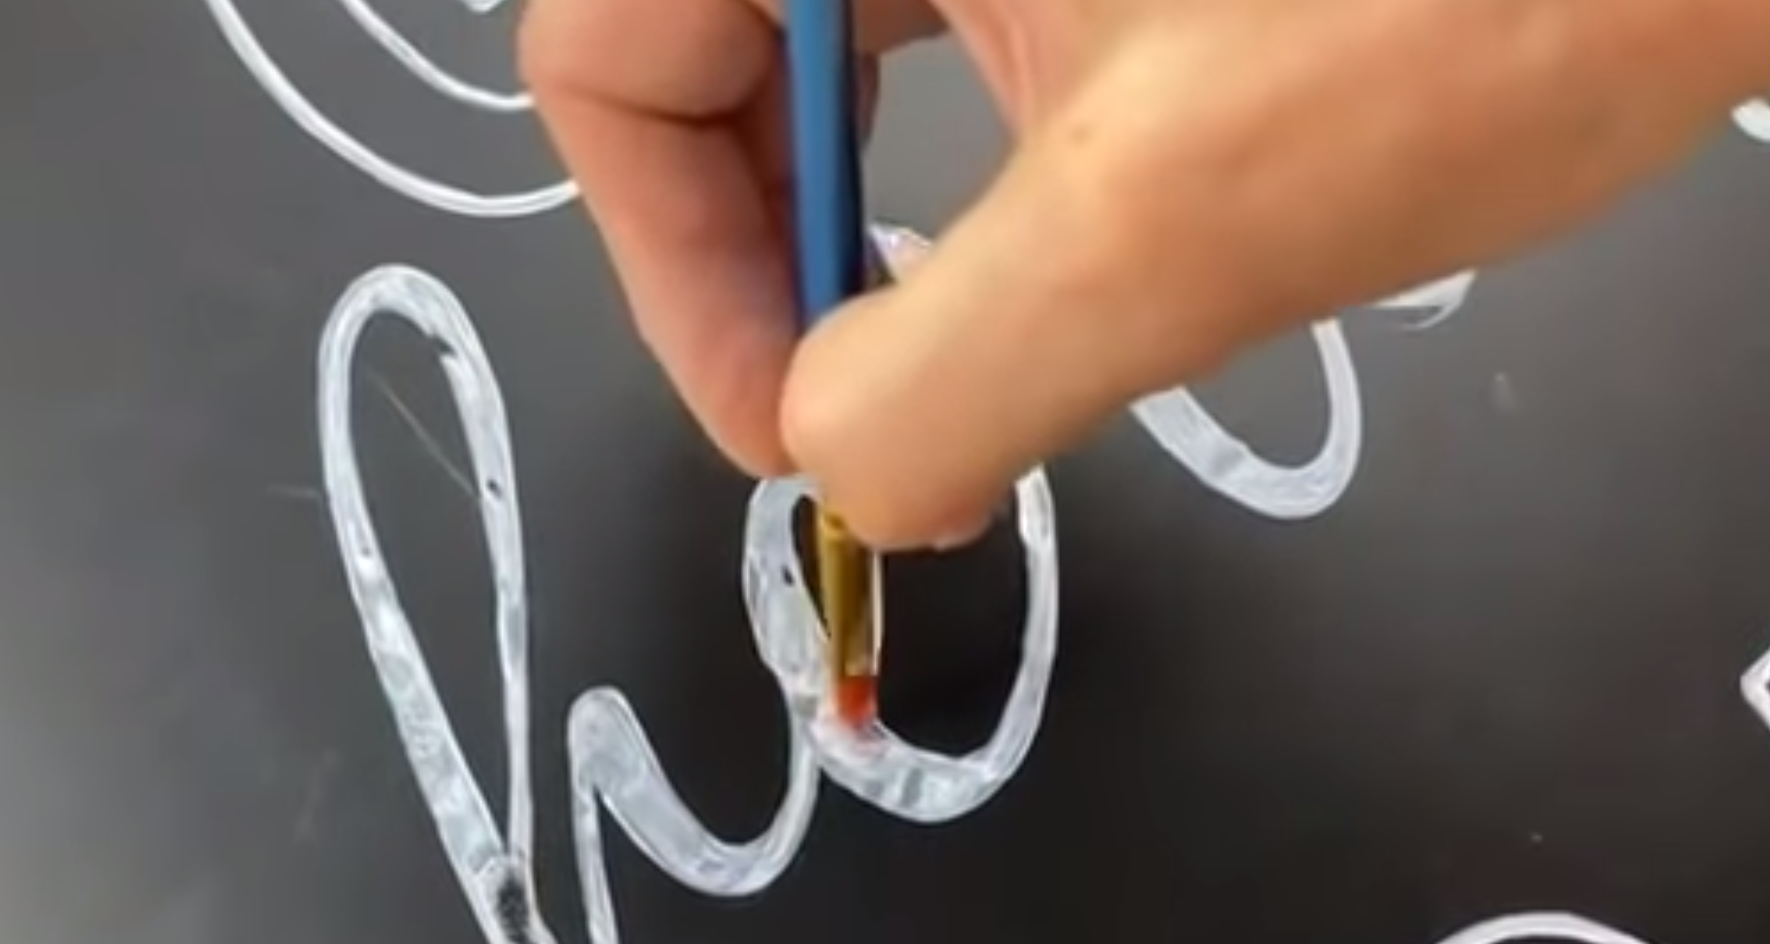
Remember to stabilize your painting hand with your pinky on the chalkboard when you color in the letters.
Step 6: Stamp the wreath elements.
We didn’t show this on the video, but here’s a bite-sized tutorial on using the Wreath Builder stamp. It shows you what you need to do to get the same look we did on our finished chalkboard.
Did you make this chalkboard sign along with us? Which technique for stamping cursive lettering do you like better – Sally’s “outlaw” style or Josie’s alternating letters? Let us know in the comments below.
Finally, don’t forget, if you’re struggling with using letter stamps on DIY signs –> practice, practice, practice on a chalkboard.
As Josie says, “It’s all about the reps.” Now go make something beautiful!
 ×
×
popular
- How to Apply IOD Athenaeum Gilded Transfer to Colored Glass Bottles
- From Ugly Duckling to Gorgeous | Black Dresser Makeover with IOD Marché des Fleurs
- 5 Creative Ways to Use One Decorative Stamp
- Turn Thrifted Finds into Charming Garden-Inspired Decor with a DIY Jadeite Finish
- Little Lark Paint Inlay Projects: Vintage Teapot & Canvas Wall Art with IOD