Handmade Holiday Gift Ideas: 3 Polymer Clay Projects with IOD Stamps
We’ve come up with three fabulous (if we do say so ourselves!) DIY gift ideas that can all be made with polymer clay and IOD Stamps. While we’re sharing these polymer clay projects as handmade holiday gifts, they could just as easily be used as DIY home decor, for a DIY wedding or other special occasion table decor, or to sell in your handmade shop.
No time now? Pin this post for later.

3 DIY Gifts to Make with Polymer Clay
Get ready to learn how to make a personalized coast set, disc earrings that could double as wine charms, and an old English ornament.
Watch the video below to see all the steps in action, or if you want to read through the supply list and instructions, keep scrolling down.
HERE’S EVERYTHING YOU NEED FOR THIS Polymer Clay Project
All IOD products can be purchased from an approved stockist. To find a shop local to you, click here. To find an online store, click here.
(This post contains affiliate links.)
- Rose Toile Stamp
- Typesetting Stamp
- Knob Toppers Stamp
- Crockery Stamp
- White polymer clay
- Clay press or clay conditioning machine (can also use a pasta maker)
- Round cookie cutters of different sizes
- Knife for cutting chunk of clay
- Toothpick to poke hole for ornament hanger and/or earrings, you can also use it to personalize the back of the ornament with a message
- Silicone craft mat or heat press transfer sheet to bake clay on
- Baking sheet
- Craft oven – ideally polymer clay is best baked in a dedicated craft oven that’s not used for food
- Fine grit sanding block
- Lint-free shop cloth
- Small paint brush
- Acrylic-water glaze mix: 3/4 tsp raw umber, 3/4 tsp ivory black and 3/4 cup water mixed together
- Sculpey gloss glaze
- If making earrings, earring hooks, jump rings, pliers, Crop-a-dile hole punch
- If making coasters: cork to adhere to the bottom of the coasters (optional)
- Ribbon for wine charms or ornaments
If this is your first time using IOD stamps, you’ll need to condition the design side of the stamp. Click here to check out a stamping basics tutorial to show you how.
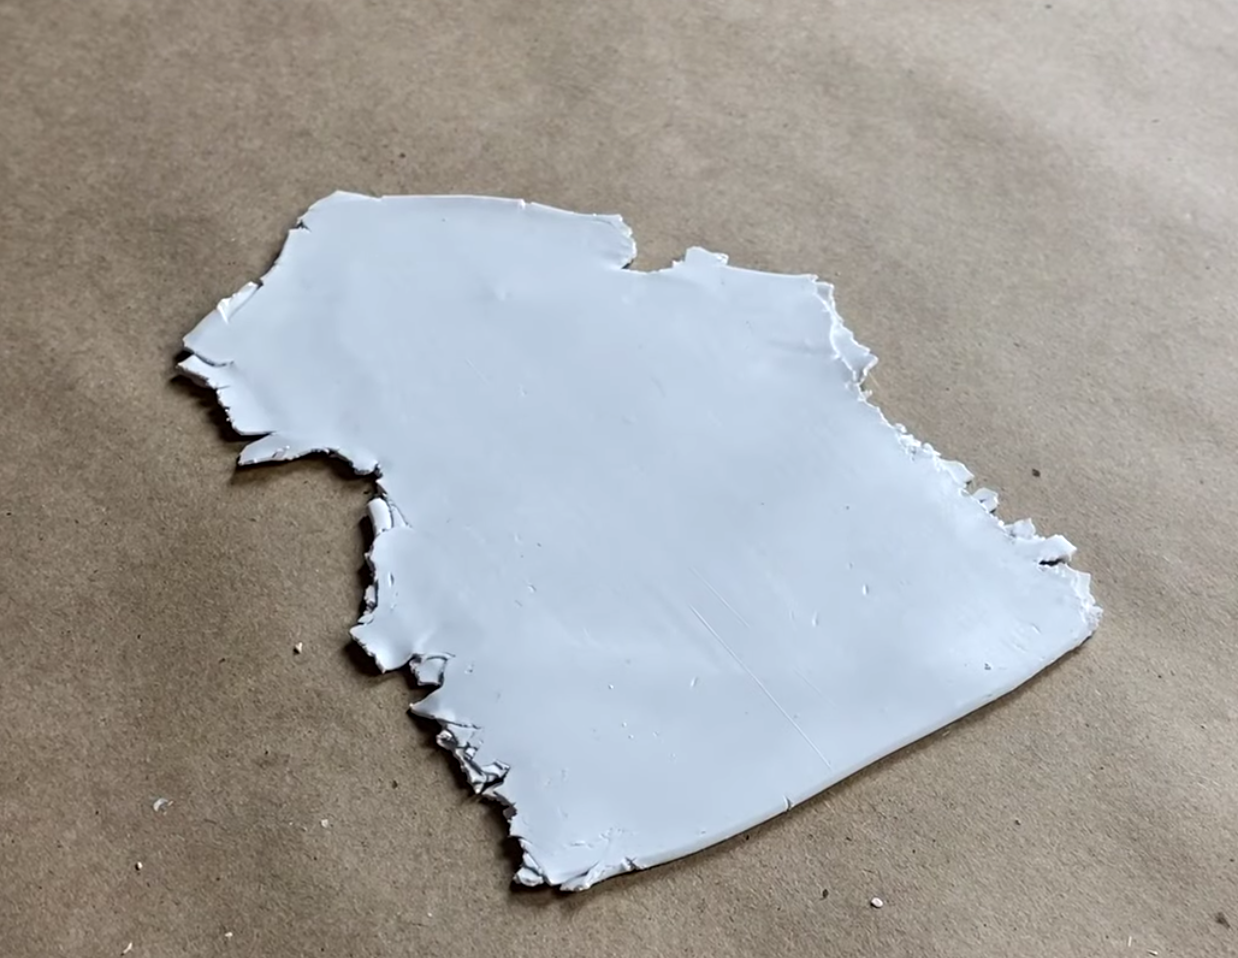
Before doing anything else, condition the polymer clay for all your pieces.
Carefully cut off approximately how much polymer clay you think you’ll need depending on how many gifts you plan to make.
Using a clay conditioning machine, wind a chunk of clay through a few times.

Fold the clay over on itself each time before cranking it through the conditioning press.
Start with the thickest, or widest setting and, each time you put it through, adjust the opening progressively smaller using the knobs on the ends. This will make the sheet of polymer clay get thinner which softens it and makes it easier to work with.
The final time you roll the clay through the conditioner, target the thickness you plan to use for your DIY gifts.
Set the sheet on your work surface while you get the cookie cutters and stamps ready to use.
Note: For all our DIY gifts, we used Sculpey brand Premo polymer clay, which we love. Just make sure to choose a high quality polymer clay as some brands are harder to work with and may require extra conditioning.
How to Make a Personalized Coaster

For this coaster, we used the Rose Toile stamp because Sally loves florals, but you can use any IOD stamp to complement the personalized initial.
First, personalize the coaster with a letter initial.
Using the Typesetting Stamp, choose the letter that works for your gift recipient. On the rolled out piece of polymer clay, firmly press the stamp where you want it.

Then, make the floral stamp impression in the clay.
Firmly press the design side of the Rose Toile stamp (or IOD stamp of your choosing), layering it over the first impression. Make sure to press all the design details into the clay.

Finally, use the circle cookie cutter to make the coaster shape.

Set aside on the baking sheet lined with a silicone baking mat.
How to Make Vintage Disc Earrings with Polymer Clay
The following steps are the same whether you want to DIY wine charms or to make polymer clay earrings.

First, create the clay blank.
Using the smallest cookie cutter, cut a circle shape of clay from the conditioned sheet BEFORE making the stamp impression.
Next, make the stamp impression.
Using the same technique as before, line the Knob Topper Stamp over the pre-cut circle of clay. Press the design firmly into the clay to make an impression.
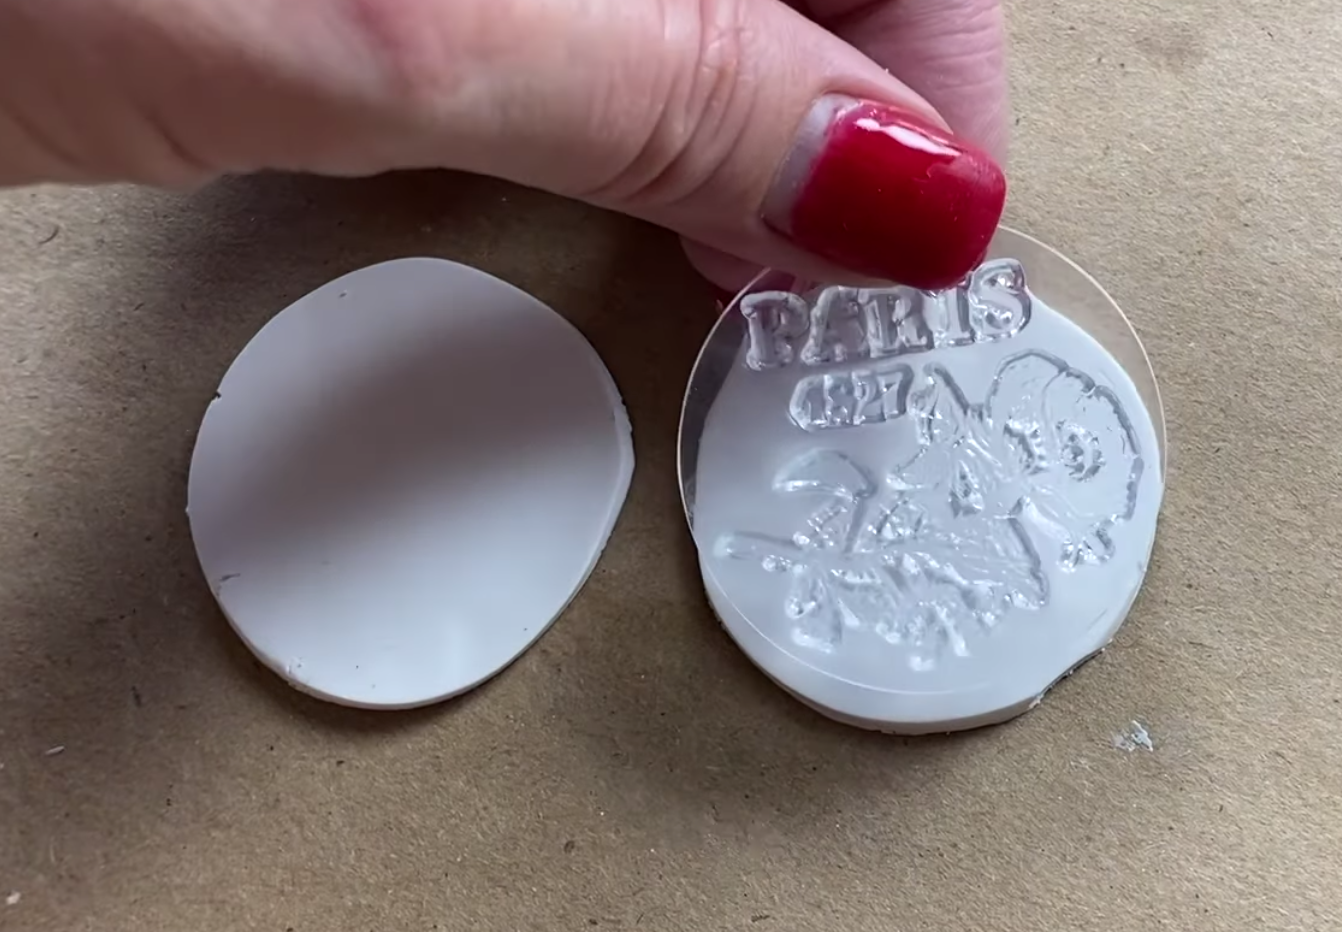
Make sure to run your fingers all of the details before lifting off.
When you press the stamp into the disc, it may distort shape a bit. We like that because it gives the earrings/wine charms a handmade, authentic look. It that bothers you, you can make the impression first, and then use the cookie cutter after.
If you don’t have a craft hole puncher to use after baking the clay, you can use a toothpick now to make a hole in the clay disc. You want to make it big enough to thread a jump ring or ribbon through (depending on how you intend to finish off this gift).

Set aside on the baking sheet lined with a silicone baking mat.
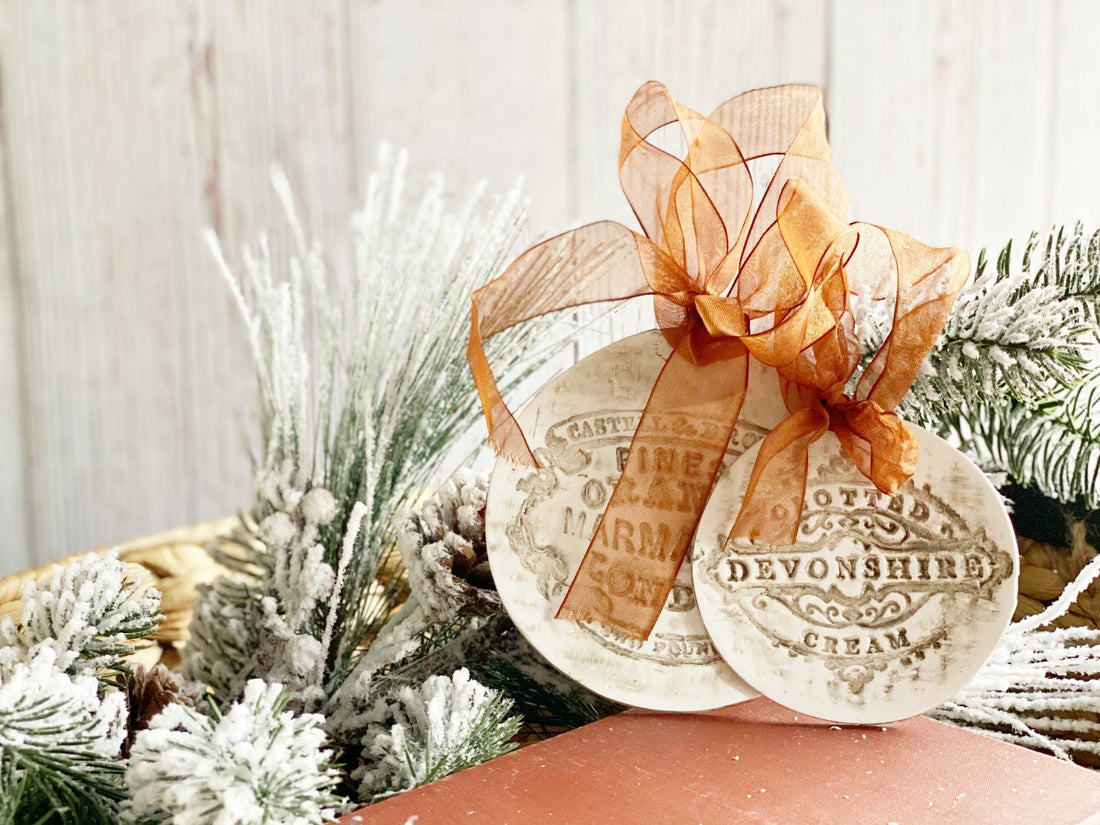
How to make an Old English Christmas Ornament
Repeat the steps from the coaster, choosing the appropriate size cookie cutter for the Crockery Stamp design.

Start by using the stamp to impress the design on the clay. With this one, you really want to take your time, making sure all the design details are pushed into the clay (without pushing all the way through!).

Use the cookie cutter to cut out the circle shape of the ornament. Make sure to press hard enough to cut completely through so you don’t distort the image when removing the excess clay.

If you want to personalize the ornament, now is the time. Using a toothpick or pointed clay sculpting tool, etch the date and your message on the smooth, backside.
You can also use the same tool to make a hole for the ribbon or hanger you plan to use for the ornament.
Set aside on the baking sheet lined with a silicone baking mat.
Now, you’re ready to bake!
Follow the package directions on whatever polymer clay you choose to use for the oven temperature and how long to bake. This will depend on the brand as well as the thickness of the polymer clay.
When done, let the pieces cool before moving on to the next step. This is what they will look like when done.

Lightly buff all the surfaces with a fine grit sanding block
Pay extra attention to any “noobules,” as Sally calls them… (maybe a combo of globules and nubby bits?!?) along the edge. Your goal is to have a smooth finish on all the surfaces – front, back, and edges.
(And don’t let your pest-of-a-sister do this to ‘personalize’ your earring… hehe HA!)

Wipe off any sanding powder with a lint free shop cloth to improve the adhesion of the glaze in the next step.
Liberally brush on the glaze to pop the stamped impression details
To make the glaze, we mixed 3/4 c water with equal parts artisan acrylic in raw umber and black ivory – 3/4 tsp each. You can adjust the proportions to make it more watery or more intense – whatever you like.

Allow the glaze to fully dry.
Seal your polymer clay projects
We used three thin coats of Sculpey gloss glaze because we like the finish – allowing 30 minutes of drying time between each coat. You could probably get away with fewer coats or use a matte sealer depending on the finish you like.
If you made earrings, now would be the time to punch a hole (if you didn’t before baking). Thread the jump ring using round nosed pliers and then attach the earring findings.
Tie your gifts up with a beautiful bow!
For the ornament and if you made wine charms, thread a complementary color ribbon through the hanger holes and you’re ready to wrap them.
If you like this post, you might also enjoy these DIY gift and holiday decor tutorials
For more ideas on how to use the Crockery Stamp, check out this post.
To learn how to DIY bracelets with polymer clay, click here.
If you’re looking for more DIY Christmas decor, check out this snowflake ornament tutorial and this wall art wreath with IOD moulds.
If you prefer working with stamps, here’s an adorable DIY Christmas Sign that you might want to try.
What gifts are you planning to make this holiday season?
Let us know in the comments below. Now, go make something beautiful!
 ×
×
popular
- How to Apply IOD Athenaeum Gilded Transfer to Colored Glass Bottles
- From Ugly Duckling to Gorgeous | Black Dresser Makeover with IOD Marché des Fleurs
- 5 Creative Ways to Use One Decorative Stamp
- Turn Thrifted Finds into Charming Garden-Inspired Decor with a DIY Jadeite Finish
- Little Lark Paint Inlay Projects: Vintage Teapot & Canvas Wall Art with IOD