


DIY Faux Cast Iron Rose Trellis Mirror Frame: A Step-by-Step Tutorial
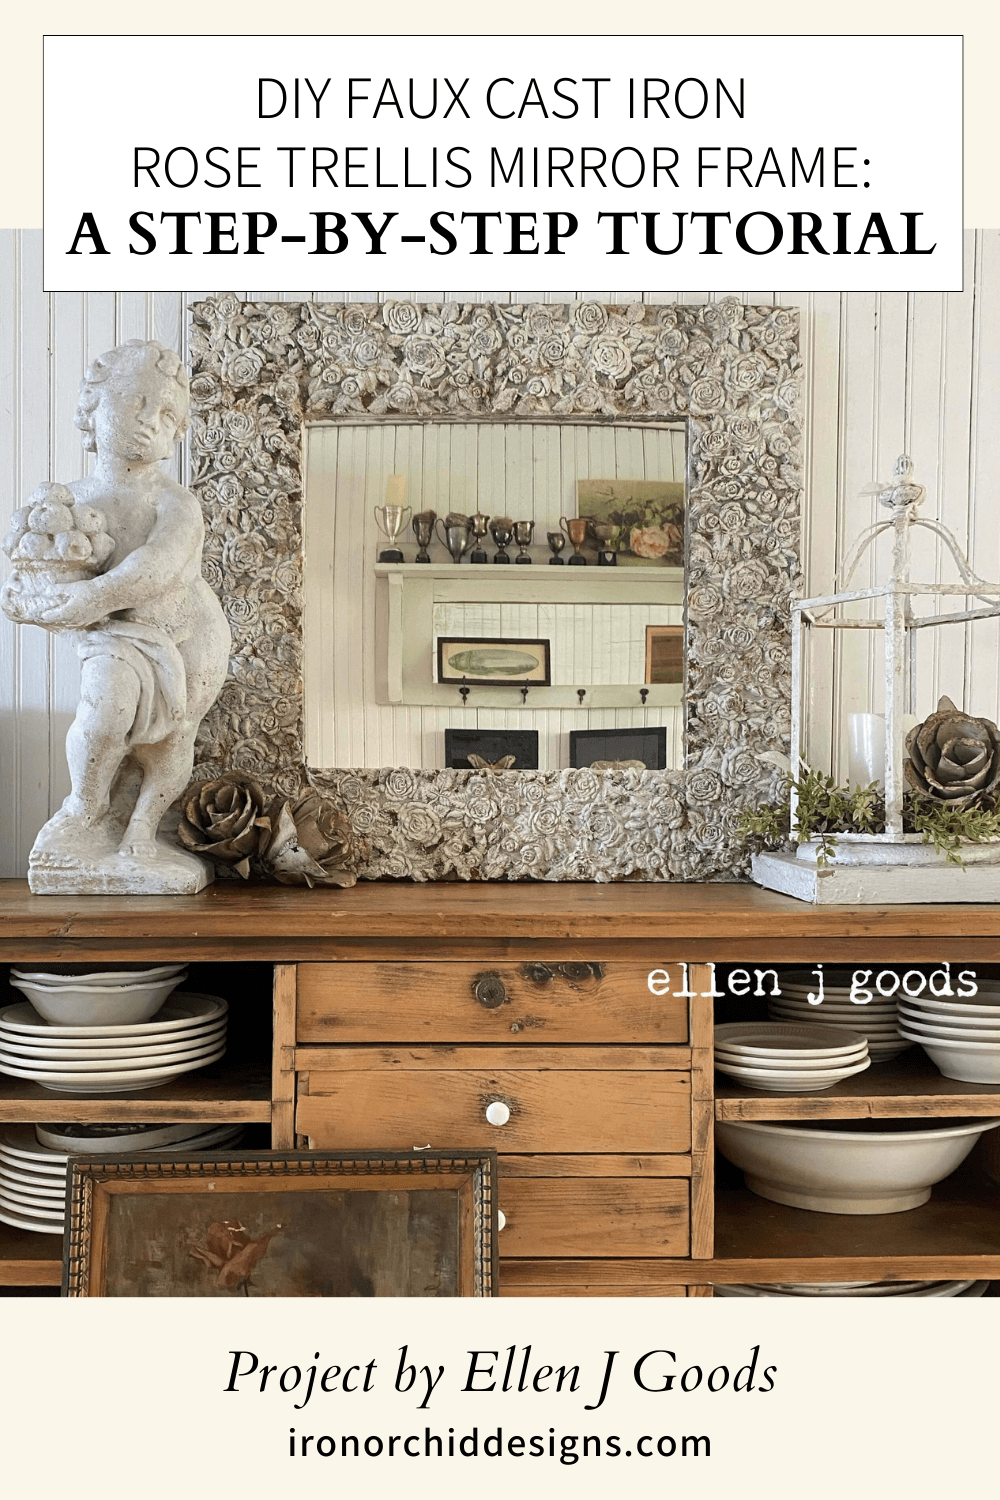
For all those who are drawn to chippy, rusty, iron finishes, we have a creative project just for you! Today, Ellen J Goods is transforming a simple mirror into a beautiful focal point with a rusty iron finish using the Iron Orchid Designs (IOD) Juliette mould and some unique faux rusting techniques.
DIY Faux Cast Iron RoseTrellis Mirror Frame: A Step-by-Step Tutorial
By Ellen J Goods
Materials You'll Need:
- IOD Juliet Mould
- Quickset Epoxy Resin
- IOD Air Dry Clay
- Cornstarch
- Black mineral or chalk-type paint (The one used here is Coal Black from Fusion Paint)
- Orange mineral or chalk-type paint (The one used here is Tustin Orange from Fusion Paint)
- Pentart Rust Effects Set
- Fusion Fresco Texturing Powder
- Pentart One-Step Crackle
- White mineral or chalk-type paint (The one used here is White from Fusion Paint)
- Dark Wax
- Clear Wax
Get in touch with your local stockists to grab your IOD and craft supplies.
Step-by-Step Instructions:
1. Prep your frame:
Create a wood frame built to fit the width of the Juliet mould. Design the frame so that ten moulds will fit with a little bit of wiggle room (3 on each long side, and 2 on each short side - don’t forget to account for the width of the Juliette mould on each end on the short side when it butts up against the long side moulds). To prepare it for the moulds, give it a quick coat of white paint.
2. Create the Resin Castings:
Mix one part A and one part B of Quickset epoxy for your resin. Pour the mixed resin into the mould, making sure it settles into all the details. Let it set for about 10 minutes or until it becomes completely opaque. You can then demould as long as the resin casting comes away easily from the side of the mould.
3. Fit the moulds onto the Frame:
Layout your Juliette castings on the frame. These moulds are designed to fit end to end and create one seamless casting.
4. Use Air Dry Clay:
In addition to resin, use air dry clay to fill in small gaps and spaces between the resin castings. Dust the inside of the mould with cornstarch for easier removal of the clay. Press the clay into the mould and use a credit card or a palette knife to flatten the back of the clay casting.
5. Freeze the mould:
Juliette is a very intricate and detailed mould, to facilitate easier removal of the clay, pop the mould into the freezer for about 30 minutes. You may get a few broken pieces, but that’s ok, you can use them between you resin castings.
6. Fill the Gaps:
Add the broken bits and small parts of the air dry clay castings to the spaces between the resin castings. (you can break down your air dry clay casting as needed)
7. Glue the Pieces:
Use Tightbond Quick and Thick to glue both the resin and air dry clay castings in place. Make sure to place something with weight over the resin castings when gluing down, it can tend to get a little buckle and this will help it glue and stay flat. Clean up any excess glue that seeps out from underneath the pieces with a Q tip or a damp cloth.
8: Paint the Base Coat:
Once the glue has completely dried, give the entire piece a base coat of Fusion Coal Black paint, Ellen uses this because it has a built in top coat that will be helpful with the layering and rust effect.
9. Create a Rust Effect:
Mix Tustin Orange and Chocolate Brown paint and dab them randomly over the roses. To create another layer of rust, sprinkle some of the rust powder from the Pentart Rust Effects Set into the wet paint. Also, scatter some Fusion Fresco Texturing Powder into the paint to add texture. Dab this in the areas where you have the rust color paint.
10. Add More Texture:
For the next layer of texture, add Pentart One Step Crackle in random spots over the frame.
11. Oxidize the Rust Powder:
Spritz the rusted areas that had the rust powder with the three reagent sprays that come with the rust powder. This is going to oxidize that rust powder.
12. Final Coat of Paint:
Apply a final coat of white paint, the rust effect will come through, and just like real rust, it will continue to come through until sealed.
13. Apply Wax
As a final step, apply some dark wax over the entire frame. Then wipe back any excess with clear wax, allowing the dark wax to settle into all of the lower details.
Congratulations! You now have a beautiful focal point mirror frame with a cast iron finish. For more tutorials like this, subscribe to our channel, and check out our video on creating a rust effect on poly resin garden pots. Enjoy creating!
Alright, grab your IOD supplies from your local stockist, and let’s get those hands making something beautiful today!!
Don’t worry if you’re a beginner. We’ve got you covered with some easy-to-follow techniques and tips on our product 101 pages! We’re honored to be part of your journey of learning and creativity. Be sure to check out the rest of the blog for more great tutorials and inspiration.We can’t wait to see what you’ll discover (and create)! Don’t forget to share your final projects with us in the Facebook Creative Tribe.
 ×
×

