Upcycle Clothes: Refashion Plaid Shirts into Boho Farm Style Beauties
It’s never been easier to upcycle clothes – just IOD them! 😀
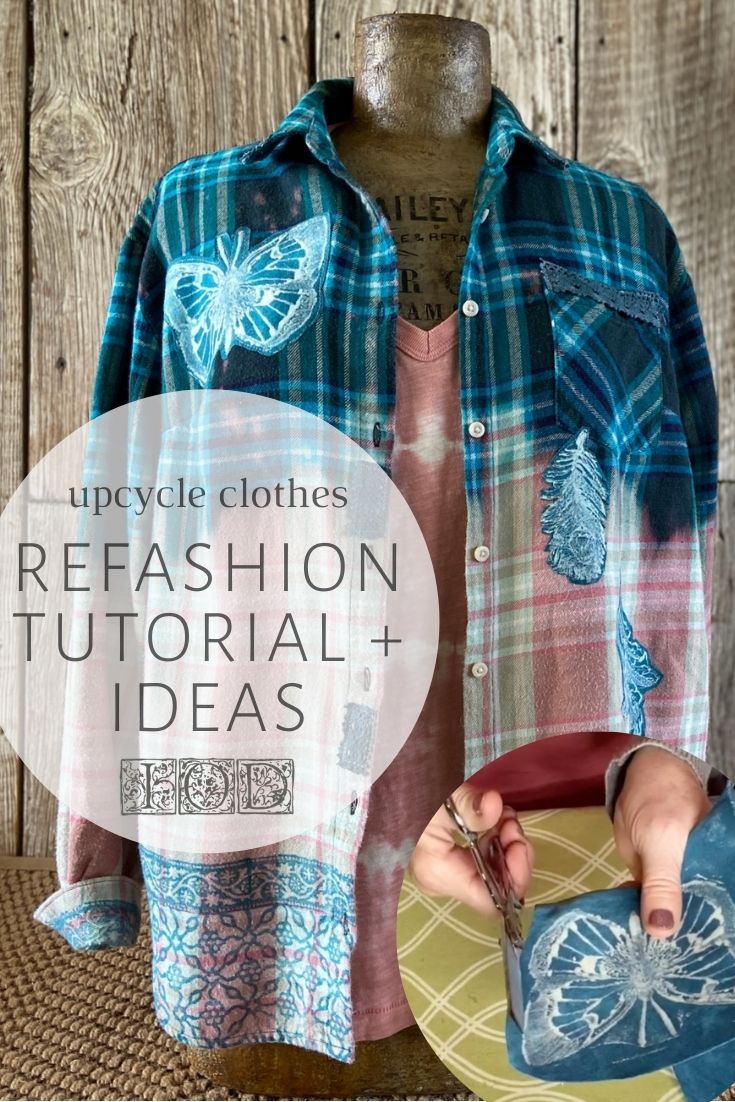
In this refashion tutorial, Rhonda, one of our lovely IOD stockists and the talent behind the Fruitful Life Studio in Exeter, CA, shows you everything you need to know to transform an ordinary plaid shirt into a one-of-a-kind beauty.
No time now? Pin this post for later.
Watch the short, 12-minute video tutorial below, or keep reading for a supply list and step-by-step instructions (and don’t forget to Subscribe to Rhonda’s YouTube channel 😀).
Here’s everything you need to upcycle clothes and refashion shirts with IOD stamps
All IOD products can be purchased from an approved stockist. To find a shop local to you, click here. To find an online store, click here.
This post contains affiliate links.
- All your favorite IOD stamps (we’ll let you know which ones she used with each refashioned shirt at the end of this post)
- Decor Ink by IOD in colors that compliment your shirt (don’t be afraid to mix as Rhonda does)
- Blank IOD ink pads
- Thin mount with gridlines by IOD (optional: This will help keep your letters straight if using an alphabet letter stamp)
- Textile detergent (optional, but helps remove any previous fabric softener buildup)
- deColorant gel spray (You could also use bleach, but it’s not as easy to use as deColorant and you run the risk of accidentally damaging the shirt fibers)
- Spray bottle and water (optional: To mix 50/50 with the deColorant)
- Fabric shears
- Steam iron
- 100% cotton plaid shirt
- Lace scraps from thrifts shirts (optional)
- Freezer paper (optional, to protect and easily wipe up work surface as you’re stamping)
- Low tack tape (optional, to mask and protect previously stamped designs)
To make DIY fabric appliques:
- 100% cotton dyed t-shirt (thrifted, new or dug out from the bottom of your closet)
- Double-sided fusible web
- Wooden craft stick to put the deColorant on the blank ink pad
- Blank ink pad by IOD
- Steam iron
- Beginner sewing machine (optional, you can also easily hand stitch in which case you’d need a needle and thread)
Upcycle Clothes and Refashion Plaid Shirts Tutorial with IOD Stamps
Step 1: Prep & distress your plaid flannel shirt
Trim off some of the edges of the shirt, without cutting the hem, with sharp sewing shears. This will allow the shirt to gently fray when washed without shredding it.

Wash and dry the cotton shirt without using any fabric softener. If you can, use a textile detergent that removes any fabric softener buildup on the fibers, as this will improve your stamped impression.
Step 2: Lighten different areas of the fabric to suit your style
You can use bleach for this step, but Rhonda discovered that spraying the shirt with a 50/50 mixture of water and deColorant was much easier.
Follow the directions on the deColorant for use and safety.
Spray the deColorant mixture and then use a steam iron to lift the color to her desired lightness.

Wash the shirt again to make sure all deColorant is removed before stamping.
Step 3: Stamp the decolorized areas of the shirt
Note: If this is your first time using IOD Stamps, check out this product basics tutorial to learn how to condition and care for your stamps.
Choose a decor ink color that complements (or contrasts) the plaid colors. Rhonda used a variety of colors and even mixed some (for example, China Blue and Black to get navy) when stamping.
Regardless of the ink color or stamp you choose to use, the basic steps are the same:
- Lay the IOD stamp on your work surface design side up
- Bring the loaded ink pad to the stamp and pat it repeatedly to load up the design surface with ink; when stamping fabric, you want to make sure the stamp is extra ‘juicy’ meaning has lots of ink on it, because the fabric will absorb the ink
- Hover the loaded stamp over where you want to stamp – and then press it down – commit and don’t shift; When stamping fabric be sure to hold down the stamp a bit longer than usual so the fibers have time to absorb the ink
- Lift the stamp straight up to avoid smudging your design
- If you’re done with that stamp, put it in a bin of warm soapy water to make cleanup easier.

Remember, you can always mask with low-tack painter’s tape to avoid making an impression where you don’t want it – as Rhonda did below where she only wanted the stamped design on the pocket.

You can stop here if you don’t want to make the stamped fabric appliques – stamped shirts are beautiful all by themselves. In this case, you want to heat set the stamped designs by running a hot iron (no steam) over the stamped impressions on your shirt before wearing or washing.
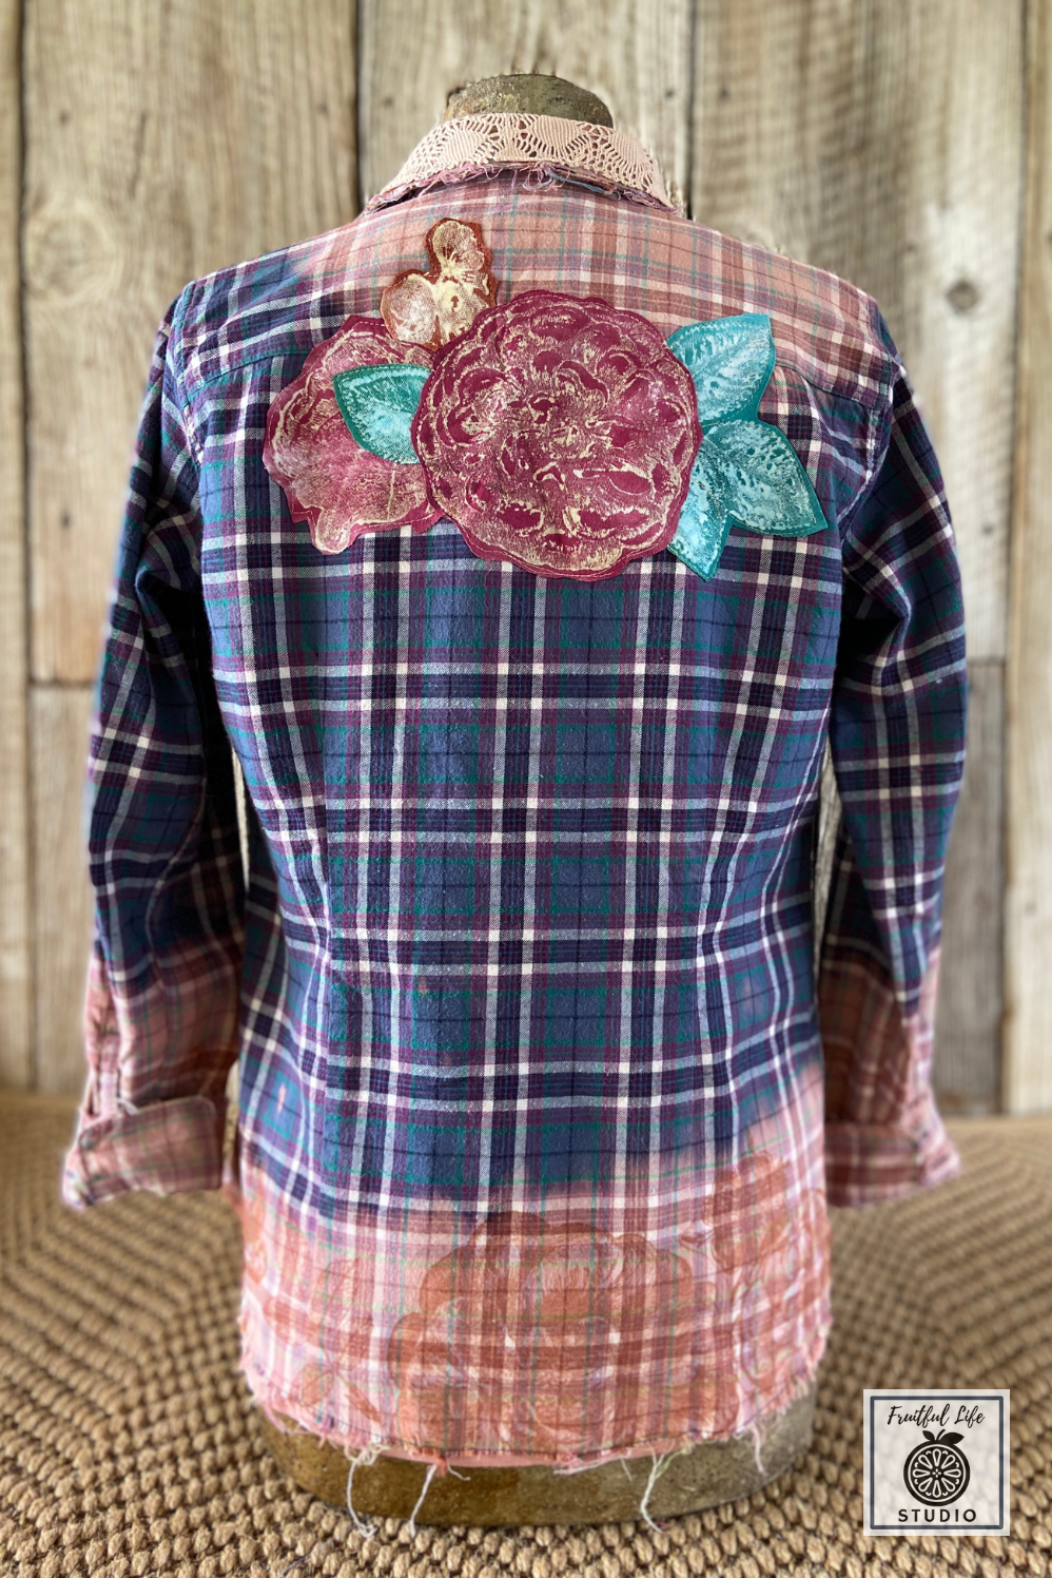
Step 4: Create your own boho style DIY fabric appliques
Fill a blank ink pad with deColourant using a wooden craft stick. Then stamp the thrifted t-shirts using the same techniques as in Step 3.

(You can also use Soft Scrub with Bleach as shown by Funkiture Gifts in this tutorial – no need to steam iron.)
Don’t worry if you smudge or otherwise don’t get a good impression because you can re-stamp with IOD Decor Ink at a bit of an offset. This will create a beautiful effect of highlights and lowlights.

Next, cut out the double-sided fusible web so that it lines up with your stamped upcycled t-shirts.
Iron the DIY fabric applique adhere it to the back (non-stamped side) of the fabric.

Cut out around the shape of the stamped impression.

Arrange the appliques on your upcycled clothes. You can layer them, as in the one below, or you can simply place one here and there.

After you’ve decided where you want the DIY appliques, carefully cut open the fusible web using a sharp-pointed tool to make it easier to peel off the backing.
Step 5: Attach the DIY fabric appliques to your refashioned shirt
First, iron the boho-stamped appliques on your shirt — following the directions on the fusible web packaging. This adheres the applique to the shirt.
Rhonda recommends the additional step of securing it with a straight stitch – either by sewing machine or by hand – to create a handmade look. This will also give the shirt extra durability in the wash.
You can hand-stitch or use a sewing machine to stitch a straight running stitch. This would be the time to add any thrifted or dyed laces to accent the appliques.


Like this post? You might also enjoy these IOD tutorials:
- How to use IOD Stamps & Transfers on Fabric
- Quick & Easy DIY Seat Cushions
- DIY Modern Boho Pillow Cover
- DIY Baby Gifts: Stamped Baby Onesies
Do you love to refashion and upcycle clothes? Are no-sew craft projects are your jam?
Let us know in the comments below and tell us if there are any other no-sew tutorials you want to see with IOD products.
Now, go make something beautiful! ❤️
 ×
×
popular
- How to Apply IOD Athenaeum Gilded Transfer to Colored Glass Bottles
- From Ugly Duckling to Gorgeous | Black Dresser Makeover with IOD Marché des Fleurs
- 5 Creative Ways to Use One Decorative Stamp
- Turn Thrifted Finds into Charming Garden-Inspired Decor with a DIY Jadeite Finish
- Little Lark Paint Inlay Projects: Vintage Teapot & Canvas Wall Art with IOD