How to Make a Hot Cocoa Bar Sign with NEW IOD Cozy Stamp

How To Make A Hot Cocoa Bar Sign with New IOD Cozy Stamp
No time to read now? Pin this post for later.

By far one of our favorite parts about the fall and winter months is cozying up by the fire (or under a blanket) and sipping on a warm hot cocoa or hot toddy! If you’re looking to create that cozy feeling in your home or have a fun treat for the kids or grandkids – an at-home cocoa bar is sure to charm! They’re such a sweet way to decorate and make your home memorable for the holidays.

And for you autumn lovers, this can easily be set up as a cider or pumpkin spice latte bar (we see you PSL lovers).

So whether you’re hopping on this trend just for fun or planning your upcoming holiday party, this tutorial on how to make hot cocoa bar signage, done by the lovely Lynne from Ellen J Goods, is for you!

P.S. We provide some fabulous tips for using IOD stamps in this tutorial too, so keep reading to learn more!

WHAT YOU’LL NEED FOR THIS TUTORIAL:

Find a stockist near you to make this darling sign for your next holiday party or to deck out your home for the holidays!

STEP-BY-STEP INSTRUCTIONS ON HOW TO MAKE YOUR OWN COCOA BAR SIGNAGE:

STEP 1: Paint your surface.

Paint your surface with dark charcoal mineral paint and then apply several coats of clear polycrylic finish. Make sure to let it dry completely in between layers!

Paint your surface

TIP #1: Make an envelope to store your IOD stamp masks.

Pop out all the masks that come with the Cozy Stamp. Take the packaging the stamp came in, fold it in half and fold one side over about ¾ of the way from the middle folded crease.

Grab some tape and tape the corners and sides down. Slide your masks in there and voile, you’ve got a handy place to keep all your masks secure! We love an eco-friendly way to reuse packaging. 😊

Make an envelope for your stamp masks

STEP 2: Condition your stamps and lay out your design.

If it’s your first time using your stamps, grab a fine sanding block and go over them in two different directions to give it some texture. It’ll help the medium stick to the stamp better!

Lay out your stamps on a piece of paper and play around with your arrangement to see how you want it to look on your painted surface.

If you’d like to use a thin mount to mount your stamps and help with placement, this is the time to do that!

Lay out your stamps and play with the layout.

STEP 3: Apply erasable ink to your stamps with a brayer.

It’s important that you use erasable ink for this project so you can use a damp cloth to wipe away any mistakes! Since we are using a dark background with white ink, mistakes would be more apparent.

STEP 4: Stamp up your board!

Place your inked up stamps on your project and firmly press down to create good contact with the board.
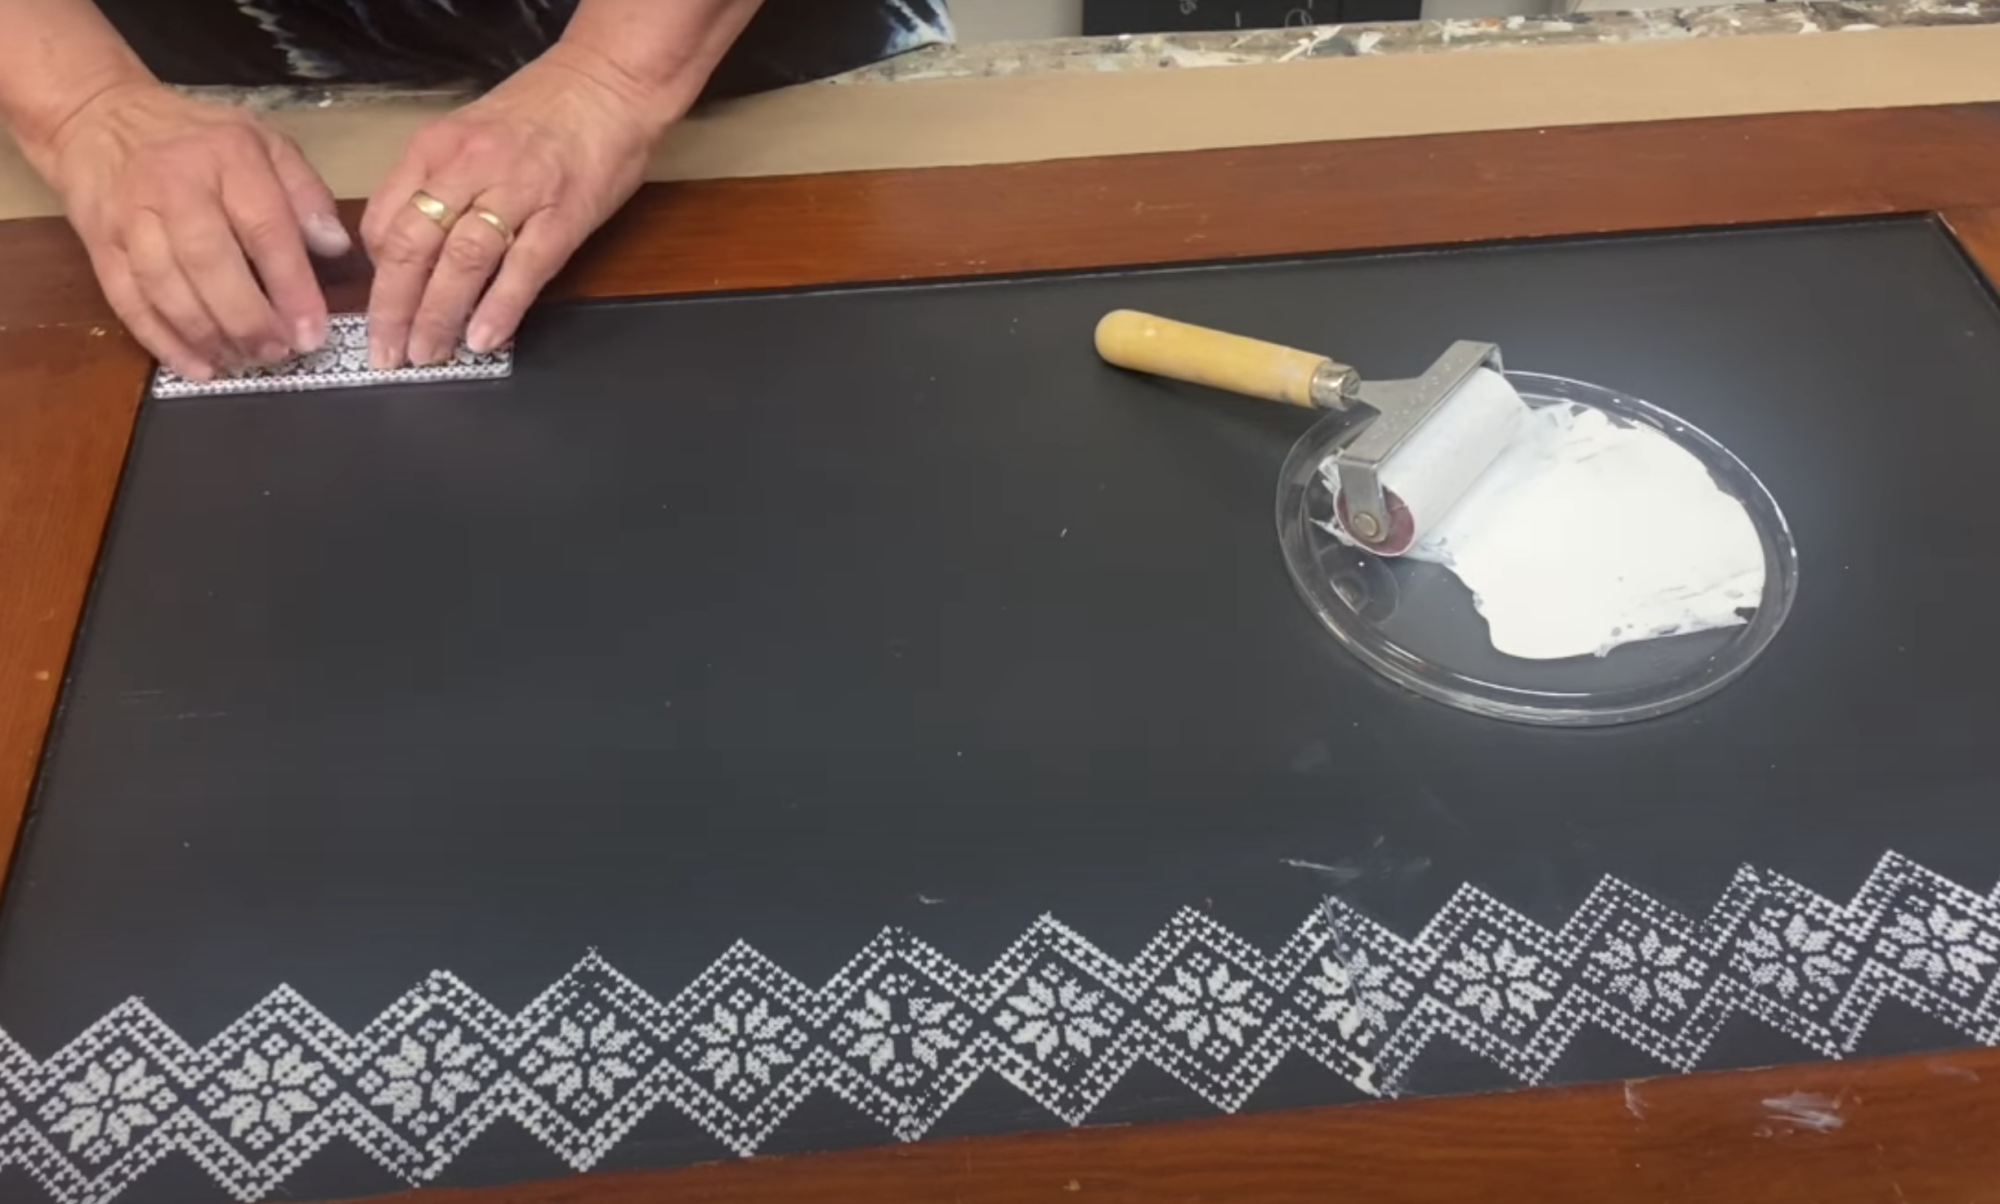
Stamp your layout onto your project.

TIP #2: Use baby wipes to remove any ink build-up on your stamps.

Keep some baby wipes on hands to make your clean-up process easier and to ensure you get a clean impression on your project by wiping away build-up!

STEP 5: Lay out your message and position your letters in place.

Using our Typesetting stamp, lay out the message you want displayed on your sign. In this case, @ellenjgoods is laying out “help yourself” on her signage. Make sure to leave blank space where you need to repeat certain letters.

Lay out your message with letters.

STEP 6: Mount your letters, apply your ink and stamp the message down.

Mount your letters using your thin mount, apply your ink using a brayer and then carefully stamp them down onto your board (you know the drill).

Now is the time to also go back and stamp those repeating letters.

Mount them, ink them and stamp them.

TIP #3: Have a bowl of soapy water on hand.

Let your stamps soak in a bowl of soapy water after using them and lay them out on a paper towel to dry. This will ensure that your stamps are cleaned and cared for after each use. ❤️

OPTIONAL STEP: Paint the border of your surface.

If you’re using a cupboard for this project, paint the border using a light-colored chalk-type paint.

"Help Yourself" Hot Cocoa Sign

3 EXTRA TIPS FOR LAYERING WITH STAMPS:

  1. Wipe away unwanted ink: after applying ink to your stamp, use a baby wipe to wipe away the parts you want to overlap with other stamps.
  2. Ink only part of the stamp: only apply ink to the parts of the stamp you want visible on your project!
  3. Mask your stamp: use the masks provided with your stamps to layer. Stamp the one you want to appear on top first.

How will you use this sign: in your home or for a party? Let us know in the comments below and share this with someone who loves hot cocoa! ☕️

"Help Yourself" Hot Cocoa Bar Sign

How to Make a Hot Cocoa Bar Sign with NEW IOD Cozy Stamp

How To Make A Hot Cocoa Bar Sign with New IOD Cozy Stamp
No time to read now? Pin this post for later.

By far one of our favorite parts about the fall and winter months is cozying up by the fire (or under a blanket) and sipping on a warm hot cocoa or hot toddy! If you’re looking to create that cozy feeling in your home or have a fun treat for the kids or grandkids – an at-home cocoa bar is sure to charm! They’re such a sweet way to decorate and make your home memorable for the holidays.

And for you autumn lovers, this can easily be set up as a cider or pumpkin spice latte bar (we see you PSL lovers).

So whether you’re hopping on this trend just for fun or planning your upcoming holiday party, this tutorial on how to make hot cocoa bar signage, done by the lovely Lynne from Ellen J Goods, is for you!

P.S. We provide some fabulous tips for using IOD stamps in this tutorial too, so keep reading to learn more!

WHAT YOU’LL NEED FOR THIS TUTORIAL:

Find a stockist near you to make this darling sign for your next holiday party or to deck out your home for the holidays!

STEP-BY-STEP INSTRUCTIONS ON HOW TO MAKE YOUR OWN COCOA BAR SIGNAGE:

STEP 1: Paint your surface.

Paint your surface with dark charcoal mineral paint and then apply several coats of clear polycrylic finish. Make sure to let it dry completely in between layers!

Paint your surface

TIP #1: Make an envelope to store your IOD stamp masks.

Pop out all the masks that come with the Cozy Stamp. Take the packaging the stamp came in, fold it in half and fold one side over about ¾ of the way from the middle folded crease.

Grab some tape and tape the corners and sides down. Slide your masks in there and voile, you’ve got a handy place to keep all your masks secure! We love an eco-friendly way to reuse packaging. 😊

Make an envelope for your stamp masks

STEP 2: Condition your stamps and lay out your design.

If it’s your first time using your stamps, grab a fine sanding block and go over them in two different directions to give it some texture. It’ll help the medium stick to the stamp better!

Lay out your stamps on a piece of paper and play around with your arrangement to see how you want it to look on your painted surface.

If you’d like to use a thin mount to mount your stamps and help with placement, this is the time to do that!

Lay out your stamps and play with the layout.

STEP 3: Apply erasable ink to your stamps with a brayer.

It’s important that you use erasable ink for this project so you can use a damp cloth to wipe away any mistakes! Since we are using a dark background with white ink, mistakes would be more apparent.

STEP 4: Stamp up your board!

Place your inked up stamps on your project and firmly press down to create good contact with the board.

Stamp your layout onto your project.

TIP #2: Use baby wipes to remove any ink build-up on your stamps.

Keep some baby wipes on hands to make your clean-up process easier and to ensure you get a clean impression on your project by wiping away build-up!

STEP 5: Lay out your message and position your letters in place.

Using our Typesetting stamp, lay out the message you want displayed on your sign. In this case, @ellenjgoods is laying out “help yourself” on her signage. Make sure to leave blank space where you need to repeat certain letters.

Lay out your message with letters.

STEP 6: Mount your letters, apply your ink and stamp the message down.

Mount your letters using your thin mount, apply your ink using a brayer and then carefully stamp them down onto your board (you know the drill).

Now is the time to also go back and stamp those repeating letters.

Mount them, ink them and stamp them.

TIP #3: Have a bowl of soapy water on hand.

Let your stamps soak in a bowl of soapy water after using them and lay them out on a paper towel to dry. This will ensure that your stamps are cleaned and cared for after each use. ❤️

OPTIONAL STEP: Paint the border of your surface.

If you’re using a cupboard for this project, paint the border using a light-colored chalk-type paint.

"Help Yourself" Hot Cocoa Sign

3 EXTRA TIPS FOR LAYERING WITH STAMPS:

  1. Wipe away unwanted ink: after applying ink to your stamp, use a baby wipe to wipe away the parts you want to overlap with other stamps.
  2. Ink only part of the stamp: only apply ink to the parts of the stamp you want visible on your project!
  3. Mask your stamp: use the masks provided with your stamps to layer. Stamp the one you want to appear on top first.

How will you use this sign: in your home or for a party? Let us know in the comments below and share this with someone who loves hot cocoa! ☕️

Back to blog