DIY Trinket Trays using IOD Moulds and Transfers
Need some beautiful trinket trays to hold your car keys, loose change, or jewelry? Display your creative talent along with those precious things you don’t want to lose!
Earlier this year, so many of you went crazy over these beauties in the Iron Orchid Designs Creative Tribe.

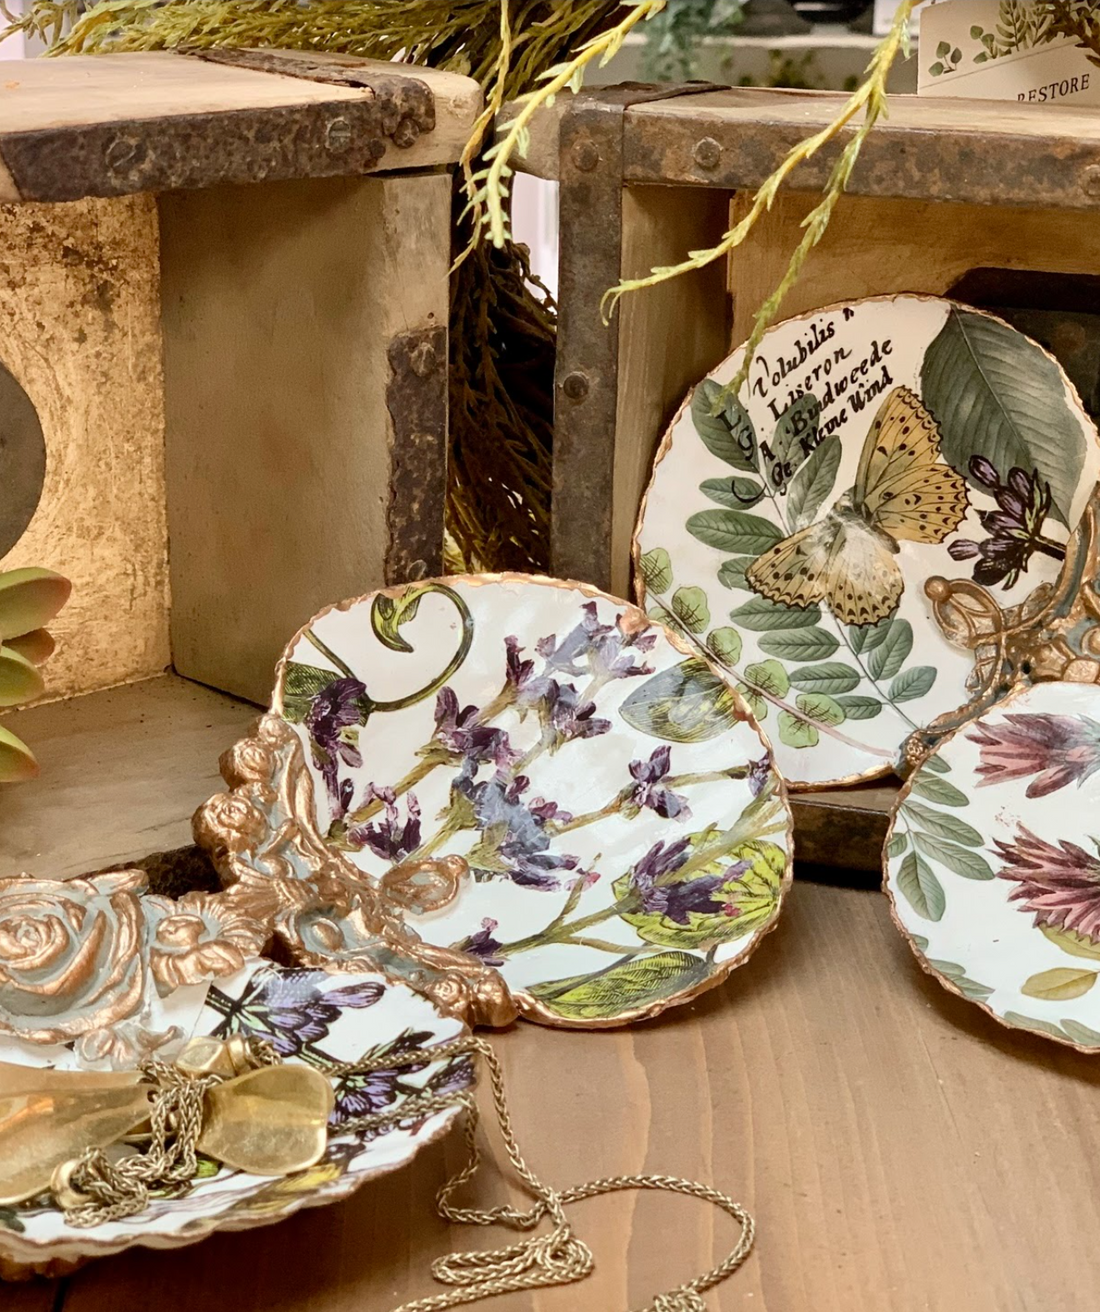
These gorgeous trinket trays were created by Tribe Member and maker, Carla Beven, using seashells, decoupage tissue, and IOD Moulds. Luckily, she kindly shared her step-by-step process with us so that one of our stockists could create this tutorial for you.
Now you can make your very own trinket trays!
No time now? Pin this post for later.
DIY TRINKET TRAYS WITH IOD TRANSFERS AND MOULDS

Many thanks to IOD Stockist Susan from Vintage Restore & More located in Inman, South Carolina. She made the jewelry trays you see above and shared all the juicy “how-to” details.
SUPPLY LIST FOR DIY TRINKET TRAYS
All IOD products can be purchased from an approved stockist. To find a shop local to you, click here. To find an online store, click here.
(This post contains affiliate links.)
- IOD Moulds: Susan used Classic Elements, Acanthus, First Gen Fleur Moulds in this tutorial, however, Carla used Birdsong, Monarch, Sea Shells, and Classic Elements Moulds in the original project; You can use whatever moulds suit your design style
- Assorted Scraps from IOD Transfers – Susan used Painterly Florals, Fronds Botanical, and Entomology Etcetera
- IOD Air Dry Clay
- Large Natural Baking Shells w/ White Scallops 4”
- Fine grit sandpaper
- High-quality decor paint (your IOD stockist can recommend a favorite brand)
- Small artists paintbrush
- Craft stick
- Putty Knife (or anything with a straight edge- even a credit card will do)
- Tight Bond Quick and Thick Glue
- Water-based high-quality acrylic sealer
- Gold Leaf Paint
Note: If this is your first time using IOD Moulds or IOD Transfers, please check out our beginner tutorials before you get started.
STEP-BY-STEP DIY DECOR INSTRUCTIONS
Step 1: Clean, dry and scuff the surface of the baking shells
Clean the shells in warm soapy water and let them dry. Using 320 grit sandpaper, scuff up the shell to help the paint adhere to the smooth surface.

Step 2: Paint and seal shells
Susan painted just the interior of the shell since she wanted a white background and liked the natural look of the outside of the shell.

Step 3: Make the air dry clay castings
For her project, Susan used IOD Air Dry Clay and IOD Classic Elements, Acanthus, Gen 1 Fleur Moulds to create the castings. A light coating of cornstarch dusted inside the mould cavity acts as a release, if needed.

Smooth out the back of the casting against the micro rim with a putty knife (or credit card) so it’s nice and flat. Then flip over the mould and fold it back so that the casting falls out without any pulling or tugging.

Susan discovered that the small round flowers from the Acanthus Mould make great “feet” so the tray will be level and won’t wobble!
Step 4: Glue the castings in place
To create a base, glue the small round flower castings to the bottom of each shell, set it down on a hard surface and slightly put pressure on the top of shell to make level.
Glue the decorative castings to the rim of the shell to create embellishment on your trinket tray.
Be generous with the glue to ensure good adhesion. Wipe off any glue that seeps out of the sides with a wet rag or small wet paintbrush. Remember to stick your paintbrush in soapy water when you’re are done to make cleanup a snap!
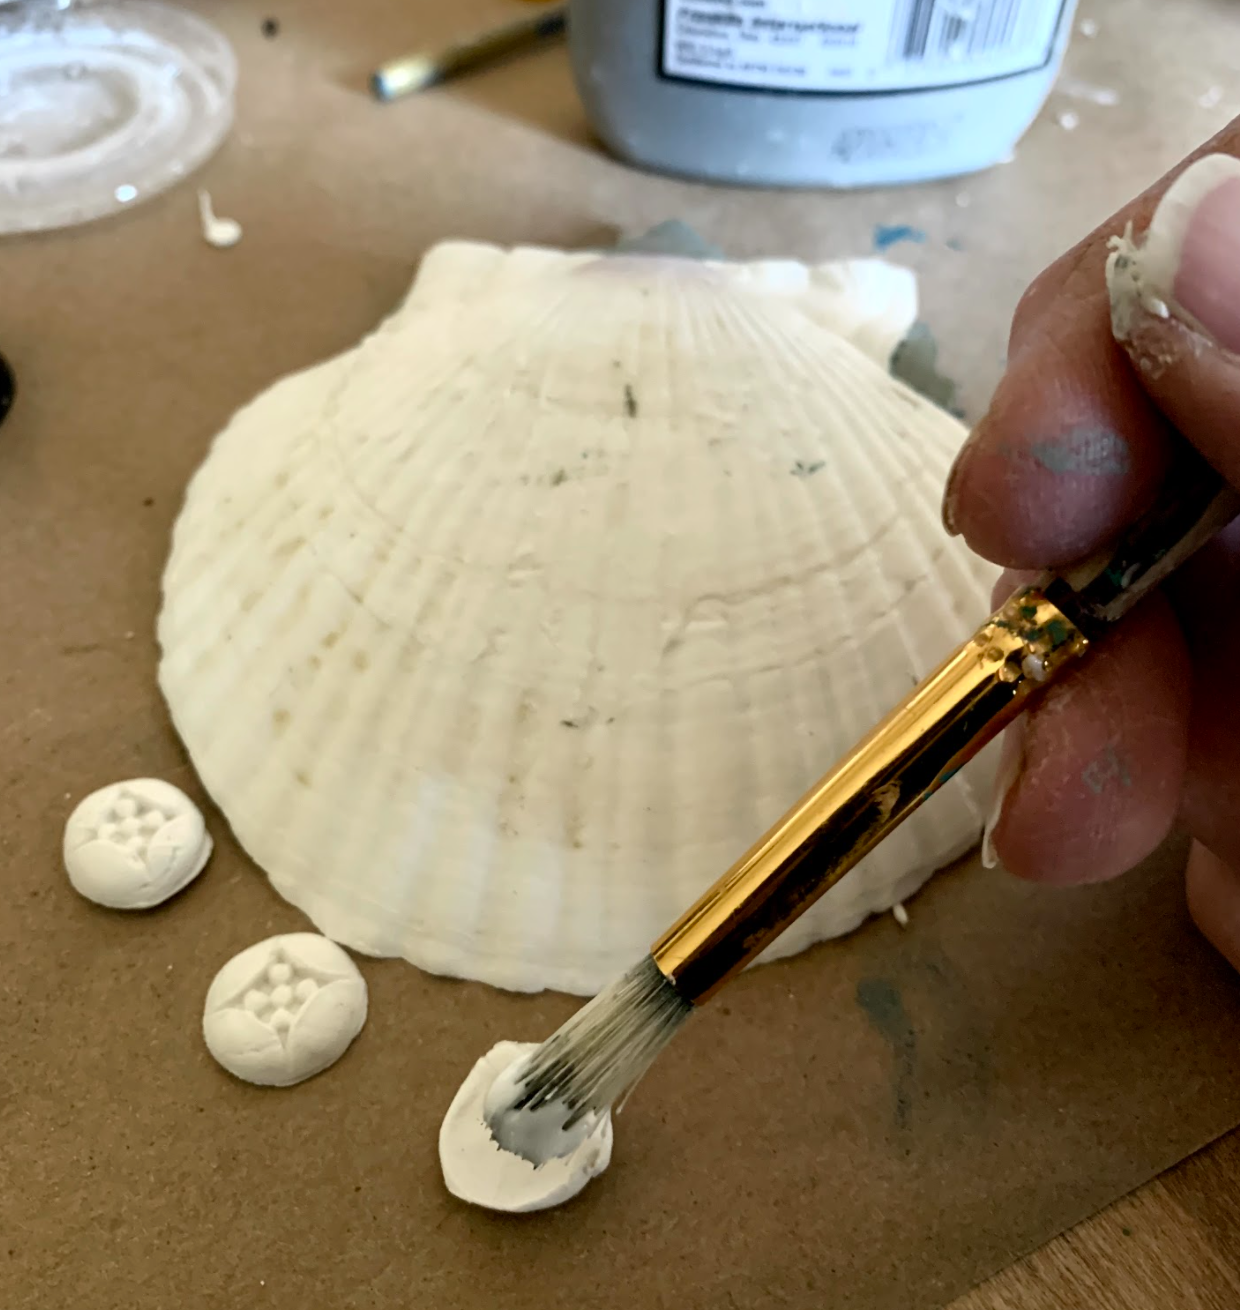
Step 5: Paint the castings
Let your casting dry – ideally overnight. But, if you’re in a hurry, wait at least until a crust is formed to preserve the design details.
Using a small artist brush, paint the castings with your color of choice. Susan chose the same white as the interior of the shell.
Let everything dry overnight.
Step 6: Apply your transfers
You just need a few small pieces of transfer for this project — this is what you’ve been saving all your scraps for! Use them up and layer them on.
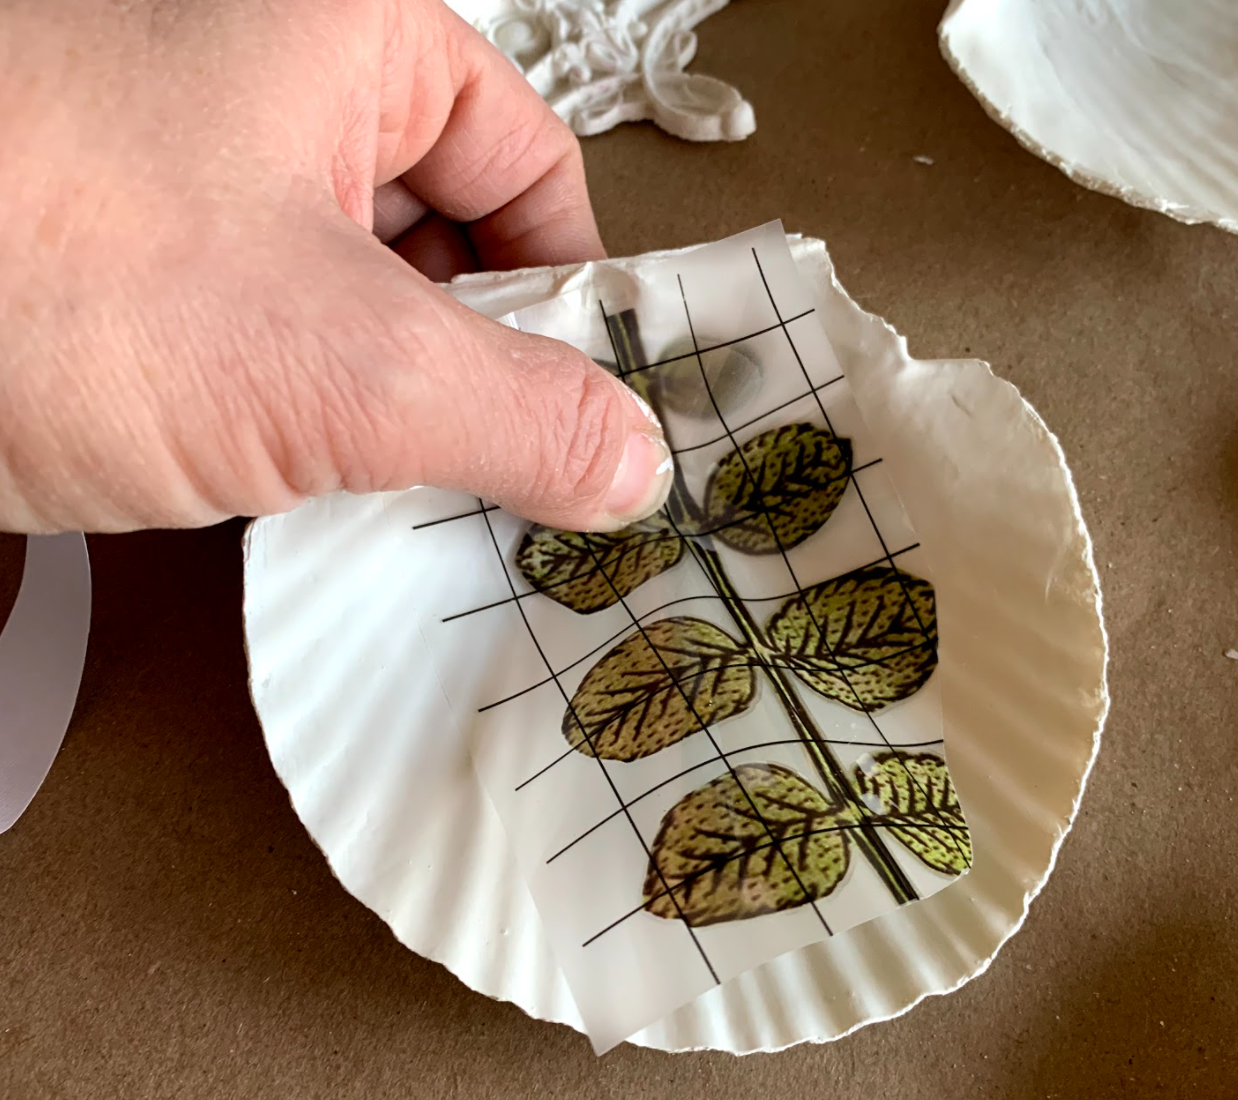
A small popsicle stick or end of an artist’s brush can help you rub on the transfer in any tight spaces where the provided tool is too big. Make sure the transfer has good contact with the shell.
Step 7: Burnish and seal
Use the transfer backing to burnish the transfer, then seal the transfer using an acrylic sealer or top coat.

Step 8: Apply Liquid Gold Leaf to the high points of the castings and around the shell edges
Apply the Liquid Gold Leaf using the flat side of the artist’s brush. Since the Liquid Gold Leaf is oil-based it needs to be the final step. Now let your trinket trays dry thoroughly before use (or before giving them as gifts!).

If you’re looking for a more coastal vibe for your trinket trays, check out this tutorial by IOD stockist Goodson Vintage Treasures in Lincolnton, NC using the Sea Sisters Mould and Painterly Floral Transfers.
What did you think of this tutorial? Please let us know in the comments below.
If you enjoyed this post, you might also like:


 ×
×
popular
- From Ugly Duckling to Gorgeous | Black Dresser Makeover with IOD Marché des Fleurs
- 5 Creative Ways to Use One Decorative Stamp
- Turn Thrifted Finds into Charming Garden-Inspired Decor with a DIY Jadeite Finish
- Little Lark Paint Inlay Projects: Vintage Teapot & Canvas Wall Art with IOD
- Furniture Makeover Inspiration: 4 Stunning Transformations with IOD's Summer Collection