Oh, the Things You Can Make with Your IOD Crockery Stamp!
We’re serving up some inspiring ways you can use your IOD Crockery stamp this week. Think English advertising pots, DIY candle labels, stamped cookies and more!
No time to read now? Pin this post for later.
What is the IOD Crockery Decor Stamp and how can I get one?
So glad you asked! This decor stamp has 13 different British-inspired label designs in various shapes and sizes which makes the creative possibilities endless. They can be used in all kinds of crafting and DIY home decor projects.

To get a Crockery Decor Stamp, click here to find the IOD stockist nearest you.
What kind of craft and decor projects can I do with the IOD Crockery Stamp?
The better question is what CAN’T you do with this decor stamp? In this post, you’ll learn how to make your own English advertising pots, DIY candle labels, and vintage milk bottles. You could also use it to make coasters, serving trays, and adorable flower pots… AND gorgeous cookies (yes, IOD stamps are food-safe).
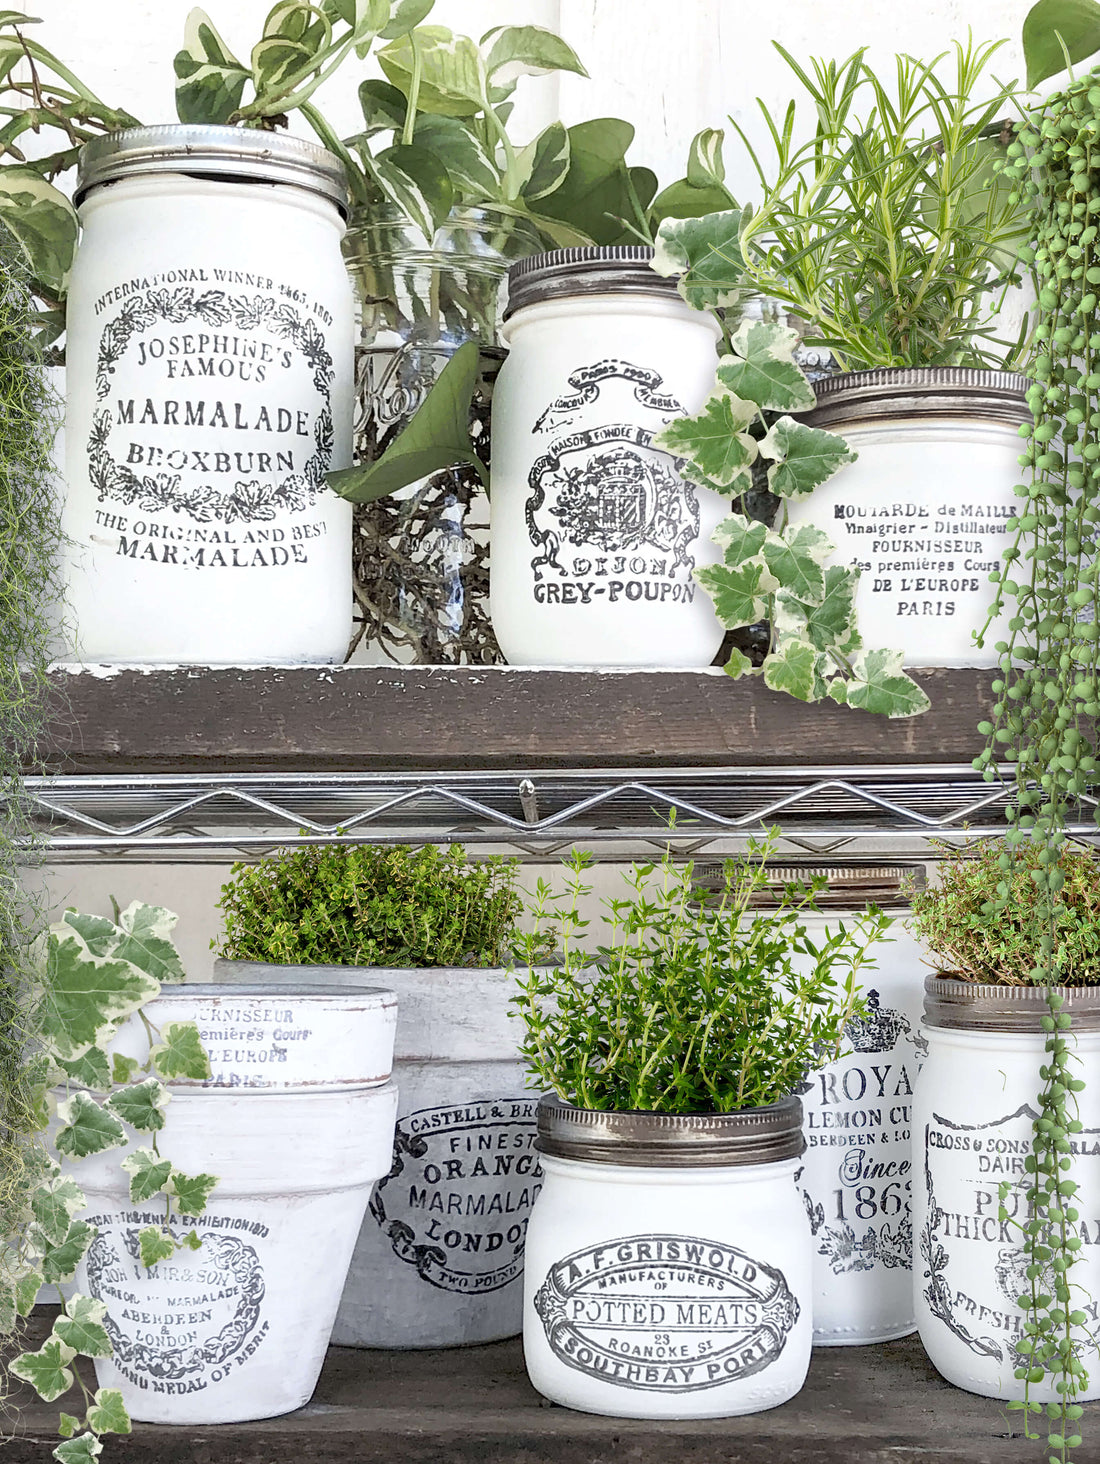
Make Your Own Old English Advertising Pots with Upcycled or Thrifted Finds
We love all things old and vintage, but sometimes real deal antiques are expensive. That’s why we like to make our own and you can too!
All you need are some clean, empty food containers or junky thrift store dishware. You can even use these techniques to makeover some of your existing kitchenware, like mugs or ramekins.
There are two ways to go about making your own English advertising pots and we’re going to share both. The first is stamping with ink and the second is using the stamp to create an impression in air dry clay.
Stamping with Ink
In this first technique, you’ll get finished pieces that have a smooth and refined finish because you’re stamping directly onto the project surface.

To make these pots, you use two different IOD stamps, the Crockery stamp and the Craquelure stamp, IOD ink in black and some antiquing paint techniques to create that authentic, aged look.
Follow along in the video below with Lynne from Ellen J. Goods of Medina, NY, as she shows you step-by-step how to get the look of antique English advertising pots without the price tag.
Stamping on Air Dry Clay to Create an Impression
This technique gives more of a handmade, homestead feel to your DIY crockery and the details of the stamps are revealed through antiquing techniques.

To get this look, roll out a small piece of IOD air dry clay and glue it to the outside of your container. Then use the Crockery stamp to make an impression in the clay.
After allowing it to dry, you paint and use antiquing techniques to highlight all the nooks and crannies, which gives your piece an authentic, old-world look.
For a complete step-by-step video tutorial on this technique, check out the video below by Clara from The Painted Sisters of Cary, NC.
DIY Candle Labels
Whether you make your own candles or you just want to add a personal touch to the ones you bought at the store, these DIY candle labels are where it’s at.

Wouldn’t these make a lovely housewarming gift?
This project is perfect for a beginner and it uses only a few supplies. All you need to DIY candle labels is paper, twine, black IOD ink and ink pad, and the Crockery stamps.
Lucky for us, Clara from The Painted Sisters made a short video tutorial so you can follow her step-by-step below.
DIY Faux Relic in a Shadowbox

It’s easy to create something that looks like it was passed down from generation to generation with this DIY project. Check out the complete tutorial by the IOD Sisters here.
Decoupage Your Crockery Stamp on Glass
Have you joined our Creative Tribe on Facebook yet? If not – hustle on over there. Ideas and IOD project inspiration abound along with support and encouragement!
Here’s one of our favorite ideas using the Crockery stamps from group member Rosie Rook. In her recent post, she shares how to make these vintage milk bottles using a decoupage technique and the Crockery stamps.

First, she pours antique white paint inside the bottles and swirls. Then she dries them upside down and, with a wet finger, wipes any excess paint from the top rim so they look like full milk bottles.
Rosie stamps gift wrapping tissue paper with black IOD ink and one of the Crockery stamps.
After letting the stamped image fully dry for 24 hours, she covers the image with a non-wax parchment paper and ironed it to set the ink. This step prevents the ink from bleeding when applying the decoupage medium.

After removing the parchment paper, she cuts out the stamped image.
Using a water-based topcoat as a base glue, she lightly paints the glass milk bottle surface. Without letting the topcoat dry, Rosie places the cutout stamped tissue paper on the milk bottle, positioning it and carefully smoothing it out.
After this step, she waits another 24 hours to let everything dry completely. Then she applies another two coats of the topcoat to seal the image.
But wait, here are some more Crockery stamp ideas!
Easy cookie decoration for beginners with stamps

Here’s a tutorial on how to stamp royal icing cookies with the Crockery Stamp, but you can also use it on fondant and in other sugar arts.
You can also mix it up with Crockery stamps and IOD transfer pieces to make wall art. Here’s a link to the video tutorial by Lynne from Ellen J. Goods.

Some more pictures of IOD Crockery stamp projects to get your creative juices flowing…


Along with the Crockery decor stamp, IOD recently released five other new stamp designs – from butterflies and florals to bohemian trim. Check out all the new designs by clicking here.
Here are some other stamp projects you might enjoy:


