DIY Nursery Decor: Dream Big Dresser Makeover with IOD Moulds
Exciting news! Josie is a soon-to-be grandma (again!) 👶 😮 🥳 … AND she’s helping her daughter DIY nursery decor – including this beautiful dresser with the latest addition to our product collection – LETTER MOULDS!

No time now? Pin this post for later.
New IOD Moulds – Uppercase and Lowercase Letters!
In case you missed it, we snuck in the release of two new mould designs at the end of December. They’re called Harper and Victoria – and you’re gonna find them indispensable!

The IOD Harper Mould features a dimensional typeset font with all the lowercase letters for the English alphabet. All IOD Moulds are made of high-quality, food-grade silicone and feature a raised micro rim for a clean cast edge.

The Victoria Mould features dimensional nature-inspired uppercase English letters. It uses a classic typeset shape overlaid with woodland vines. You might notice that the IOD letter moulds are thinner than our other moulds. This enables for an easier release of your casting as the letters are more delicate in shape than our other designs.
Watch the video below or keep reading to learn how to DIY nursery decor with this sweet dresser makeover.
Supply list for DIY nursery decor project
All IOD products can be purchased from an approved stockist. To find a shop local to you, click here. To find an online store, click here.
(This post contains affiliate links.)
- Thrifted dresser, ideally with a plain front
- He Loves Me Mould by IOD
- Birdsong Mould by IOD
- Heirloom Roses Mould by IOD
- Monarch Mould by IOD
- Harper Mould by IOD (the star of this show – our newest letter mould!)
- IOD Air Dry Clay
- Tite Bond Quick and Thick Glue
- Cornstarch
- Putty knife for cutting along a drawer front and dresser frame, optional for smoothing the backs of the castings
- Soft-bristled paintbrush if painting before clay has fully dried, or regular paintbrush
- Your favorite chalk or mineral-type paint in pale pink
- Your favorite chalk or mineral-type paint in red or pink to make the glaze
- Mixing cup and water to make the glaze
- Lint-free shop cloth
- Optional: Plastic cup and applicator for glue
- Decorative drawer pulls
STEP-BY-STEP Nursery Dresser Makeover
STEP 1: Create your flowers, birds, butterflies and vines castings
Note: If this is your first time using IOD products, click here to check out this post on how to use IOD Moulds.
We used the Heirloom Roses, He Loves Me, Birdsong, and Monarch Moulds to create flowers, birds, and butterflies on our nursery dresser. If you’re DIY nursery decor for a baby boy, then you might want to consider some of our other mould designs.

The most efficient way to do this project is to make all your casting first. Here are the basic steps:
- Dust the mould cavity with cornstarch and tap out any excess powder
- Roll a ball of clay in the approximate size you need for a particular casting; For the vines, roll the clay into a rope shape
- Push the clay into the cavity and use your thumbs to push out any excess, using the micro rim to get a clean edge; you can also use a putty knife to scrape the excess clay and smooth the back
- Flip the mould over and fold it back to release the casting on your work surface
NOTE: Because we recorded this video live, most of the castings were batch created ahead of time. This allowed us to layout the collage design before gluing them on. We used nature to inspire our arrangement and collage of IOD air dry clay castings.
STEP 2: Arrange and glue the castings onto the thrifted dresser
Arrange your castings as you like, thinking about negative space and what draws the eyes. After you find a layout you like, apply glue to the backside of the castings and adhere them to the dresser and drawer fronts.
Be sure to apply an even coat of glue along the back of the casting – all the way to the edges.

Lay the casting back down where you want it and apply gentle, even pressure to make sure it has good contact with the wood. Repeat this process until all your castings are glued down.
Wipe away any excess glue with your finger or a small brush.
For faster gluing when you have a lot of castings, pour the glue into a small disposable plastic cup and dip your applicator in to get it on more castings quickly.
When castings go across a seam of the drawer and dresser frame, you’ll need to be “cut” at the seam after gluing. This is easier to do with a wet casting – so cast these designs last – just before gluing.
After adhering the casting to the wood – over the drawer edges, use a putty knife to go through the casting at the seam of the drawer for a clean cut.

STEP 3: Create the letter castings and glue them down
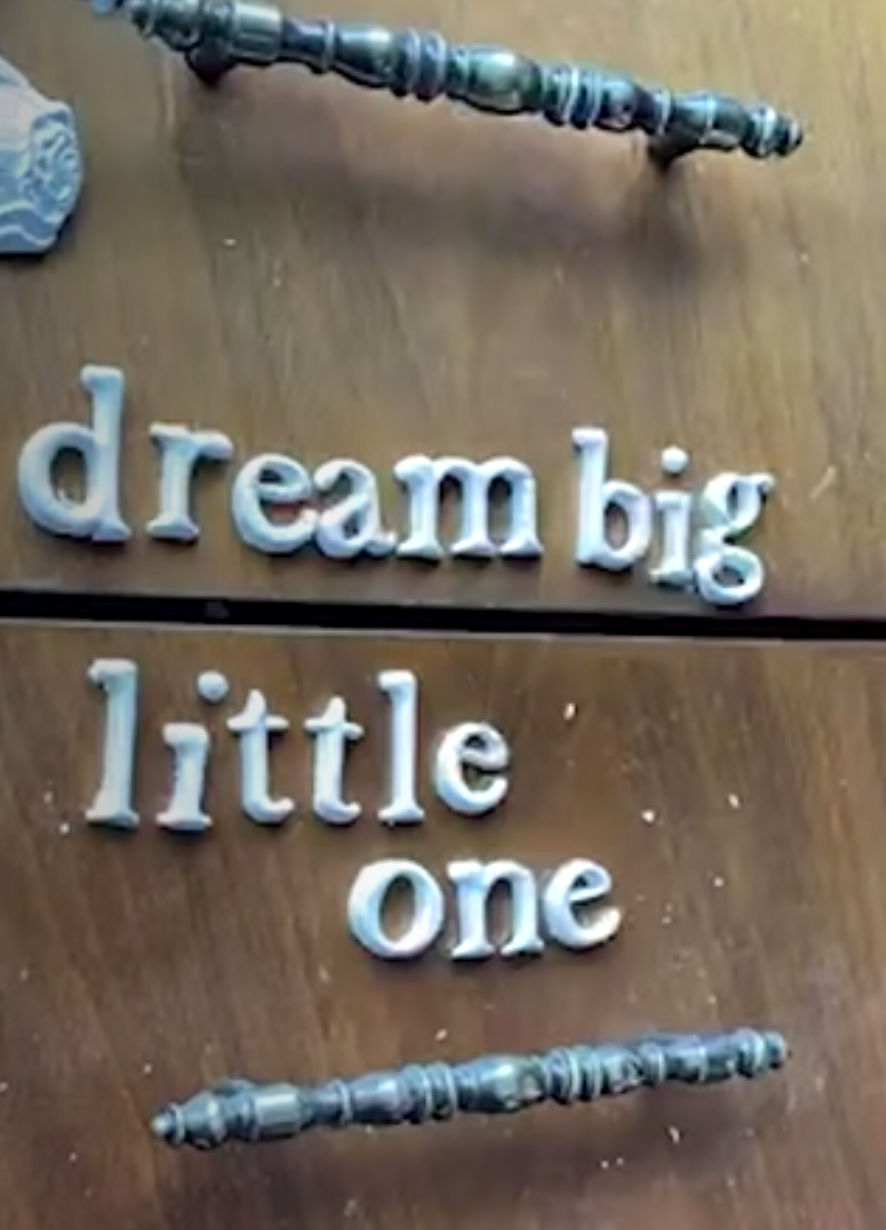
We added the sweet saying “Dream Big Little One” to our nursery dresser using the new IOD Harper Mould. You can choose whatever quote speaks to you. The details on this mould are sophisticated with an edge and a plateau detail on each letter.
Use the same process as above to create your letter castings.

There are so many design options for placing the words onto the dresser. We chose a slightly catty-whampish layout because we didn’t want the letters lining up linearly. It was the perfect complement to our nature-inspired collage design.
As you do your arrangement, keep in mind where you want to put your hardware. Make sure it works with your design. (We ended up choosing different hardware because we didn’t like the look of these pulls.)
Another option would be adding the letters and words in a curved line that runs vertically next to the collage-design. Or weave a stem in, through, and around the edge of the collage, and use that as the “line” where your letters are glued along. This is where you lean into creativity!
STEP 4: Paint the nursery dresser
If you have the time, allow the air dry clay castings to harden completely and the glue to cure. This will give you the best results.
If you don’t have time, wait at least 15 minutes for the clay to form a crust, which will help preserve the design details when you paint. Angling a fan on your design will help speed up this process.
Before painting, make sure to clean up any miscellaneous bits of clay, cornstarch, or dust.
We used a very soft chip brush to begin applying the first coat of pale pink chalk/mineral paint. Using a soft brush is super important when the castings aren’t completely dry – as was the case for us.
Apply the paint liberally and use a cross-hatch or irregular stroke pattern to create texture. Make sure to push the paint into all the nooks and crannies of your castings, but don’t push too hard if your working with wet castings, as we did.
After coating the entire dresser with the pale pink paint, let it dry. Then go back over the drawers with another coat of the same color.
Once those first two coats of paint are dry, we brushed a deeper pink paint to the collage and dresser drawers.
Then we wiped away the darker pink with a damp, lint-free shop cloth to let the pale pink show through.
Keep wiping and work at it until you’re happy with the effect.

Our final step was to add the cutest little pink flower knobs for our nursery dresser! And we’re ready for the new baby!
If you like this post, you’ll also enjoy learning how to mix casting and stamping to make a beautiful composition in this post.
For more dresser makeover inspiration, check out these posts:
popular
- Back to the Basics with IOD Gilded Transfers: Guide, Tips & Tutorials
- Back to the Basics with IOD Paint Inlays: Guide, Tips & Tutorials
- One Paint Inlay. A whole spring tablescape.
- Back to the Basics with IOD Transfers: Guide, Tips & Tutorials
- Cluttered Craft Space? Try This Pretty Winebox Storage Idea


