How to Paint Flowers: Easy DIY Decor Hack Using IOD Stamps
Have you always dreamed of learning how to paint flowers but felt *a little* intimidated? Ok – maybe a lot but get ready to check your worries at the door! Learn the easiest way to paint flowers with this tutorial and the new fresh florals stamps by IOD. (Hello, Peonies and Chrysanthemums!)
No time now? Pin this post for later.

See how IOD stockist Jami and her hubby Zeb from Jami Ray Vintage makeover a thrift store dresser into a one-of-a-kind vintage floral wardrobe in the video below. Or keep scrolling for a supply list and step-by-step instructions.
Here is what you’ll need to ‘grow’ the easiest hand-painted flowers on furniture.
All IOD products can be purchased from an approved stockist. To find your local retailer, click here.
(This post contains affiliate links.)
- Peonies Stamp by IOD
- Decor Ink by IOD in Mixing White and Black
- Thin mount with gridlines by IOD
- Piece of old or thrift store furniture you want to makeover
- High-quality decor paint (Jami used a cobalt blue milk paint mixed with a bonding agent – ask your local IOD stockist for a specific brand and color recommendation)
- Paint for the flowers – complementary colors of your choice
- Paintbrush (to paint the furniture)
- Artist quality paintbrushes (to fill in the flowers and leaves)
- Sander with 220 grit sandpaper
- High-quality sealer (Jami used White Oil Wax Sealer)
- Lint-free shop cloth
IOD Peonies Stamps: The easiest way to paint flowers on furniture makeovers and in DIY home decor
PREP YOUR FURNITURE PIECE
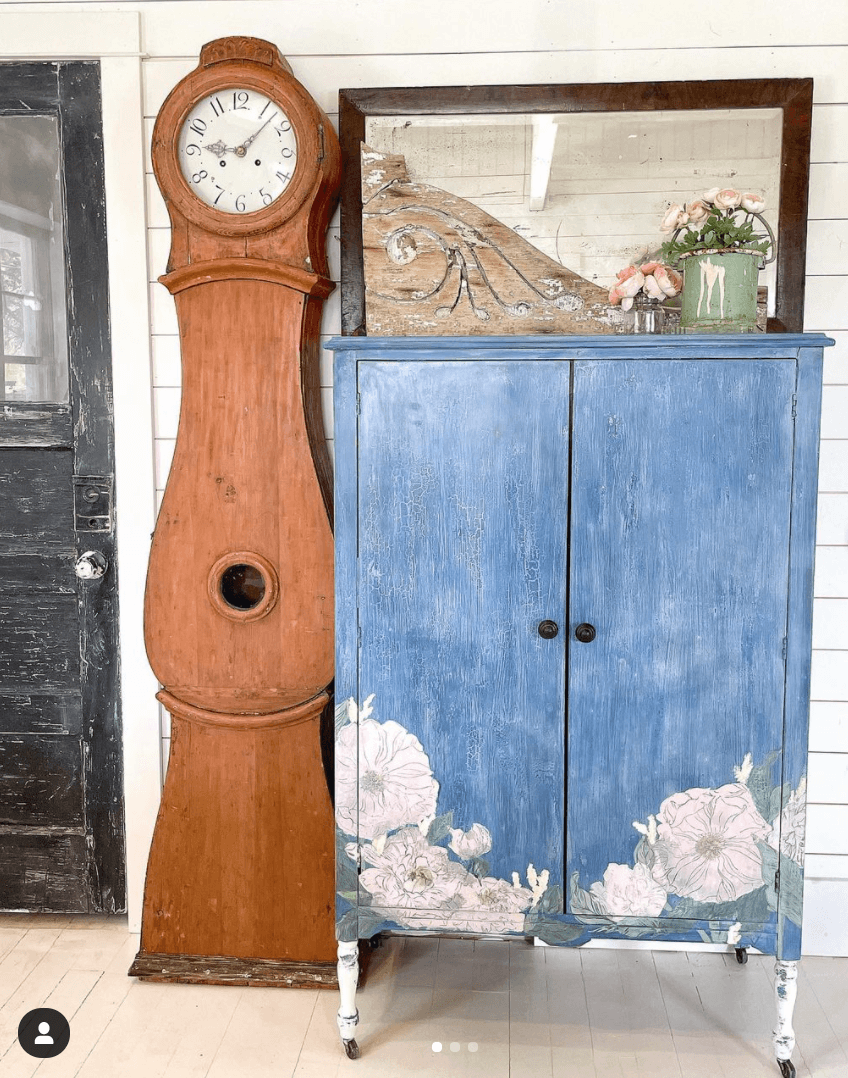
Jami cleaned her thrifted wood wardrobe with soap and water then covered it with two coats of milk paint mixed with bonding agent. The furniture piece she was working on was shiny and oily so the bond helped prevent the milk paint from chipping too much.

DISTRESS TO GET A WORN, SHABBY CHIC LOOK
Once both coats of paint are completely dry, use a sander to create an old, vintage look.

PREP YOUR NEW IOD STAMPS
Every new set of IOD stamps needs to be conditioned before use. After you open the package, remove the plastic layer that covers the stamps. Use a worn, fine grit sand paper on the textured side of your stamp to give your stamp some “tooth” for the ink to stick to. This step needs to be done just once, the first time you use the stamp. Is your first time using IOD Stamps and Decor Ink? Check out Stamping Basics.


PLANT THE PEONIES STAMPS USING WHITE INK
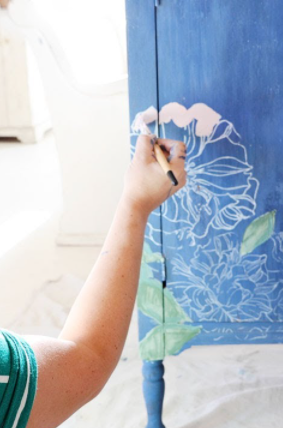
Jami stamped with IOD Mixing White Decor Ink first to create a pattern of leaves and flowers. This created something similar to a coloring book or “paint-by-number” outline for her handpainted flowers.


COLOR IN THE STAMPED FLOWERS
Using an artist brush, to fill in the leaves and flowers with color. It doesn’t need to be perfect! This technique is very forgiving – it leaves a lot of room to get creative and for you to have a few “oopsies” along the way!


BRING BACK THE PAINTED FLOWER DETAILS WITH BLACK INK
Using IOD Black Decor Ink, stamp over your painted flowers using the same stamping design and patterns as you did the first time around with the white ink. DO NOT do this all at the same time, as you’ll want to “mask” different parts of your design as you go along. (More on this in a second.)

What’s “masking” and why does a stamp need a decor mask?
All IOD Decor stamps come with a reusable decor mask. This is a piece of flexible plastic cut precisely to match your stamped images. The mask covers up the stamped image you want to appear in the foreground while you add stamped images to the background. It creates a layering effect and perception of depth without muddying your design. (It’s a little hard to see in the picture because the mask is clear, but Jami taped it down over the painted flower on left while she stamped the leaves. On the right is after she lifted the decor mask off – see how the leaves look like they are behind the blossom?)


PRO TIP: Once you decide on your layout, mount the stamps on an IOD Thin Mount with gridlines. This will help ensure you have a matching pattern when you stamp over the painted outline of flowers with black decor ink. No guessing at how you placed the stamps!
SAND BACK YOUR PAINTED FLOWERS AND SEAL
Use 220 grit sandpaper with a hand sander then wipe away the dust. This Brush on white oil wax sealer, let it sit for about 5 minutes or so, then wipe it down with a shop cloth.


Jami went back in once the oil wax was dry and planted more flowers on the piece, including some free handed pretty yellow flowers. The results are stunning!
Ready to paint flowers on all your DIY home decor projects? We want to see! Post a pic on social media or leave a comment to let us know what you’ve created.
Check out these posts for more DIY inspiration.


 ×
×
popular
- Thrifted Stool + Lamp Makeover with the IOD Fern Fables Transfer
- How to Apply IOD Athenaeum Gilded Transfer to Colored Glass Bottles
- From Ugly Duckling to Gorgeous | Black Dresser Makeover with IOD Marché des Fleurs
- 5 Creative Ways to Use One Decorative Stamp
- Turn Thrifted Finds into Charming Garden-Inspired Decor with a DIY Jadeite Finish