How to Salvage Vintage Furniture with Easy, Elegant Texture
Nothing is more disappointing than finding a gorgeous piece of furniture with good bones – only to discover it also has chips, dings, or damaged wood veneer. Fear not, dear maker! You can still salvage that vintage furniture with this trick.
No time now? Pin this post for later.

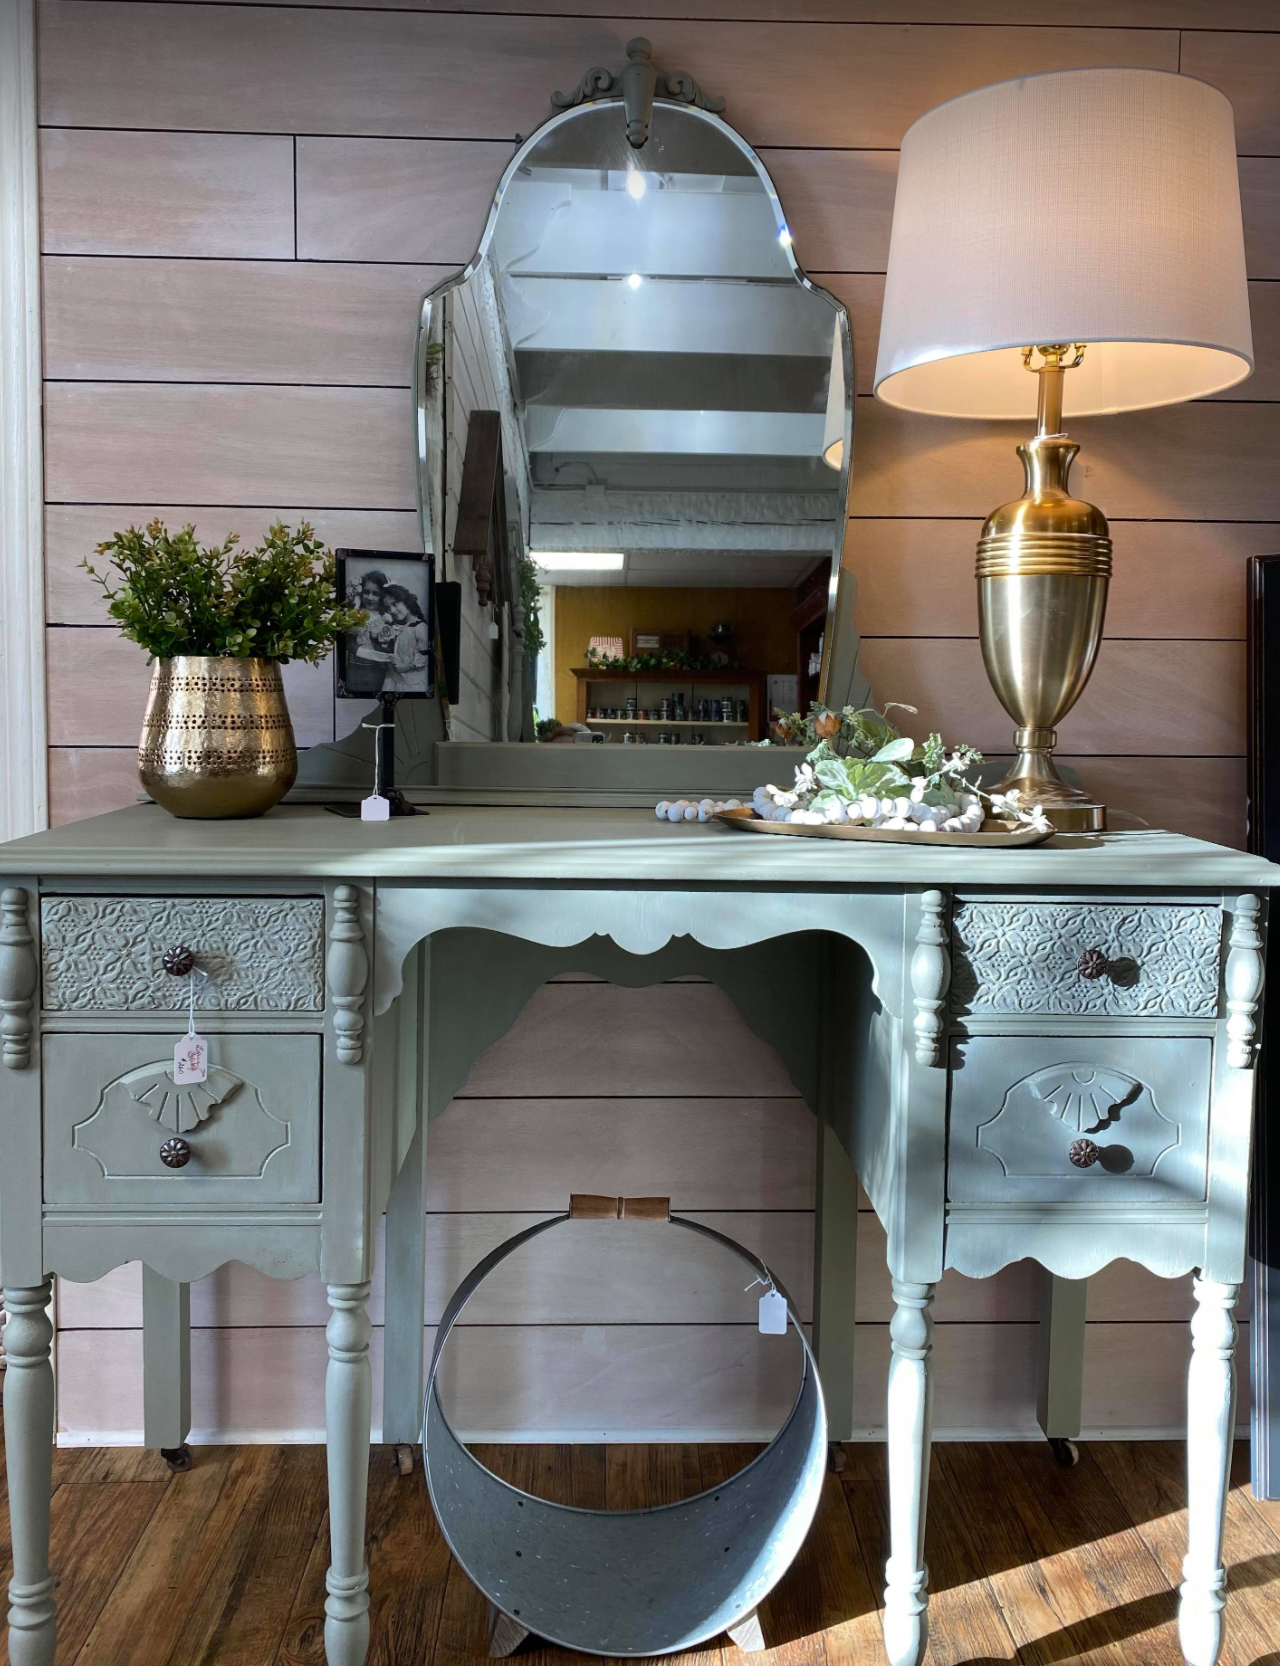
Nicked-Up Vanity to Knockout: How to salvage vintage furniture
IOD stockist Jenny, from Wirthy Treasures in Geneseo, IL taught us a fabulous trick for hiding damaged furniture surfaces. (And, the results are just so pretty that you might even want to do it on mint condition furniture pieces as well!)
Inspired by the stamp impressed technique in troweled paint seen in this video, she used paint mixed with powdered putty. This mixture allowed her to build up a thick enough base to hide any blemishes or damage on her Victorian vanity.
Watch the step-by-step video tutorial below. Or, if you prefer to read, keep scrolling for a supply list and step-by-step instructions.
HERE’S EVERYTHING YOU NEED TO Salvage Vintage Furniture & add beautiful texture
All IOD products can be purchased from an approved stockist. To find a shop local to you, click here. To find an online store, click here.
(This post contains affiliate links.)
- Bohemia Stamp by IOD
- Wallflower Transfer by IOD (optional for sides of drawers)
- Furniture piece
- Your favorite furniture paint (ask your stockist for recommendations)
- Paintbrush
- Powdered Putty
- Wide craft stick
- Wide putty knife
- Sandpaper or sanding block
- Water-based polyurethane sealer
How to Hide Damaged Wood on Painted Furniture
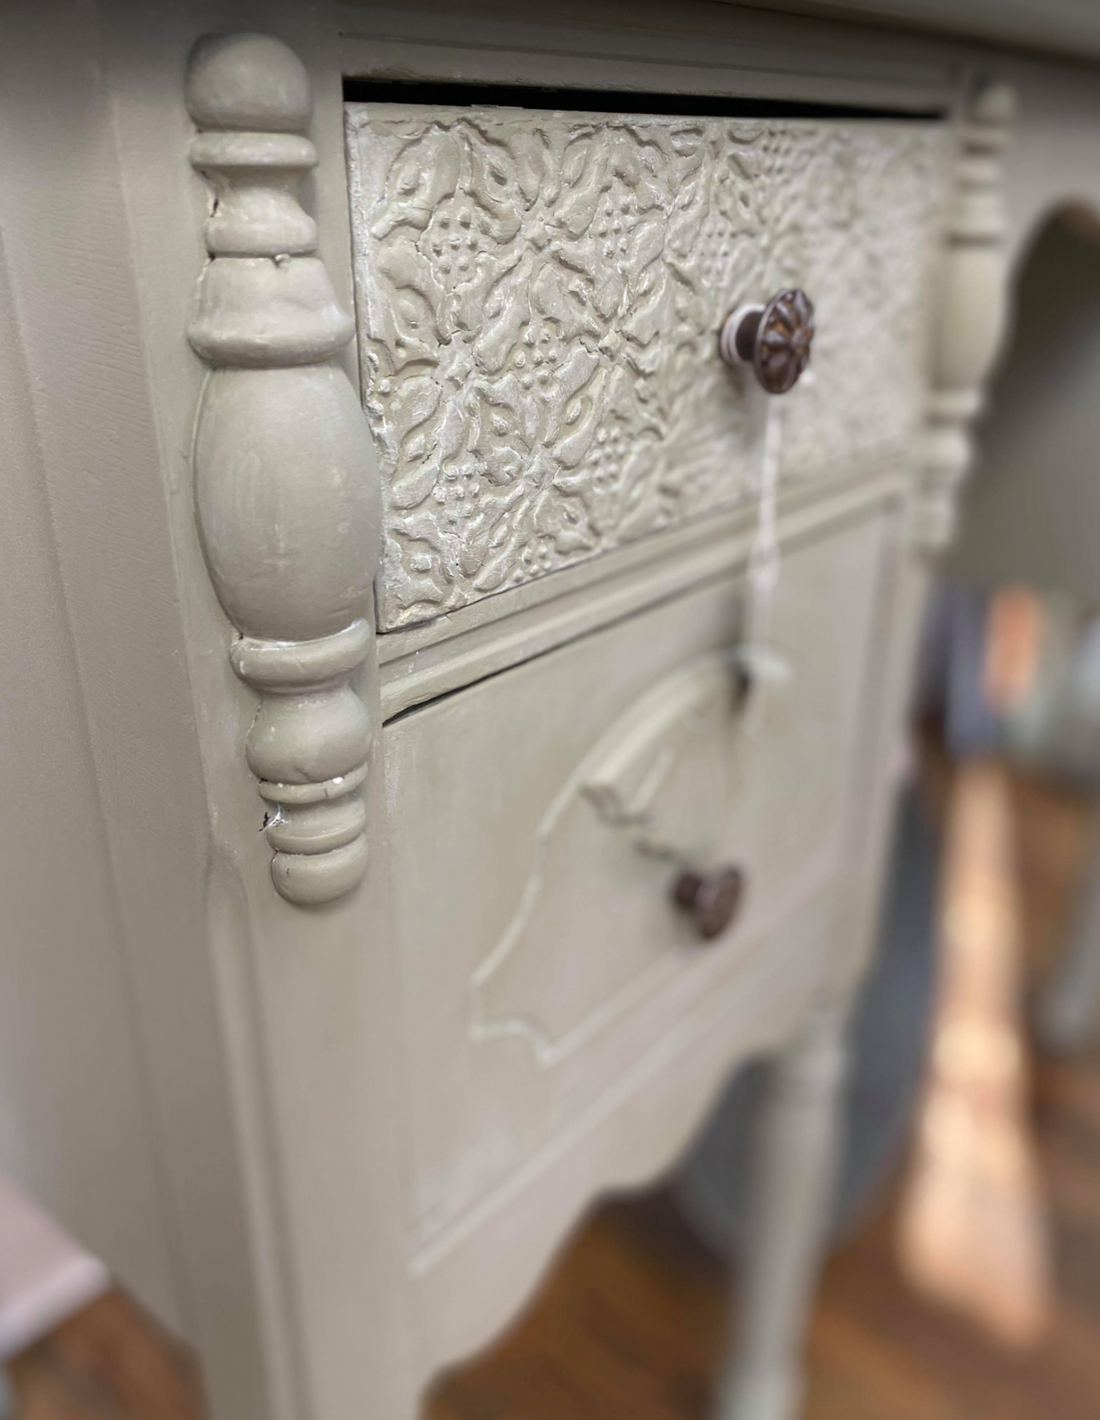
Jenny started with a drawer that had dings, nicks, and bubbles in the wood veneer. She decided to remove the veneer completely and was left with an uneven, rough surface.
Instead of sanding, she decided she wanted to create a beautiful texture while at the same time covering up the damage to the vintage drawer fronts. She began by cleaning and painting the piece.
Step 1: Choose which IOD Stamp you want to use based on the style of your vintage furniture piece or your home decor style
Jenny decided to use one of the patterns from the IOD Bohemia Stamp set because over the surface of the drawer, is easy to match the pattern up, and the design takes up a lot of space so those imperfections underneath are well hidden.

Is this your first time using IOD Stamps? Check out this tutorial to learn about how to prep, use and care for your stamps.
STEP 2: Mix equal parts water and powdered putty
You’re aiming for a paste consistency similar to spackle. If needed, you can add more putty powder, a little at a time, to get the consistency just right. Keep mixing until the putty is smooth.

TIP: A splash of vinegar will give you more time to work with the putty before it starts to set up – called “open time.” Jenny didn’t do this for her project because she had her stamps ready to go.

STEP 3: Spread the putty onto your salvaged vintage furniture piece
Just like frosting a cake! The putty should be evenly applied so you can get a clear stamped impression over the entire piece. The edges should be just as thick as the center. Scrape any excess putty off the sides of the drawer.

Slide the wide putty knife over the surface of the putty to give it a smooth finish. Use barely any pressure – just enough to even out the surface.

And don’t worry if it’s not perfectly smooth – the design details of the IOD stamps are very forgiving!
STEP 4: Allow the putty to dry (or set-up) enough to have a crust
You can just wait, but Jenny found it helpful to put the drawer in front of a fan. This accelerated the crusting while the putty underneath remained impressionable.
STEP 5: Time to get out your IOD stamps!
Hover your stamp over where you want it and then press it down into the putty with even pressure. Commit and don’t shift (and if you do, don’t worry because you can always smooth the putty out and try again!) 😀
It helps to use one hand to stabilize the stamp while running your fingers along the back of the design details. Just be careful not to press too hard, as you don’t want to push all the way through the putty.

Turn the stamp, line up the design, then press down again to cover the remaining part of the drawer.
After you’re happy with the texture on your drawer front, let the putty dry thoroughly based on the package direction before painting.
STEP 6: Paint and wax as you like to pop the highlights of the stamped impression
Jenny mentioned she might use white wax to highlight and create depth on the design. Another option would be to do a color wash and seal – check out this tutorial to learn how to create this look.
BONUS – Follow these steps if you want to add a fun surprise with “peek-a-boo” transfers or stamps!
No need to buy a transfer to create this look, but you’ll be amazed at how many projects you can get out of one IOD transfer pad!

If this is your first time using IOD transfers, check out these tips.
And if transfers aren’t your style, you can also use IOD Stamps on the sides of the drawer (check out this little viddy).
Here’s where Jenny finished her Live video tutorial.

But as you see in the finished piece, she painted, sealed and added knobs to match. How beautiful is this?
If you’d like to add some peek-a-boo details to the sides of the wooden drawers…
BONUS STEP 1: Paint the sides and top ridge of the drawers and seal
Jenny added two coats of paint then a matte water based polyurethane. The drawer should have plenty of room to slide because if it fits too snug in the opening, the paint and your beautiful transfer will rub off over time. Sanding down the sides of the drawer before painting can give you some extra room.
BONUS STEP 2: Pick your transfer or stamp and decide how you want it to look
The gridlines on the transfer are great for this! Jenny used the grid to line up the transfer with the top of the drawer, then folded the transfer at the bottom of the drawer to create a guide for the area that will be trimmed off.
Give yourself some wiggle room near the edge of your crease as you trim your transfer. This will ensure you have full coverage on your painted furniture piece.
BONUS STEP 3: Rub on the transfer (or stamp) the sides of the drawer
After you trim off the excess transfer, remove the backing and rub the transfer a couple of times with your hand to get it started, then use the application tool.

If any of the transfer peeks over the side of the drawer, use some sandpaper to sand it off so that it doesn’t catch when the drawer is closed. Burnish the transfer, by rubbing it vigorously with some of the plastic transfer backing.

Cut and apply additional transfers for any areas you’d like filled in.
BONUS STEP 4: Seal the transfer (or stamp impression ) with a coat of high-quality water-based polyurethane sealer
Let it dry completely before putting the drawer back in the dresser.
Have you tried any of the stamp impressed techniques yet? Let us know in the comments below.
 ×
×
popular
- How to Apply IOD Athenaeum Gilded Transfer to Colored Glass Bottles
- From Ugly Duckling to Gorgeous | Black Dresser Makeover with IOD Marché des Fleurs
- 5 Creative Ways to Use One Decorative Stamp
- Turn Thrifted Finds into Charming Garden-Inspired Decor with a DIY Jadeite Finish
- Little Lark Paint Inlay Projects: Vintage Teapot & Canvas Wall Art with IOD