Handmade Holiday Gift Ideas: Mini Gallery of DIY Wall Art
This mini gallery of DIY wall art makes a perfect gift for a grandma, mom, sister or bestie! As usual, you can customize the designs to match the style of whoever you’re making this gift for by using different IOD moulds or stamps.
No time now? Pin this post for later.

Watch the video below to see all the steps in action, or if you want to read through the supply list and instructions, keep scrolling down.
HERE’S EVERYTHING YOU NEED MAKE THIS Mini Gallery of DIY Wall Art
All IOD products can be purchased from an approved stockist. To find a shop local to you, click here. To find an online store, click here.
(This post contains affiliate links.)
- Wood Gallery Blanks by IOD in sizes 8×8, 5×7, and 8×10
- Farmhand Stamp by IOD
- Heirloom Roses Mould by IOD
- Trimmings 1 Mould by IOD
- Air Dry Clay by IOD
- IOD Decor Ink in Black
- Blank Ink Pad by IOD
- Thin mount with gridlines by IOD
- Titebond Quick & Thick Glue
- Cornstarch (optional, for easier release of castings)
- Photo clip
- Spatula
- Your favorite chalk type paint in antique white
- Artists acrylic paint in raw umber (for color wash)
- Large and small paint brushes
- Lint-free shop cloths
- Clear wax of your choice and wax brush (your stockist can recommend a favorite)
- Stinky gold paint (optional to paint the photo clip)
If this is your first time using IOD products, you’ll want to first check out our product basics. Click here to learn more about IOD Stamps and click here for IOD Moulds.
STEP-BY-STEP INSTRUCTIONS FOR A Mini Gallery of DIY Wall Art
STEP 1: Make your castings.
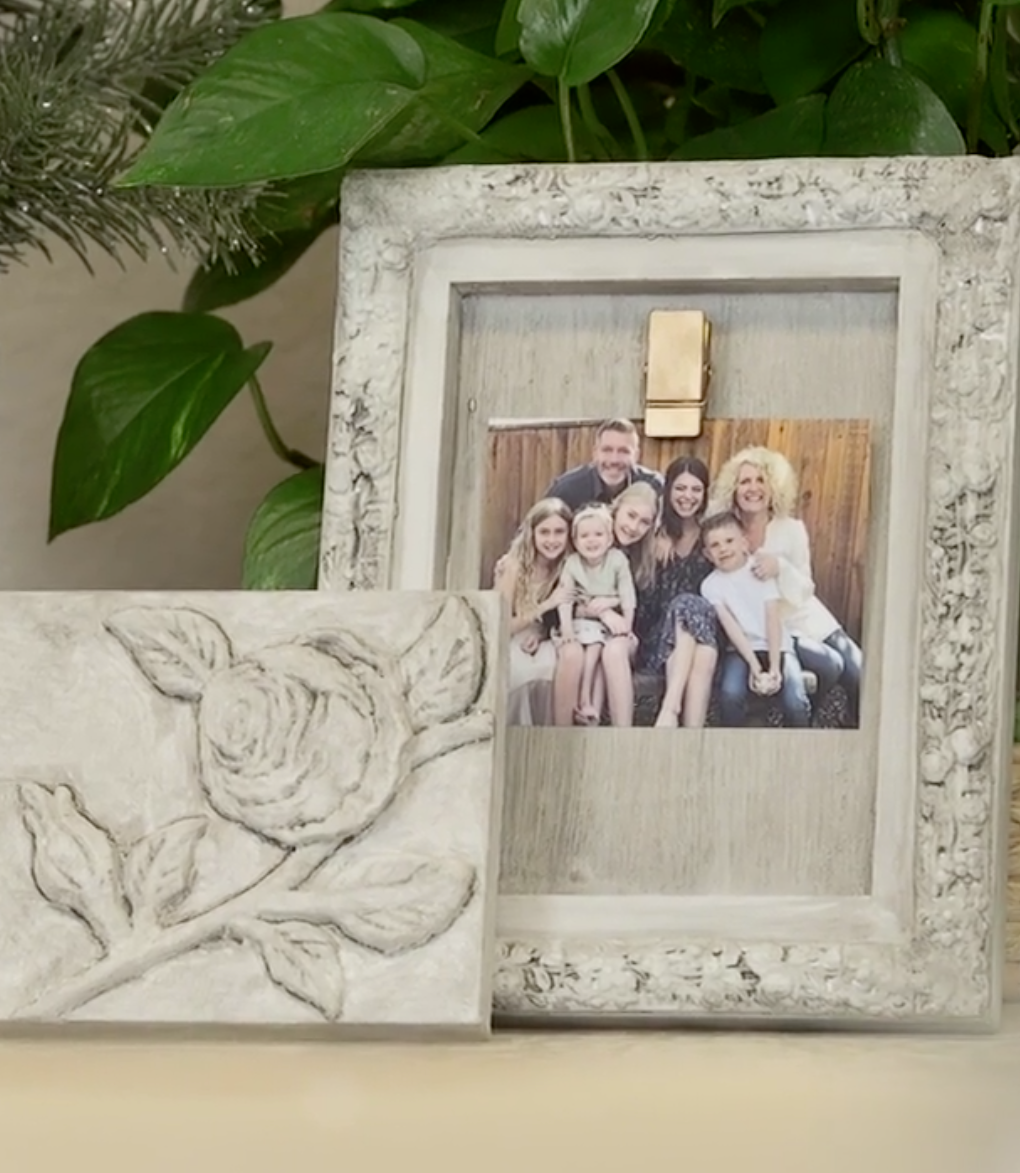
Two pieces of wall art in this mini gallery use IOD moulds – the family photo frame and the dimensional design with roses. We used the Trimmings 1 Mould for the frame and the Heirloom Roses Mould for the dimensional art.
The most efficient way to do this project is to make all your casting first. Here are the basic steps:
- Dust the mould cavity with cornstarch and tap out any excess
- For the trimmings, roll a rope of clay of the approximate size you need; for the roses, you’ll roll a ball
- Push the clay into the cavity and use your thumbs to push out any excess, using the micro rim to get a clean edge
- Flip the mould over and fold it back to release the casting on your work surface

STEP 2: Arrange and glue your air dry clay casting down.
For the family photo frame, you’ll be using the shadowbox side of the 8×10 gallery blank. Lay the blank flat side down on your work surface so you can easily glue the trim on the shadowbox edge.
Next, arrange the trimming casting around the edge, overlapping the corners. To create a mitered edge, use your spatula to create angled cuts on the trim at the corners of the frame.

Apply an even coat of glue along the back of the casting. Lay it back down where you want it on the shadowbox edge. Apply gentle, even pressure to make sure the casting has good contact with the wood. Repeat this process until all the trim is glued down.
Tip: After gluing all the trimming down, you can use two straight edged tools to align it with with the edge of the frame.

For the dimensional design, you’ll be using the smooth side of the 5×7 gallery. Arrange your castings as you like, thinking about negative space and what draws the eyes.

After you find a layout you like, apply glue to the backside of the castings and adhere them to the gallery blank.

Set these two pieces aside to dry for about 15 minutes at a minimum. This will allow the air dry clay to form a crust. (If you have the time, it’s really best to wait 24 hours before moving on to the next step.)
STEP 3: Paint all the gallery art pieces!
Using a wide brush, generously apply the white chalk or mineral-type paint to all three gallery pieces.

If you like a lot of texture, use a cross-hatch stroke pattern (making an X with the brush). For a smoother look, use long brush strokes. And don’t forget to paint the edges (and smooth out any drips, if you don’t have a sister to do that for you!). 🙂
Get the paint in all the nooks and crannies of the castings. If you only allowed 15 minutes for the air dry clay to cure, make sure to use a soft brush and stroke gently so as not to distort the design.
Let everything dry.
STEP 4: Stamp the quote.
If this is your first time using IOD Stamps, make sure to condition first and also fill your ink pad (see here for more details on how to do both of these things).
Arrange the letters on the 8×8 gallery blank. We decided on “This is us” with the Farmhand alphabet stamp but you can choose whatever quote and font style you like (and that fits on the gallery blank – you can always get a bigger one for a longer quote).

After arranging the letters on the board, press the thin mount on the back to stick on the stamps. Check the gridlines to make sure your aligned on the board and your letters are straight.

Lay the thin mount with the stamps attached design-side up on your work surface. Bring your loaded ink pad to the stamp and pat to load the ink onto the stamps.

Pick up the thin mount and hover it over the painted gallery blank to line up the edges with the gridlines. Then — COMMIT and DON’T SHIFT.
This means, once you lay your stamp down, stabilize it with one hand while you run your fingers over the backs of the letters. You want to get good contact and ink transfer without accidentally moving the stamp and creating a double or ‘halo’ image.

Lift the the thin mount and stamps straight up and let the ink fully dry before moving on to the next step. Twenty-four hours dry time is recommended but you can speed it up by using a heat tool or hair dryer to set the ink faster.
STEP 5: Pop the details in the moulded gallery pieces with a color wash.
We used a light color wash – one part artists acrylic paint in “raw umber” to eight parts water on the two pieces where we used air dry clay castings. If you want a darker or more dramatic look – feel free to play with the proportions of paint to water.
After mixing your color wash, but before you start painting, dampen a lint-free cloth with water and crumple so you’re ready to blot and more the wash quickly after applying.

Liberally apply the color wash one section at a time. As you color wash, go right back in with your damp shop cloth to wipe away and blot the excess wash until you get the tint and texture you like.

Repeat until you’re done glazing both pieces.
Let everything dry.
STEP 6: Lightly apply clear wax to give depth and seal your mini gallery collection of DIY wall art.
BEFORE WAXING – stick your photo clip to improve adhesion. We painted our clip with “stinky gold paint’ because we thought it looked prettier, but again, you can customize however you like.

Lightly work in the clear wax over all the surfaces of your DIY wall art.

Other ideas for this DIY mini gallery gift…
- Add a little love note to the back of your wall art pieces
- Use the clip to hold a “to do” list or use as a recipe board
- Use this idea to build a love one’s gallery by adding to it at each milestone – birthday, Mother’s Day, anniversary…
What handmade gifts are you making this holiday season?
Let us know in the comments below. We’d love to hear all about what beautiful things you’re making.
For more handmade gift ideas, check out the following posts:
 ×
×
popular
- How to Apply IOD Athenaeum Gilded Transfer to Colored Glass Bottles
- From Ugly Duckling to Gorgeous | Black Dresser Makeover with IOD Marché des Fleurs
- 5 Creative Ways to Use One Decorative Stamp
- Turn Thrifted Finds into Charming Garden-Inspired Decor with a DIY Jadeite Finish
- Little Lark Paint Inlay Projects: Vintage Teapot & Canvas Wall Art with IOD