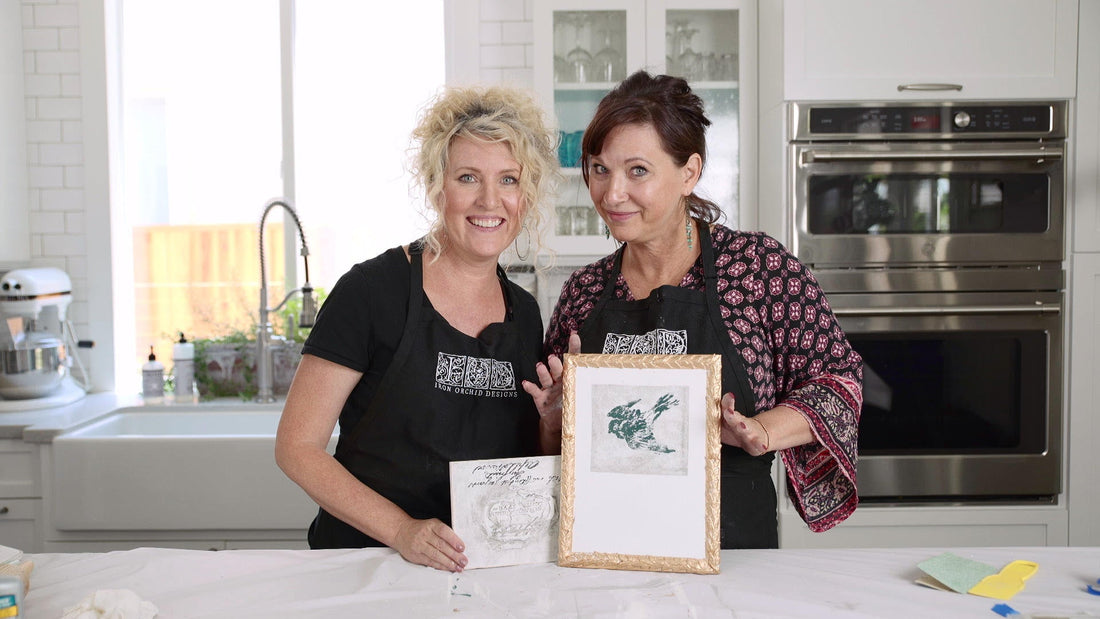
IOD Gallery Wall Episode 6 / Flight and Textured Seal

Josie and I are keeping our eye on the prize and making sure we finish this Gallery Wall series STRONG! Watch episode 6 below!

To start at the beginning of the IOD Gallery Wall Series and get the plywood cut plan for the complete wall, please see this post. Or, if you want to WATCH the complete Gallery Wall Series, click here.

To find your stockists look HERE

This post contains a few affiliate links to help you find the products we use. You’re not charged extra to use any of the links, but the few dollars we make will be used toward creating more IOD video tutorials.

Here is all you’ll need to get started on your next two pieces for your Gallery Wall:

  • 7.4 x 6 1/2″ thick Sande Smooth Plywood Board (Textured Seal)
  • 10 x 8 1/2″ thick Sande Smooth Plywood Board (Flight)
  • IOD Air Dry Clay
  • Laurel Décor Mould
  • Kindest Regards; Birds Branches Blossoms; Queen Bee Décor stamps
  • Titebond Quick and Thick Glue
  • White and Charcoal Grey Chalk Paints
  • Grey Wash (mix water with your charcoal chalk paint in a 2:1 mixture)
  • Coarse Sandpaper
  • Paint Brushes
  • 1” Painter’s Tape
  • Straight Edge
  • Shop Cloth
  • Fine to Medium Sandpaper
  • Clear Wax
  • Wax Brush
  • Hammer
  • Simple Hanger
  • Ruler

Let’s start off with your Flight piece and our Laurel Décor Mould! Take our Air Dry Clay and gently press some into the straight, textured piece on the Laurel Décor Mould. Remove the clay from the mould, and lay in a frame on the edge of our flight piece with a glue to secure. We love using Titebond Quick and Thick glue to secure the air dry clay to wood! Gently smooth the corners of clay for a seamless transition from the Air Dry Clay to the board, and take extra clay and smooth clay into the cracks in your frame. To create a continuous frame between pieces, remove the very end point of the Laurel Mould pieces with a straight edge.

Paint the entire piece, including the Air Dry Clay frame, with a white paint. Once the paint dries (we allow 24 hours to ensure we don’t pull up any paint!), add your painters tape to the inside of the Air Dry Clay frame, laying the tape as close to the clay as possible. Add one strip of tape across the center of your Flight piece, so there are two sections within the frame.

On to your Textured Seal piece! Roll some clay into a ball about the size of an egg, then smooth it out with a rolling pin to about 1/8thickness. Glue to the just above the center of the board with a wood glue, and smooth the edges to the board with a butter knife.

Take the scroll piece from our Queen Bee stamp set and press down into the clay to create an impression. Use a soft brush to add white paint over the clay and across the board, but be gentle when painting over the letters to prevent smudging!

Add water to a dark charcoal chalk paint to create a very watery wash (in a 2:1 mixture). Lightly add the wash over your textured seal piece and to the larger section of your flight piece with a brush, and blot the wash with a damp shop cloth to lighten. Once the wash is dry you can add another layer of wash around the edges of the clay to create a vignette look.

Once the light grey wash on your Flight piece is dry we can stamp! Add a deep blue paint with your brayer to the bird stamp from our Birds, Branches, and Blossoms Décor Stamp set and press the stamp to the grey of the board. Set aside to let dry.

Apply dark charcoal chalk paint with your brayer to sections of your Kindest Regards stamp, and stamp your Seal piece to add a little more dimension.

Add a little gold leaf paint to the laurel frame of your Flight piece. In LOVE with this gold frame!

We have just a few finishing touches left! Sand the edges of your Seal piece for a soft, distressed edge and remove your painter’s tape from your Flight piece. Touch up any paint or wash bleeding with a light sanding or paint.

Add a clear wax coat to seal your pieces and add a nice sheen. Lightly hammer in your simple hangers to the backs of your pieces, and you are all done!

Only two more episodes to go before we FINISH this series, and there’s a big surprise so stick with us! Go make something beautiful!

Here are all the other IOD Gallery Wall tutorials:

IOD Gallery Wall Episode 1

IOD Gallery Wall Episode 2

IOD Gallery Wall Episode 3

IOD Gallery Wall Episode 4

IOD Gallery Wall Episode 5

IOD Gallery Wall Episode 7

IOD Gallery Wall Episode 8

IOD Gallery Wall Episode 9

iod_moulds_gallery_wall

IOD Gallery Wall Episode 6 / Flight and Textured Seal

Josie and I are keeping our eye on the prize and making sure we finish this Gallery Wall series STRONG! Watch episode 6 below!

To start at the beginning of the IOD Gallery Wall Series and get the plywood cut plan for the complete wall, please see this post. Or, if you want to WATCH the complete Gallery Wall Series, click here.

To find your stockists look HERE

This post contains a few affiliate links to help you find the products we use. You’re not charged extra to use any of the links, but the few dollars we make will be used toward creating more IOD video tutorials.

Here is all you’ll need to get started on your next two pieces for your Gallery Wall:

  • 7.4 x 6 1/2″ thick Sande Smooth Plywood Board (Textured Seal)
  • 10 x 8 1/2″ thick Sande Smooth Plywood Board (Flight)
  • IOD Air Dry Clay
  • Laurel Décor Mould
  • Kindest Regards; Birds Branches Blossoms; Queen Bee Décor stamps
  • Titebond Quick and Thick Glue
  • White and Charcoal Grey Chalk Paints
  • Grey Wash (mix water with your charcoal chalk paint in a 2:1 mixture)
  • Coarse Sandpaper
  • Paint Brushes
  • 1” Painter’s Tape
  • Straight Edge
  • Shop Cloth
  • Fine to Medium Sandpaper
  • Clear Wax
  • Wax Brush
  • Hammer
  • Simple Hanger
  • Ruler

Let’s start off with your Flight piece and our Laurel Décor Mould! Take our Air Dry Clay and gently press some into the straight, textured piece on the Laurel Décor Mould. Remove the clay from the mould, and lay in a frame on the edge of our flight piece with a glue to secure. We love using Titebond Quick and Thick glue to secure the air dry clay to wood! Gently smooth the corners of clay for a seamless transition from the Air Dry Clay to the board, and take extra clay and smooth clay into the cracks in your frame. To create a continuous frame between pieces, remove the very end point of the Laurel Mould pieces with a straight edge.

Paint the entire piece, including the Air Dry Clay frame, with a white paint. Once the paint dries (we allow 24 hours to ensure we don’t pull up any paint!), add your painters tape to the inside of the Air Dry Clay frame, laying the tape as close to the clay as possible. Add one strip of tape across the center of your Flight piece, so there are two sections within the frame.

On to your Textured Seal piece! Roll some clay into a ball about the size of an egg, then smooth it out with a rolling pin to about 1/8thickness. Glue to the just above the center of the board with a wood glue, and smooth the edges to the board with a butter knife.

Take the scroll piece from our Queen Bee stamp set and press down into the clay to create an impression. Use a soft brush to add white paint over the clay and across the board, but be gentle when painting over the letters to prevent smudging!

Add water to a dark charcoal chalk paint to create a very watery wash (in a 2:1 mixture). Lightly add the wash over your textured seal piece and to the larger section of your flight piece with a brush, and blot the wash with a damp shop cloth to lighten. Once the wash is dry you can add another layer of wash around the edges of the clay to create a vignette look.

Once the light grey wash on your Flight piece is dry we can stamp! Add a deep blue paint with your brayer to the bird stamp from our Birds, Branches, and Blossoms Décor Stamp set and press the stamp to the grey of the board. Set aside to let dry.

Apply dark charcoal chalk paint with your brayer to sections of your Kindest Regards stamp, and stamp your Seal piece to add a little more dimension.

Add a little gold leaf paint to the laurel frame of your Flight piece. In LOVE with this gold frame!

We have just a few finishing touches left! Sand the edges of your Seal piece for a soft, distressed edge and remove your painter’s tape from your Flight piece. Touch up any paint or wash bleeding with a light sanding or paint.

Add a clear wax coat to seal your pieces and add a nice sheen. Lightly hammer in your simple hangers to the backs of your pieces, and you are all done!

Only two more episodes to go before we FINISH this series, and there’s a big surprise so stick with us! Go make something beautiful!

Here are all the other IOD Gallery Wall tutorials:

IOD Gallery Wall Episode 1

IOD Gallery Wall Episode 2

IOD Gallery Wall Episode 3

IOD Gallery Wall Episode 4

IOD Gallery Wall Episode 5

IOD Gallery Wall Episode 7

IOD Gallery Wall Episode 8

IOD Gallery Wall Episode 9

Back to blog