


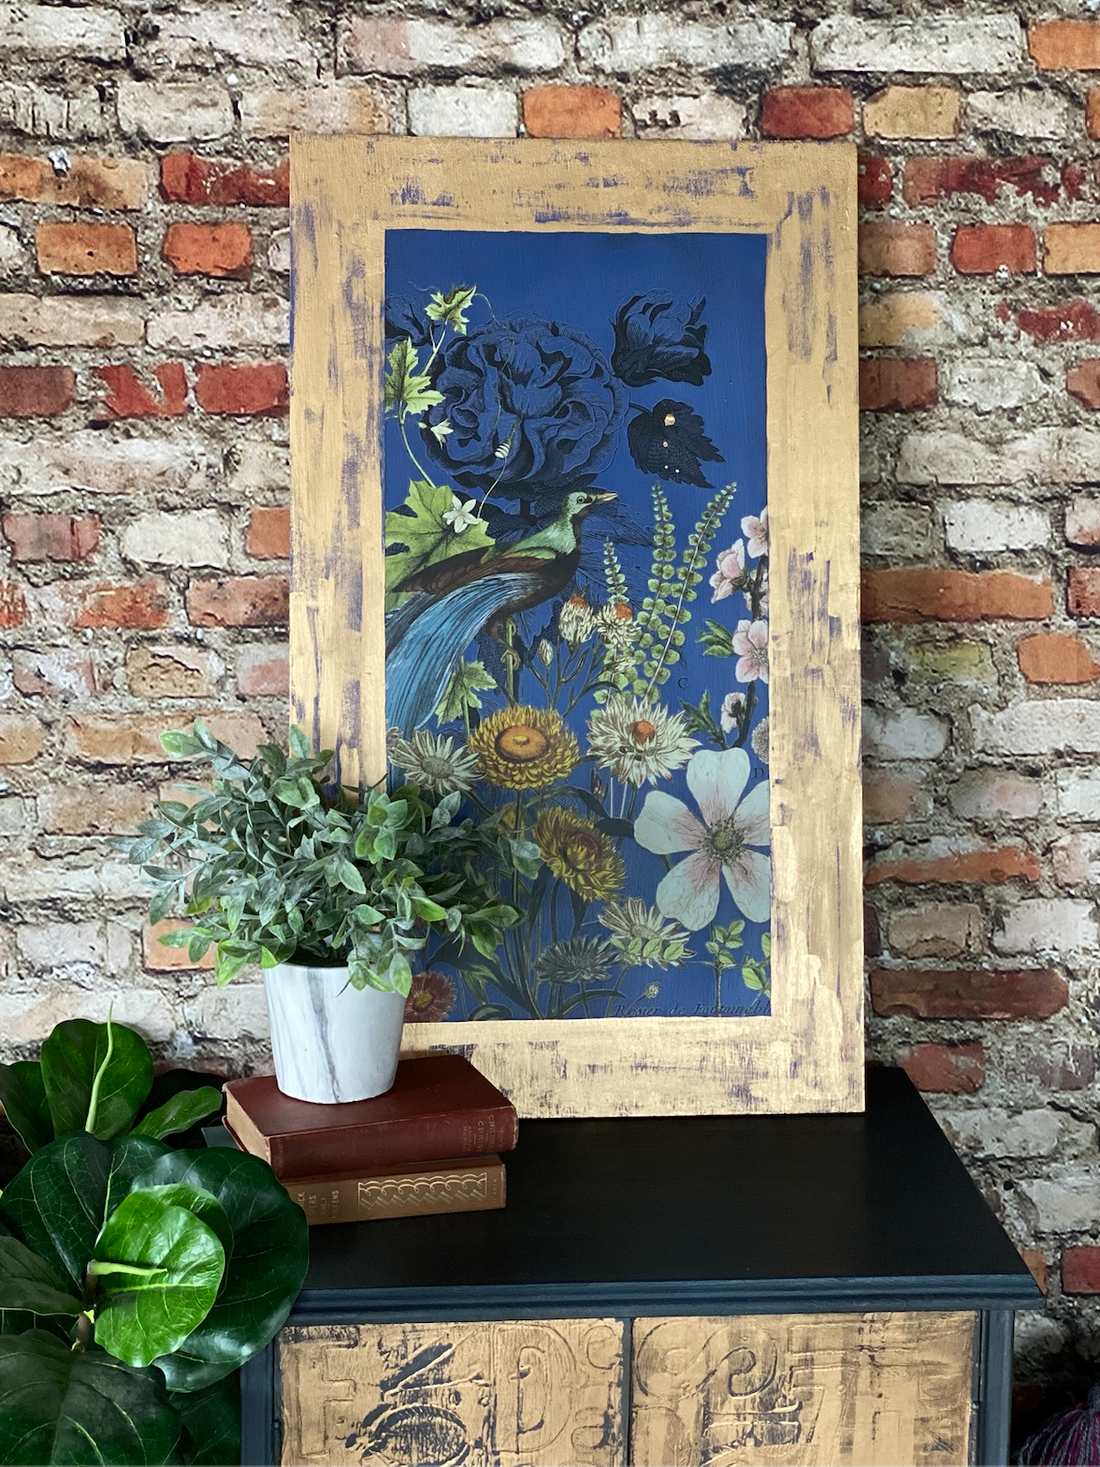
IOD Gallery Wall Midnight Garden Part 1 - Episode 8
We finished up our IOD Gallery Wall Series with the last two pieces: Midnight Garden 1 and Midnight Garden 2. You can make these two pieces at the same time – we just broke them down into separate tutorials so that they’re easier to follow if you’re tight on time.
No time now? Pin this post for later.

To start at the beginning of the IOD Gallery Wall Series and get the plywood cut plan for the complete wall, please see this post.
Watch our step-by-step video tutorial below or keep on scrolling if you prefer reading. (This was originally recorded as a Facebook Live, so the audio doesn’t always line up exactly but all the details are there. 😆)
HERE’S EVERYTHING YOU NEED FOR THE IOD GALLERY WALL – Midnight Garden Part 1 Wall Art
All IOD products can be purchased from an approved stockist. To find a shop local to you, click here. To find an online store, click here.
(This post contains affiliate links.)
- 17 x 29” piece of 3/4″ thin sande smooth plywood
- Midnight Garden Transfer from IOD
- Chalk style or mineral-based decor paint in a royal blue (your stockist can recommend a high-quality brand)
- Water-based polyurethane topcoat
- IOD Silicone Paint Blade
- Wide Painter’s tape
- Fine tip permanent ink black art pen
- Razor knife (optional to score the transfer before removing the tape)
- Lint-free shop cloth
- Clear wax and dark wax
- Wax brush (this is just a regular oval paintbrush that you only use for wax)
- Hammer
- Saw tooth picture hanger
- Ruler or straight-edge
Step-by-Step Instructions for DIY Peacock Wall Art in the IOD Gallery Wall
Step 1: Apply a base coat of paint.

If you’re using a paintbrush, you may need to apply two coats (let dry in between). Your goal is super opaque coverage to cover the knots in the wood and smooth the surface.
Step 2: Seal with a high-quality water-based top coat.
Apply a thin, even top coat and allow it to dry completely. Don’t skip this step as sealing enhances the adhesion of the transfer because you create a less porous surface for it to adhere to.
Step 3: Create the faux matboard and frame with masking tape
Mask the top, bottom, and sides of your board with thick painter’s tape to create a frame. If your paint isn’t fully dry, take the tack down on the tape by doing a few pre-sticks on your clothes. This will keep the paint from pulling up with the tape when you’re done.

Run your finger around the inner edge of the tape make sure it’s firmly adhered to your board.
Use a fine tip permanent black ink art pen, draw a line right up against the tape. This will establish the edge of the faux mat and create the appearance of shadow and depth, just like a real matboard.

If you want a mitered edge or just want to get a little fancier with your faux matboard and frame, check out this tutorial.
Step 4: Position and rub on the transfer
This tutorial uses a transfer in the new pad format. But, don’t worry if you have an IOD transfer that came in a tube. You’ll just need to use scissors to cut the image to fit your piece of plywood.
For this piece, we started with the left side of the Midnight Garden Transfer image. These are the first two pages in the transfer pad. Tear about the pages with the non-stick backing and layout the transfer to with the backing to get an idea of the alignment of the image.
When you’re ready to apply the transfer, remove the non-stick backing. Use the grid lines on the transfer to line up the image with the bottom of your mat. Once you’re happy with the position, rub your hands over the transfer to lightly adhere it to the gallery board. Then, use the IOD transfer tool to rub on the image.

Step 5: Burnish the Transfer.
Cut a palm-sized piece of the non-stick backing and rub it over the transfer.
Josie suggests folding up the corners, so they look like dog ears on a favorite page of a book. Folding up the corners prevents them from catching on any bits of the transfer that aren’t yet fully adhered.

The transfer will overlap the edge on the masked tape area and that is ok!
Step 6: Apply the top half of the transfer.
This step is only for if your transfer came in the pad format vs. the tube format. When applying, make sure to arrange the transfer piece so that it fits with the design. (The edges are cut to be very forgiving so if you’re off a bit, don’t stress!)

Step 7: Score around the transfer.
Use your thumbnail to score, or cut, the transfer along the line of tape. That way, when you pull the tape up, the transfer won’t rip.

Step 8: Go for the gold — Paint the faux frame!
In a well-ventilated area or using a fan (no damaged brain cells during this project!), use your brush to get close to the outside edge of the faux frame. Don’t put any tape over the transfer because you risk ripping the transfer off when you pull up the tape. If you choose, you can use a straight edge around the outside of the transfer, just be careful that the paint doesn’t bleed under your straight edge.

Step 9: Seal your piece and hang it on your IOD Gallery Wall.
Apply a thin coat of matte water-based polyurethane and allow it to fully dry. Center and hammer in the picture hanger into the back of the piece. Hang in your gallery – then stand back and admire your work! 😆
Here are all the other IOD Gallery Wall tutorials in this series:
IOD Gallery Wall Episode 1 (this blog!)
 ×
×
popular
- How to Apply IOD Athenaeum Gilded Transfer to Colored Glass Bottles
- From Ugly Duckling to Gorgeous | Black Dresser Makeover with IOD Marché des Fleurs
- 5 Creative Ways to Use One Decorative Stamp
- Turn Thrifted Finds into Charming Garden-Inspired Decor with a DIY Jadeite Finish
- Little Lark Paint Inlay Projects: Vintage Teapot & Canvas Wall Art with IOD